
EG Certified Payroll (WH-347): the setup guide
This is the setup walk-through for EG Certified Payroll (WH-347), one screen at a time, from opening the file to your first approved payroll and PDF. Each step says what to click and what you should see, with the screen as it looks on a Windows PC. It takes about twenty minutes with the figures used here; use your own project and workers instead wherever you like.
Jump to a section
Opening the file
If you used the installer, Excel already trusts the file and it opens with no yellow bar. If you downloaded the workbook on its own, see the one-minute guide to enabling macros first.
Step 1: Open the file with macros enabled
Open the file with macros enabled. If a yellow bar appears at the top, click Enable Content.
You should see: The Software License Agreement page, with I Agree and Decline at its bottom.
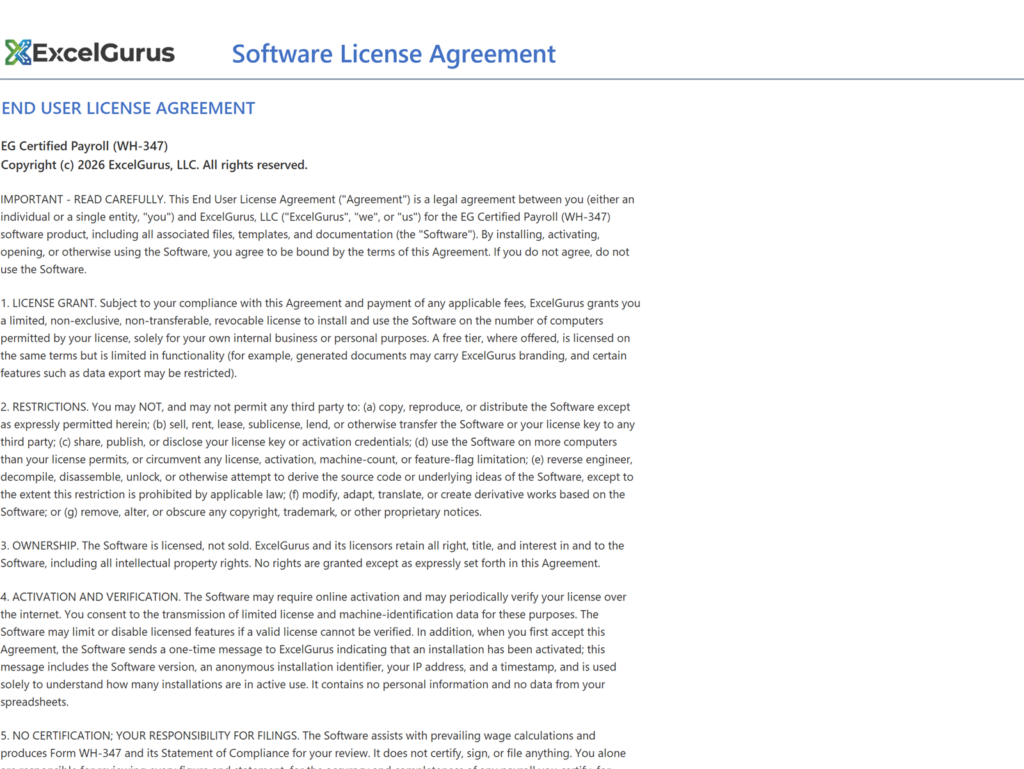
Step 2: Scroll to the bottom of the agreement and click I Agree
Scroll to the bottom of the agreement and click I Agree.
You should see: The Home page.
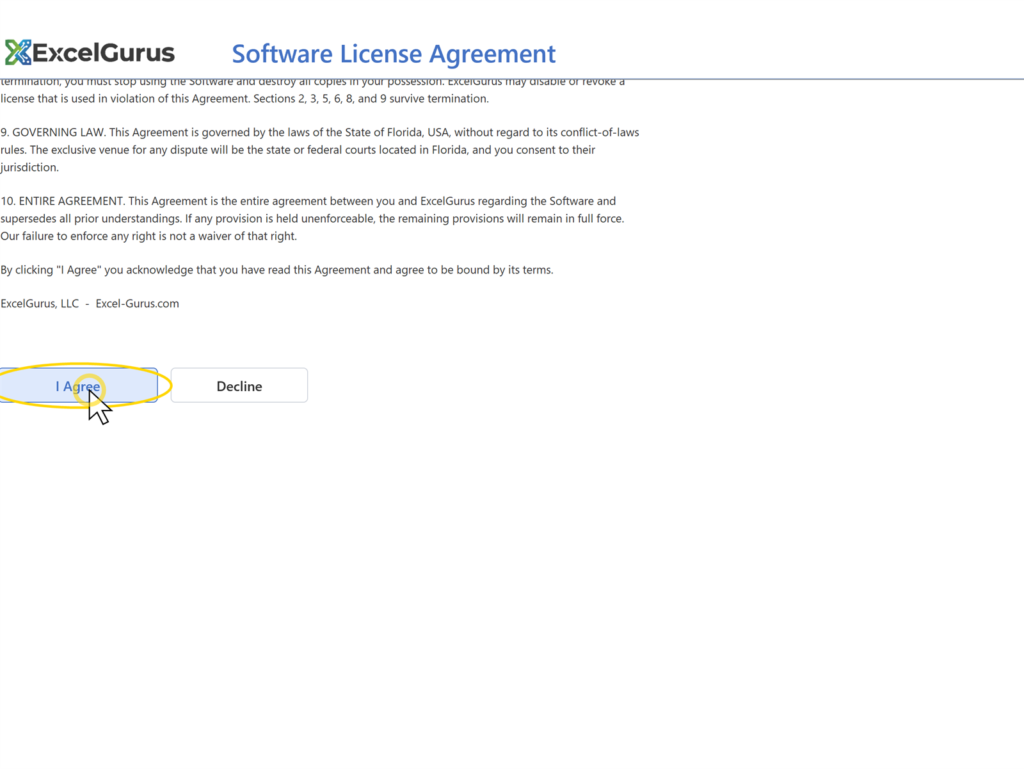
Home
Step 3: Read the three tiles under Overview
Read the three tiles under Overview.
You should see: Active employees 0, Active projects 0, Payrolls 0. Under Payrolls, New payroll and Open payroll; under Sample project, Load sample project.
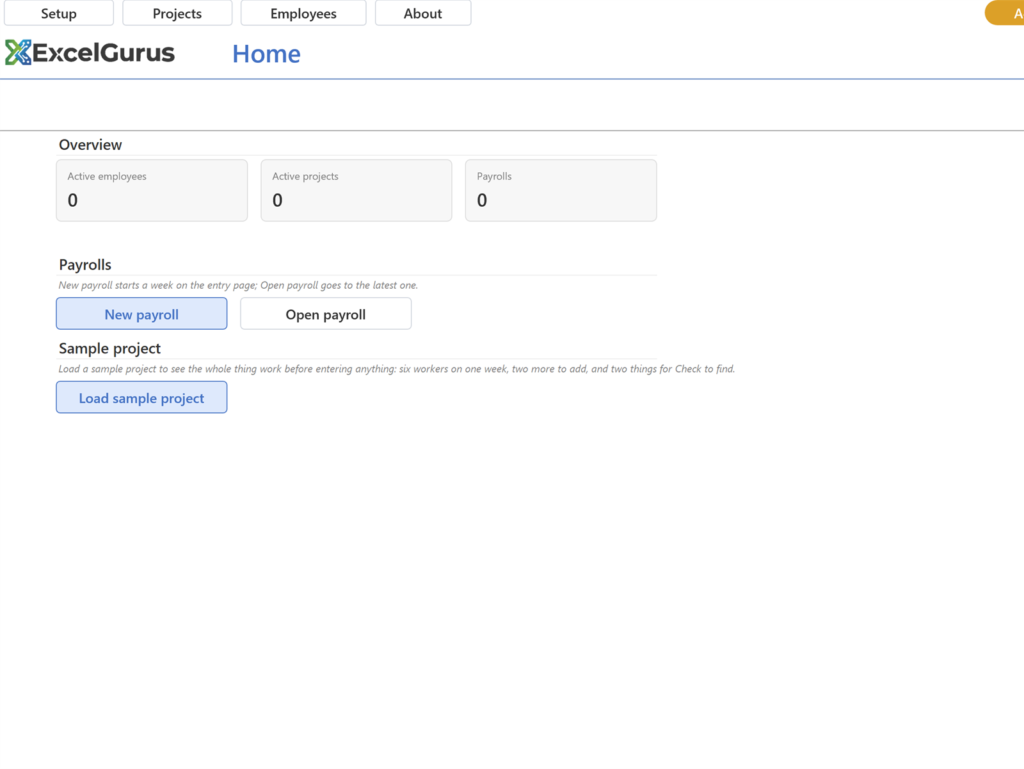
Step 4: Click Setup in the header row
Click Setup in the header row.
You should see: The Setup page, with a Home button at the left of its header row and the chip at the right.
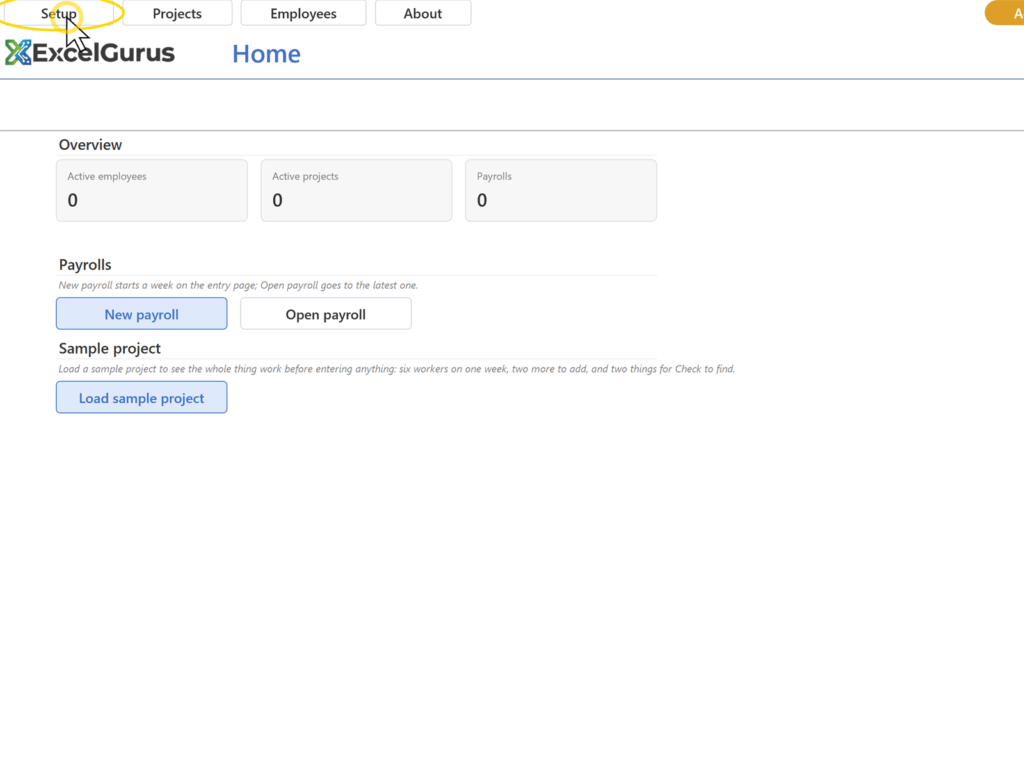
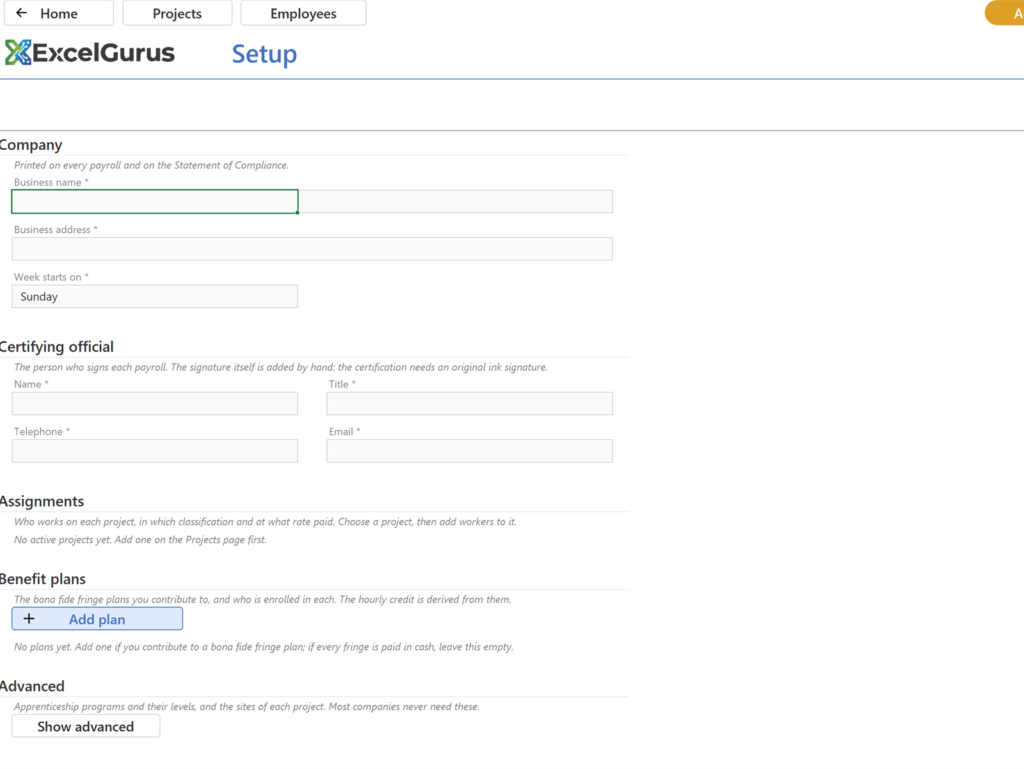
Setup
Step 5: Click Setup
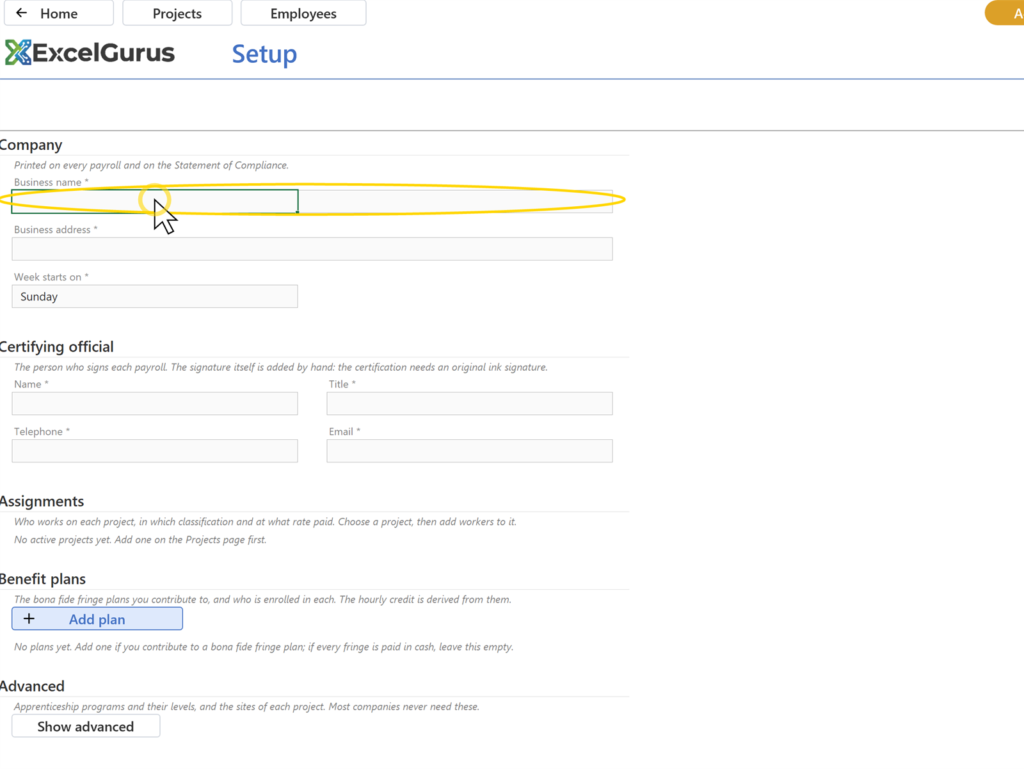
Click Setup. Under Company, click the Business name field, type your business name and press Tab.
You should see: The value stays and a small Saved note appears beside the section title.
Step 6: Click the Business address field, type the address, Tab
Click the Business address field, type the address, Tab.
You should see: The address stays.
Step 7: Click the Week starts on field and open its dropdown arrow; pick the day your…
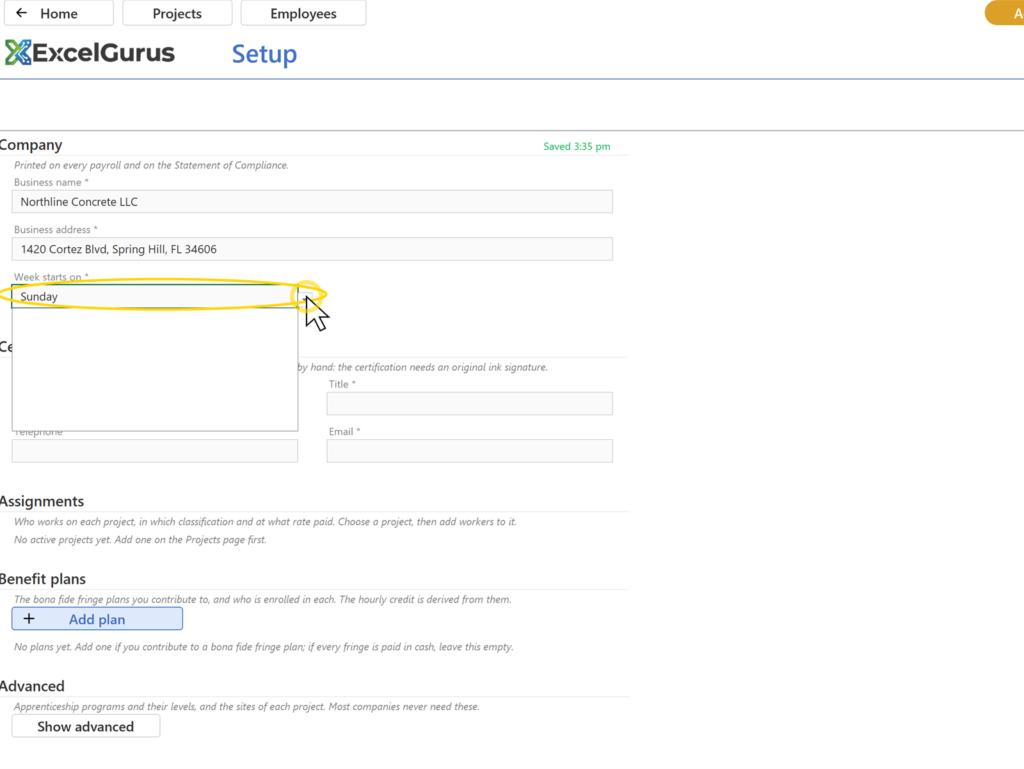
Click the Week starts on field and open its dropdown arrow; pick the day your workweek begins.
You should see: The list of days; the chosen day stays.
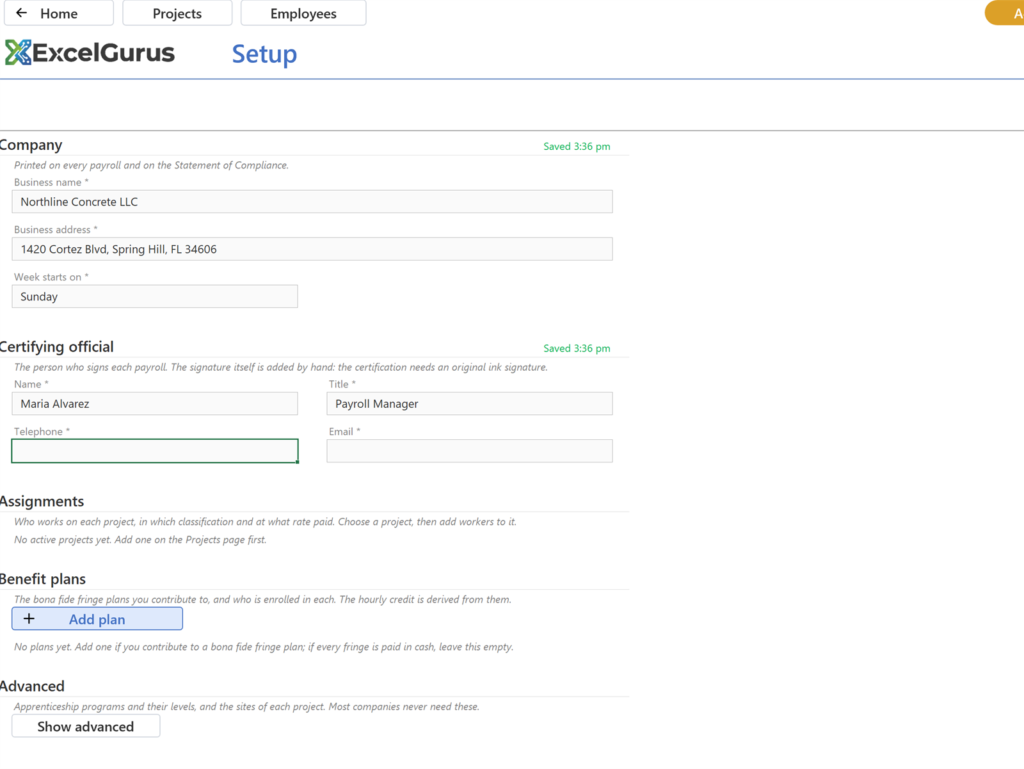
Step 8: Under Certifying official, type the name and the title of the person who sign…
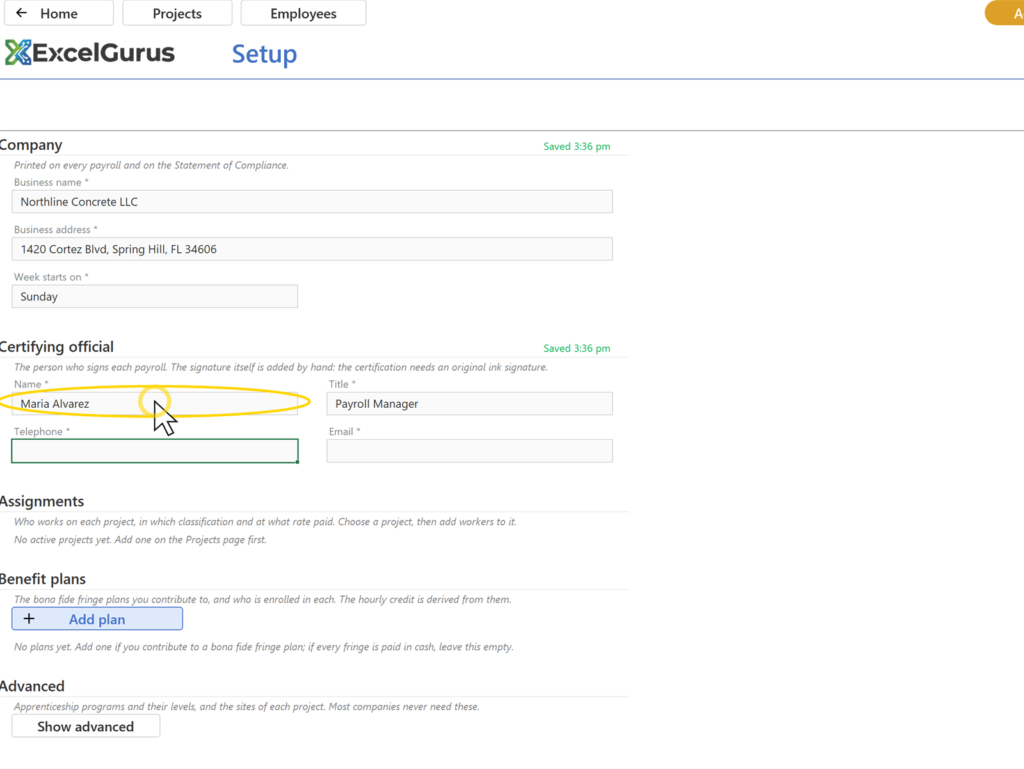
Under Certifying official, type the name and the title of the person who signs each payroll.
You should see: Both stay, with the Saved note.
Projects and classifications
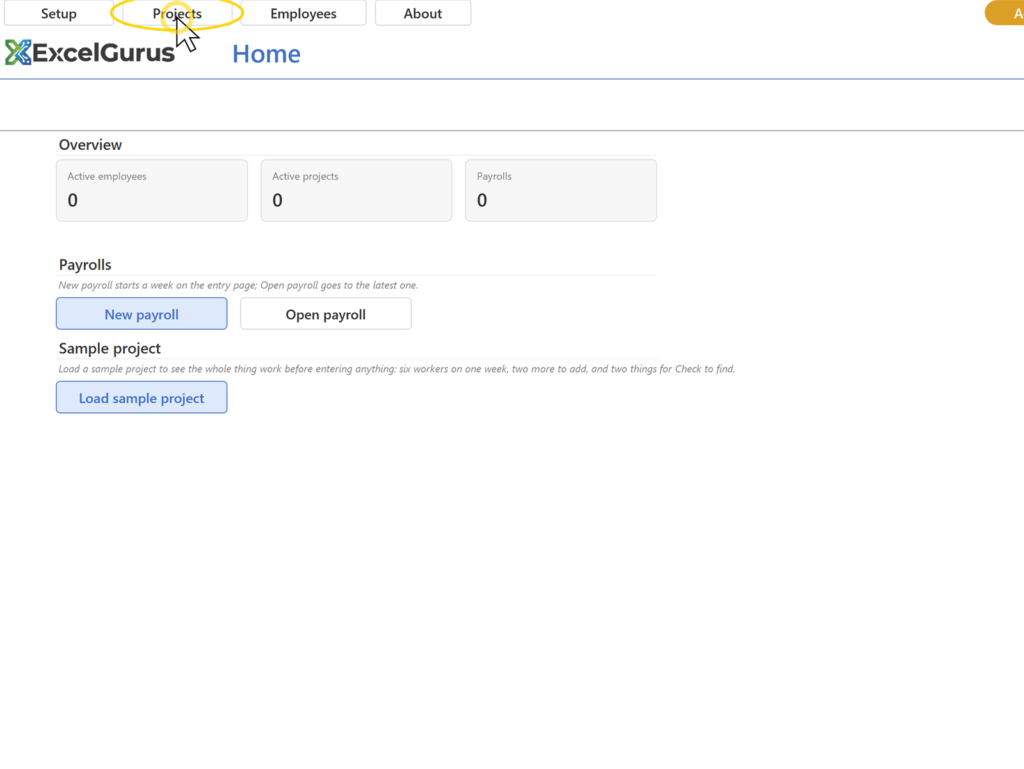
Step 9: Click Projects in the header row, then the blue Add project button
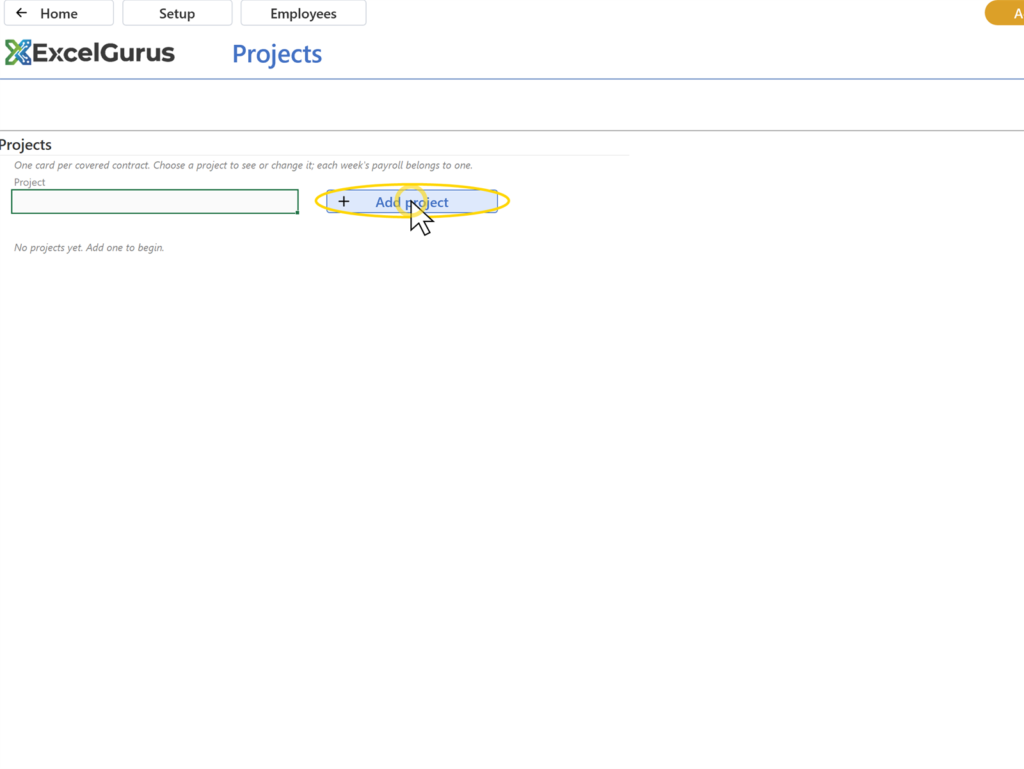
Click Projects in the header row, then the blue Add project button.
You should see: A card opens under the Project selector, headed (unnamed), with empty fields.
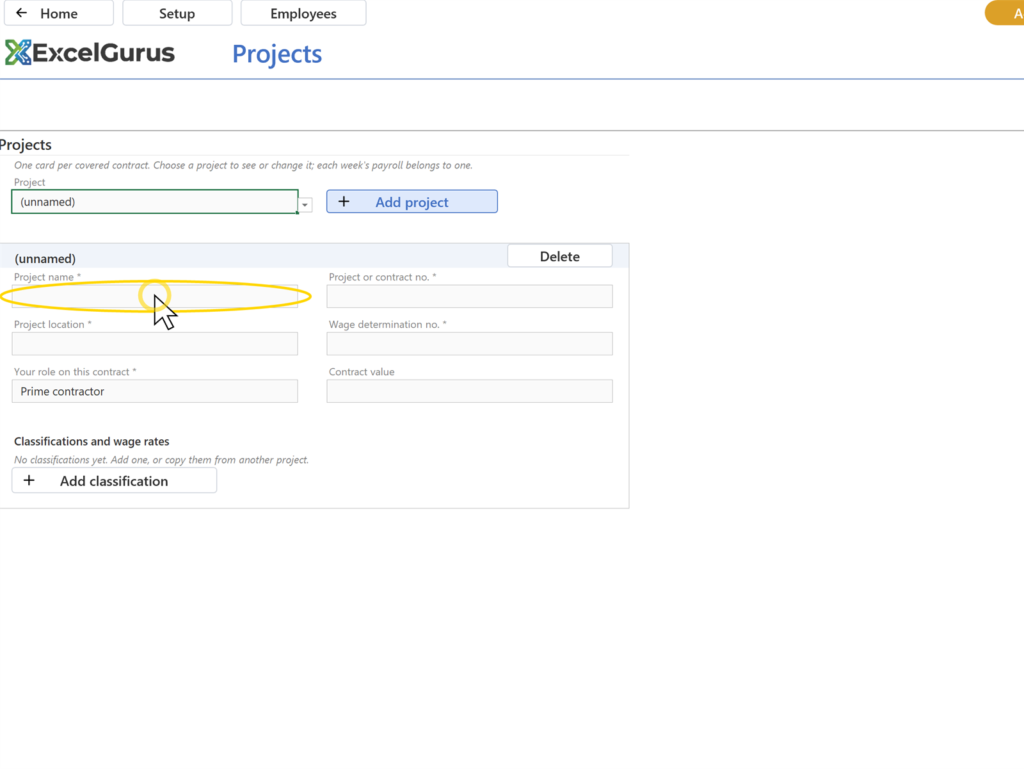
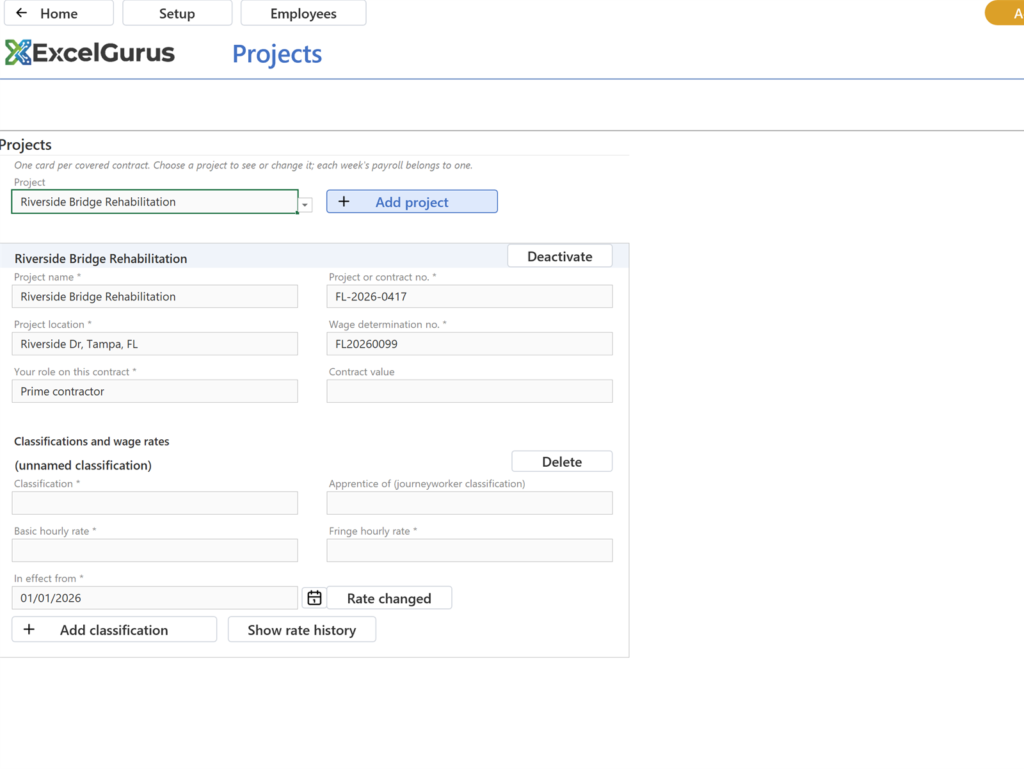
Step 10: In the card, fill Project name, Project or contract no., Project location and…
In the card, fill Project name, Project or contract no., Project location and Wage determination no. Leave Your role on this contract as Prime contractor.
You should see: The card's heading shows the project name as you leave the name field; each value stays.
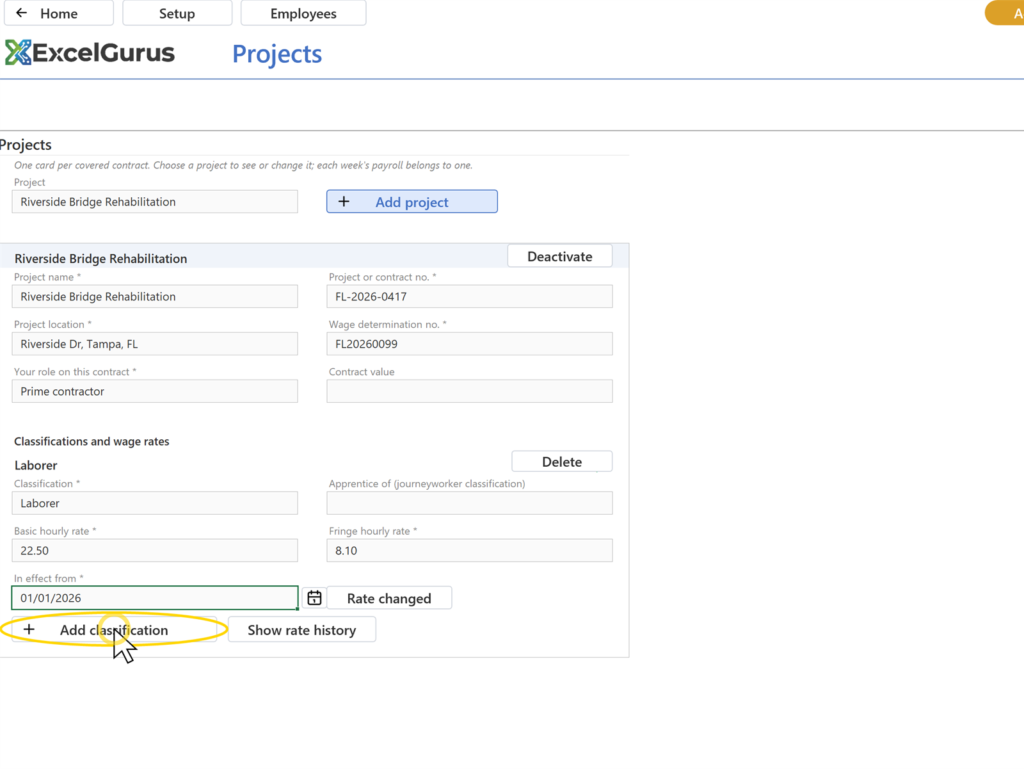
Step 11: Under the card, click Add classification
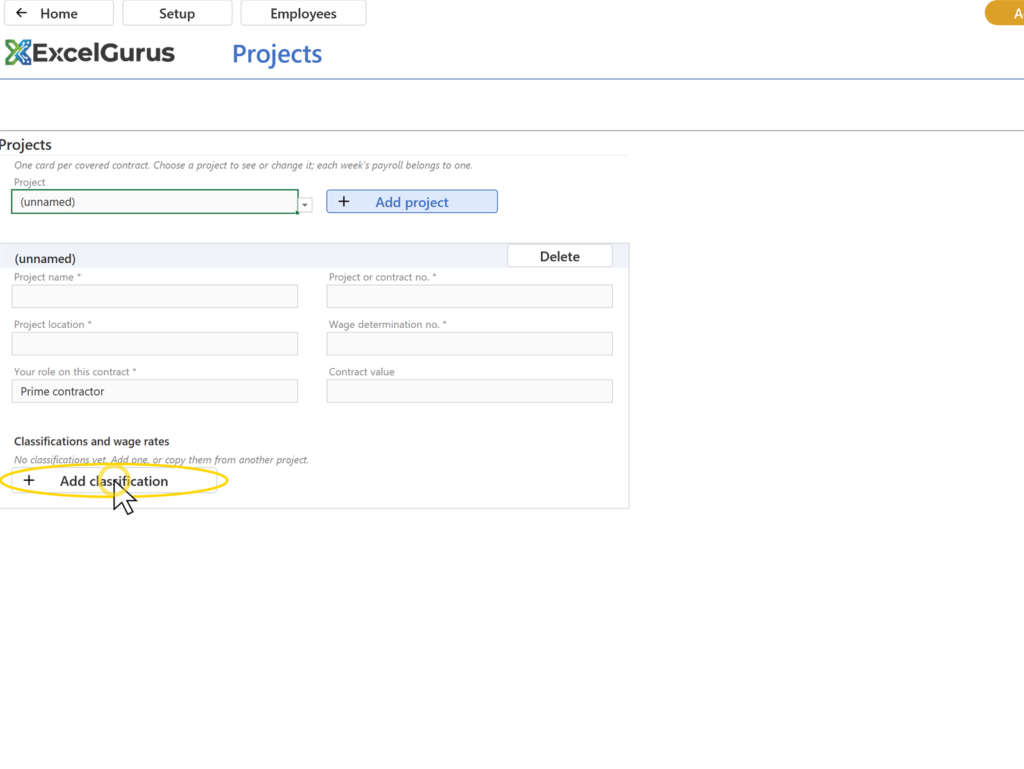
Under the card, click Add classification.
You should see: A classification block: a Classification field, a rate row with Basic hourly rate, Fringe hourly rate and In effect from set to January 1 of this year.
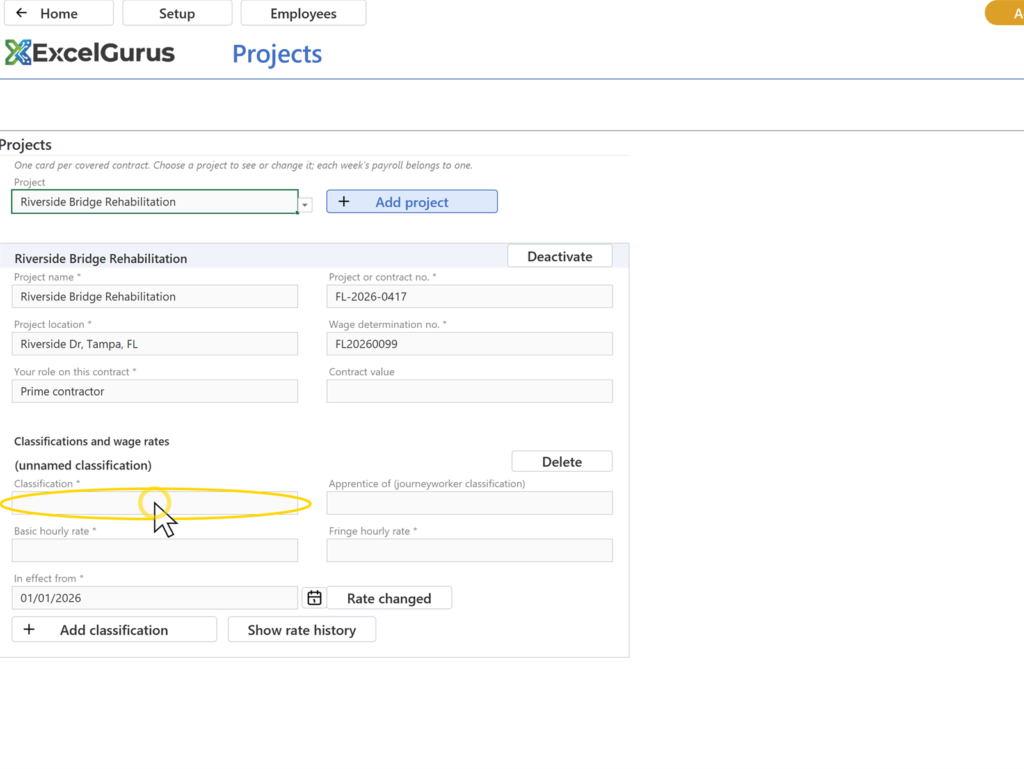
Step 12: Click the Classification field, type Laborer, Tab
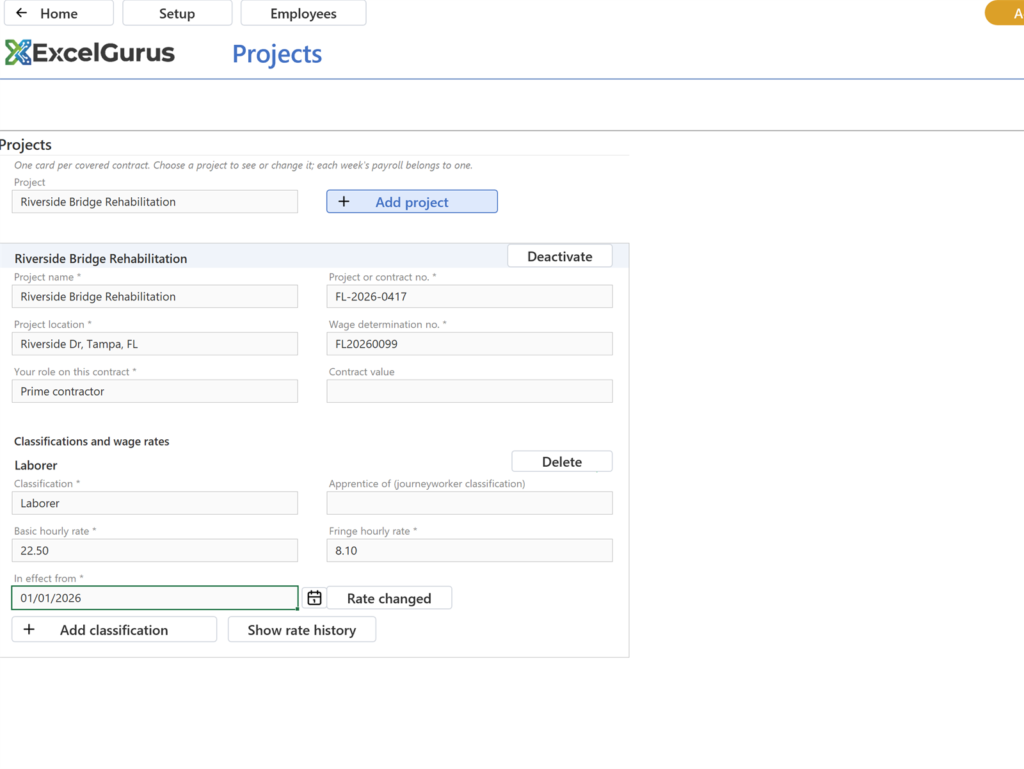
Click the Classification field, type Laborer, Tab. Under Basic hourly rate type 22.50, Tab; under Fringe hourly rate type 8.10, Tab.
You should see: The block's heading reads Laborer and both rates stay.
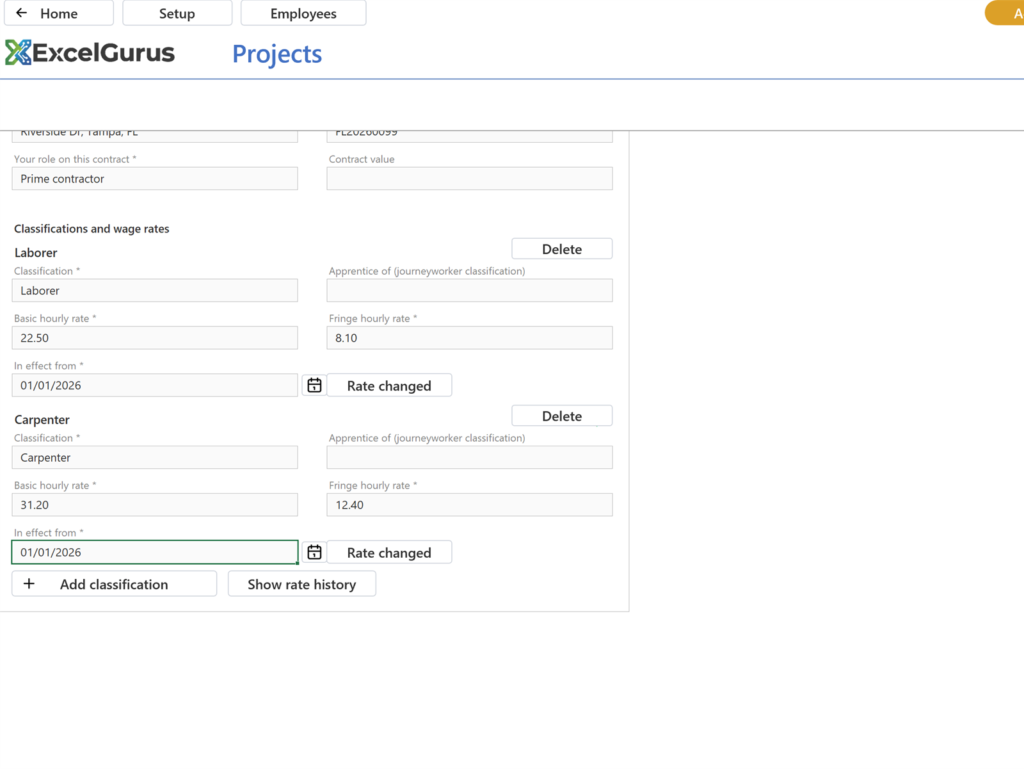
Step 13: Click Add classification again and enter Carpenter, 31.20, 12.40 the same way
Click Add classification again and enter Carpenter, 31.20, 12.40 the same way.
You should see: Two classification blocks under the project, each with its rate row.
Step 14: When a wage determination changes a rate, click Rate changed on that block, s…
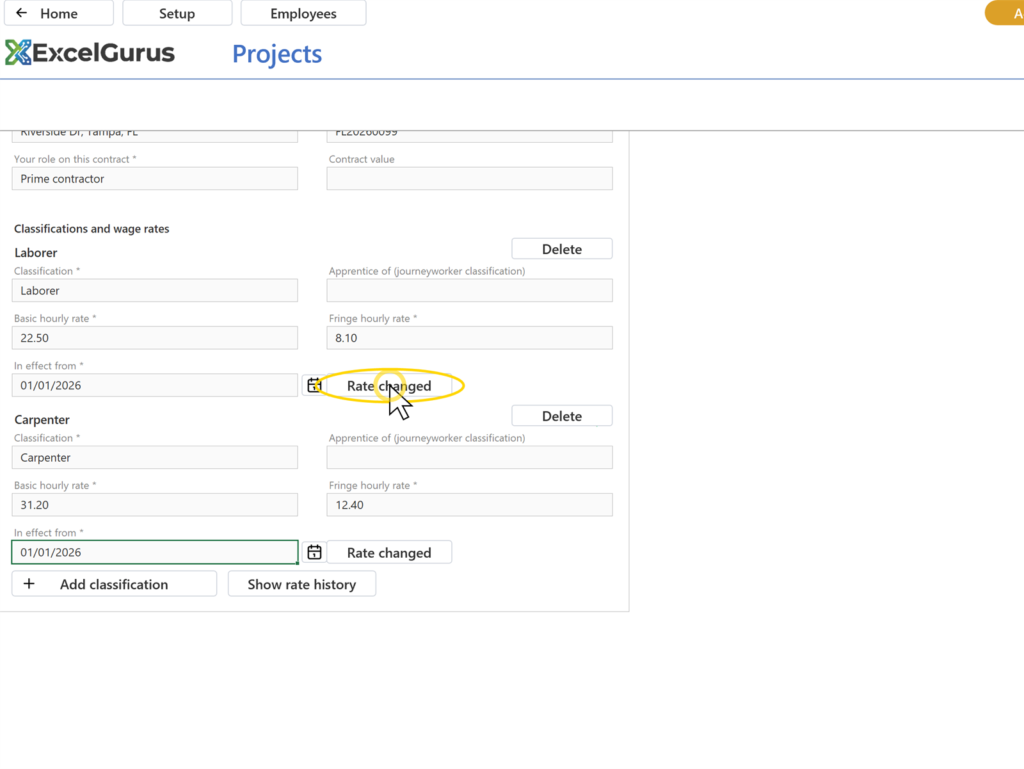
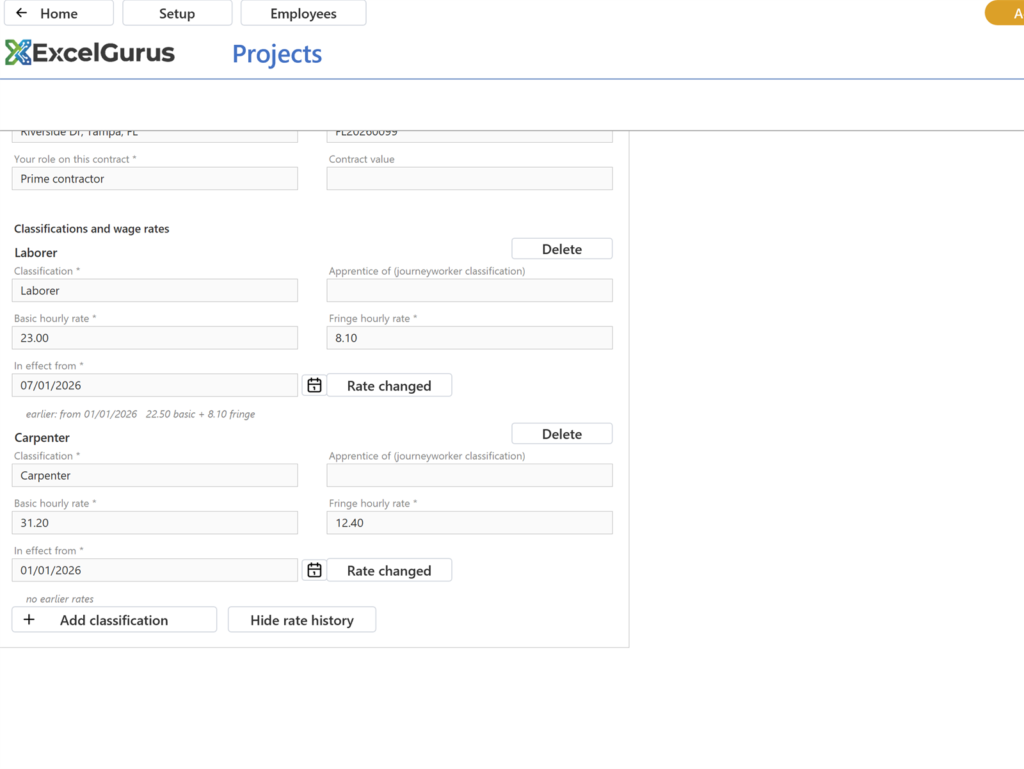
When a wage determination changes a rate, click Rate changed on that block, set In effect from to the date the new rate applies, and type the new rates. Show rate history lists the earlier rates.
You should see: The block carries the new date and rates; under it, the earlier rate with its date.
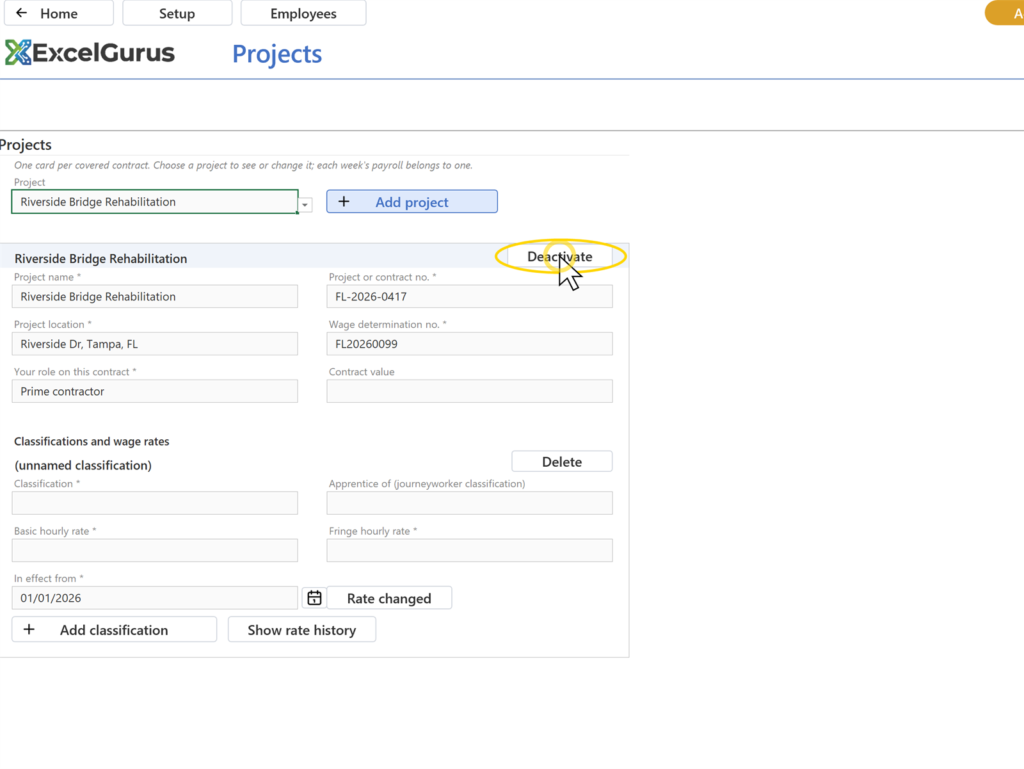
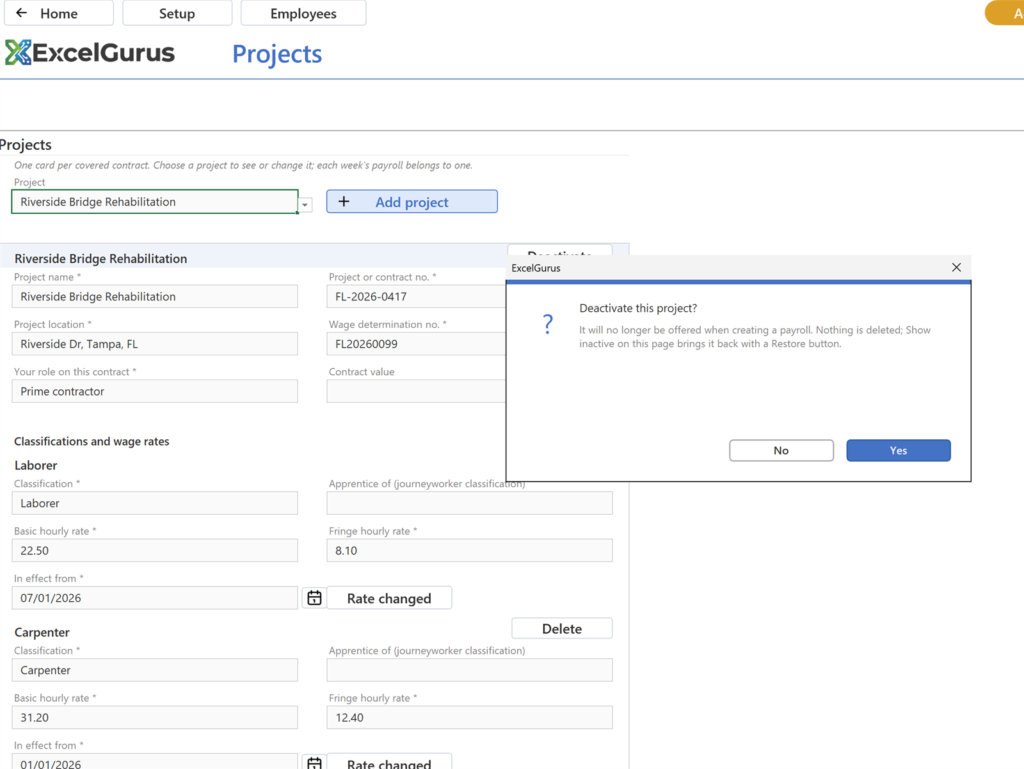
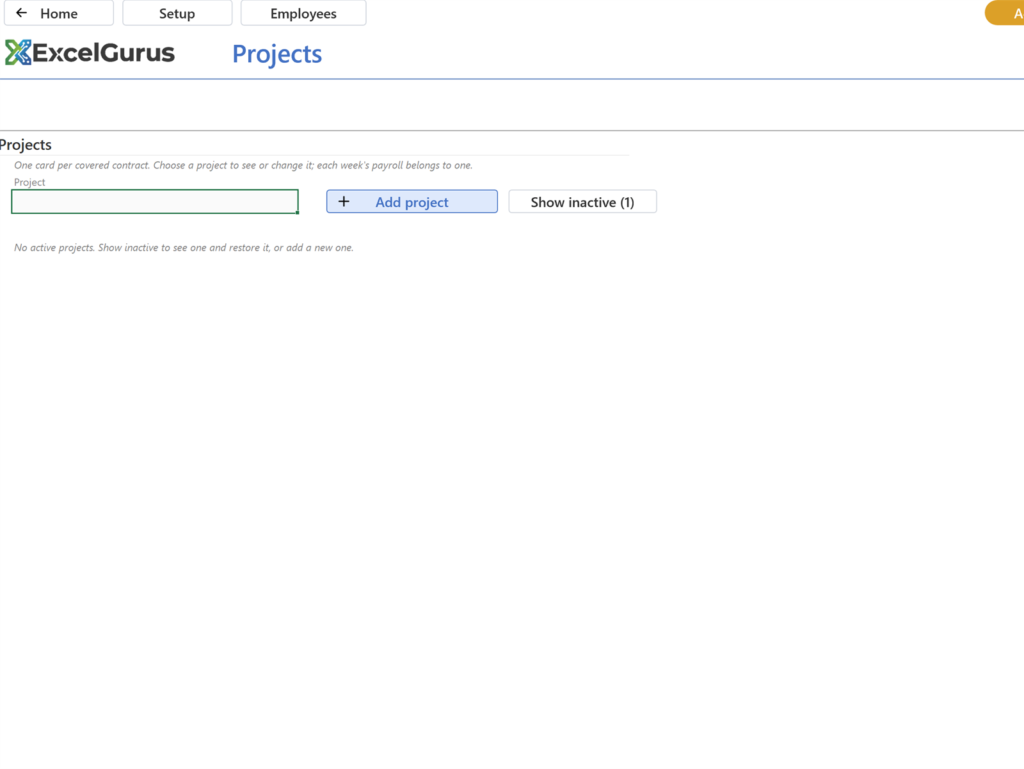
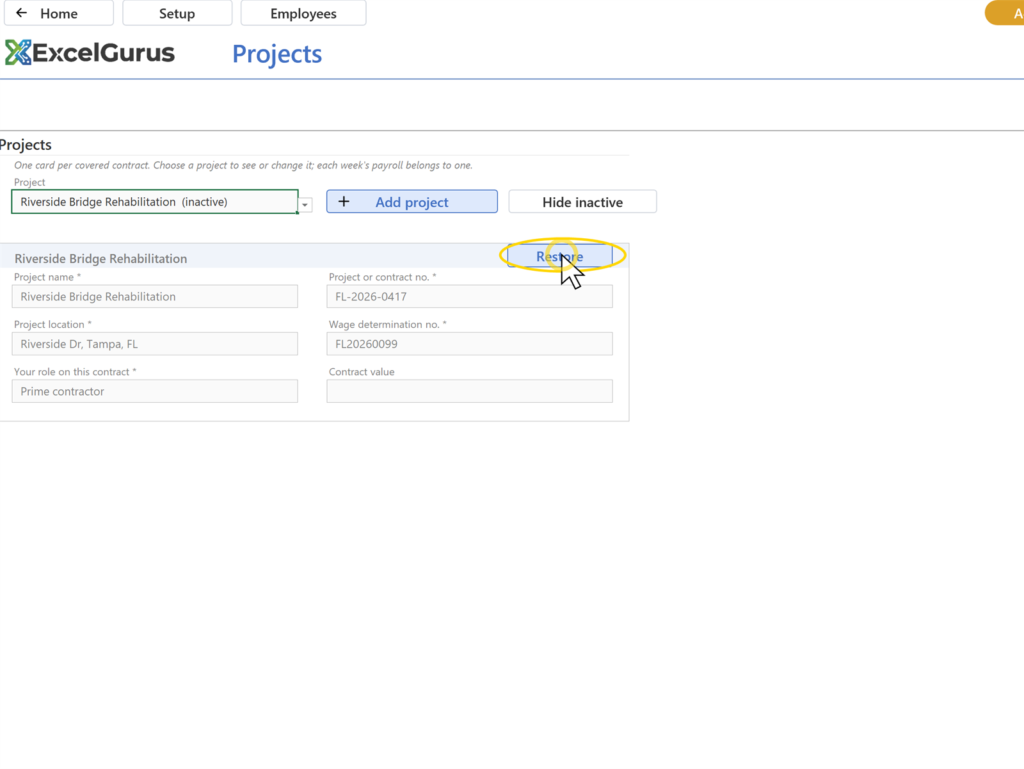
Step 15: On the project's card, click Deactivate and confirm
On the project's card, click Deactivate and confirm. Click Home: Active projects reads 0. Click Projects, then Show inactive (1), then Restore on the card.
You should see: After Deactivate the selector is blank and a Show inactive button appears; Show inactive lists the project marked (inactive) with a Restore button; Restore makes it active again.
Employees
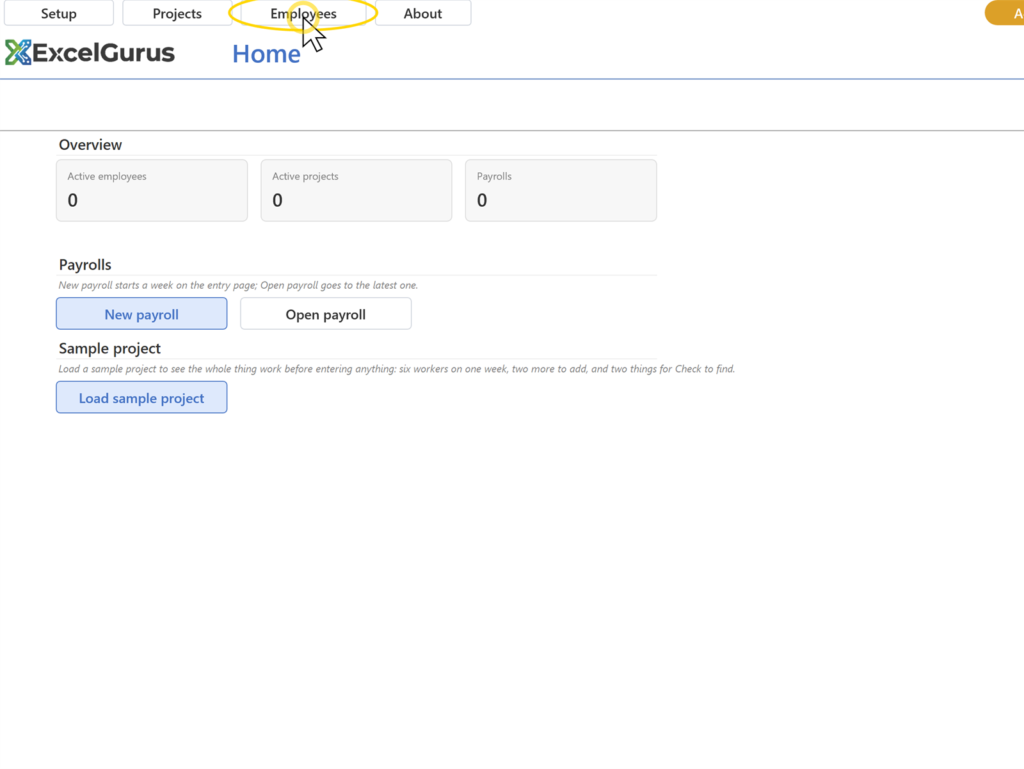
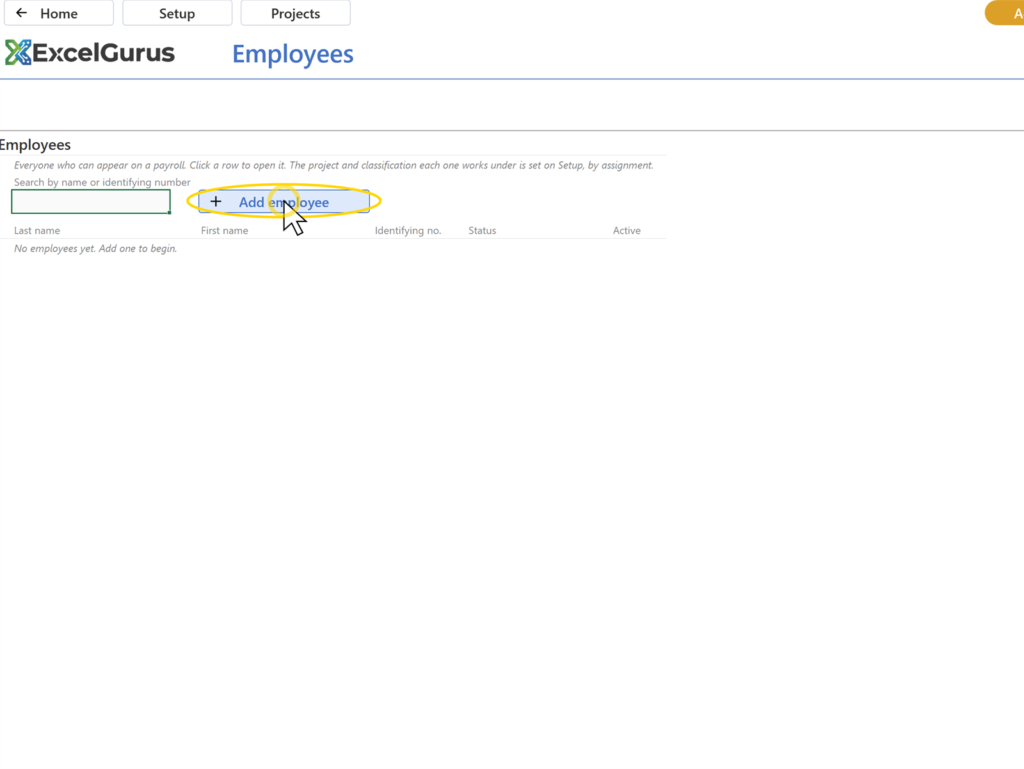
Step 16: Click Employees in the header row, then the blue Add employee button
Click Employees in the header row, then the blue Add employee button.
You should see: A new row in the list and a card under it, headed (unnamed).
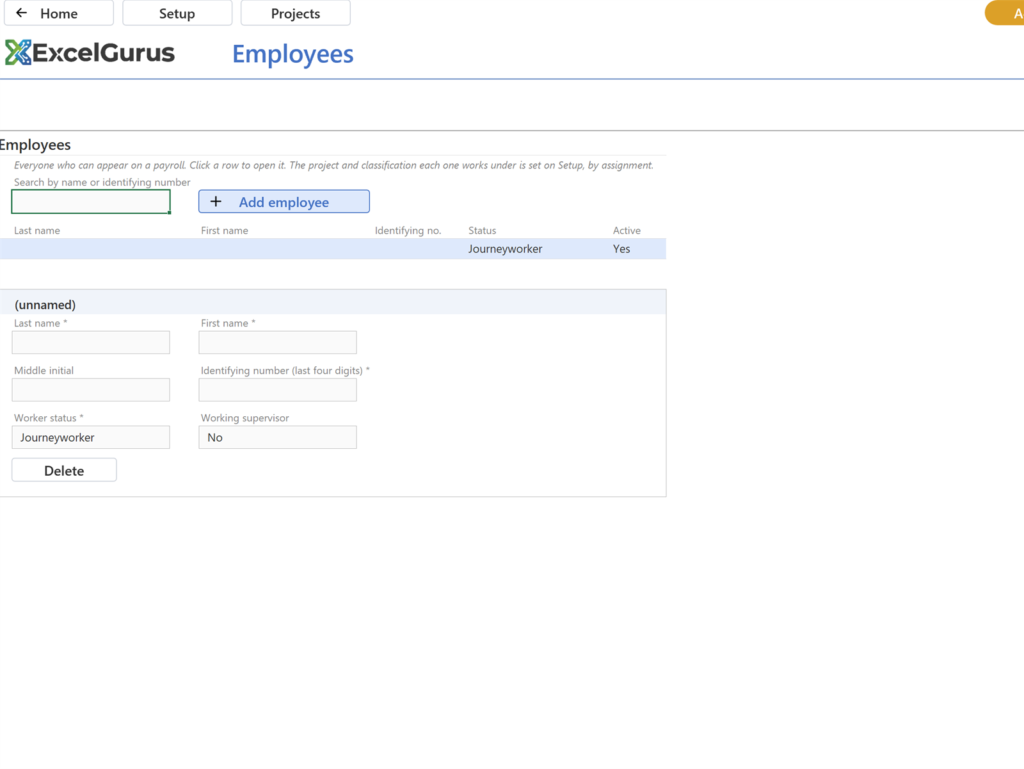
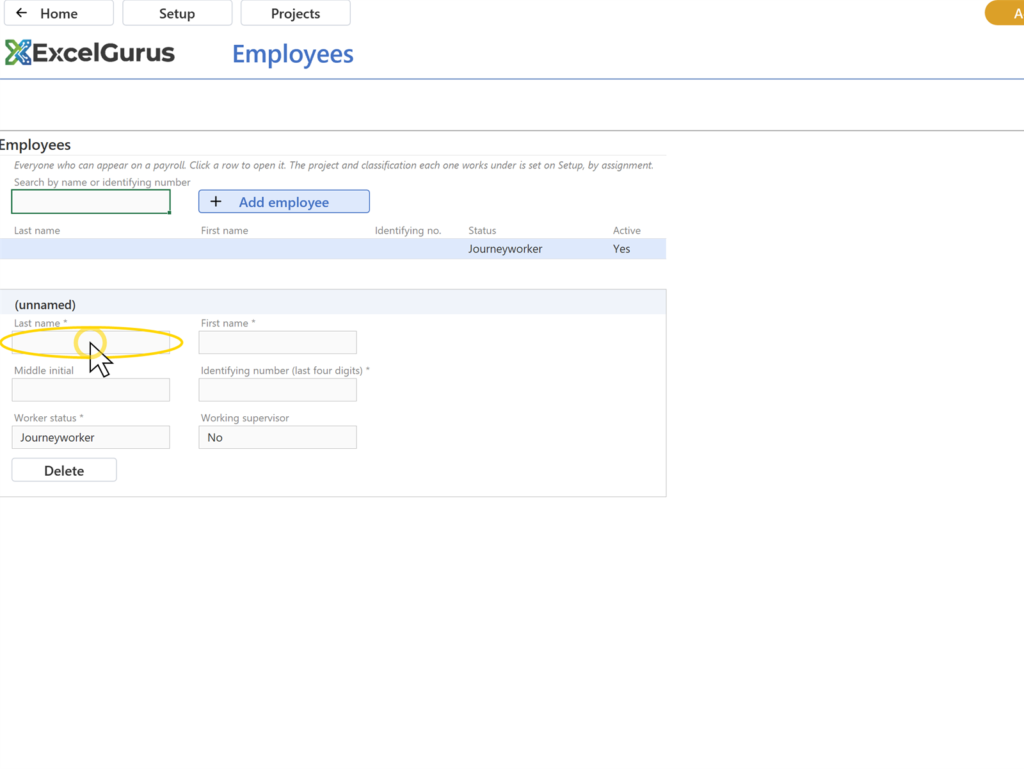
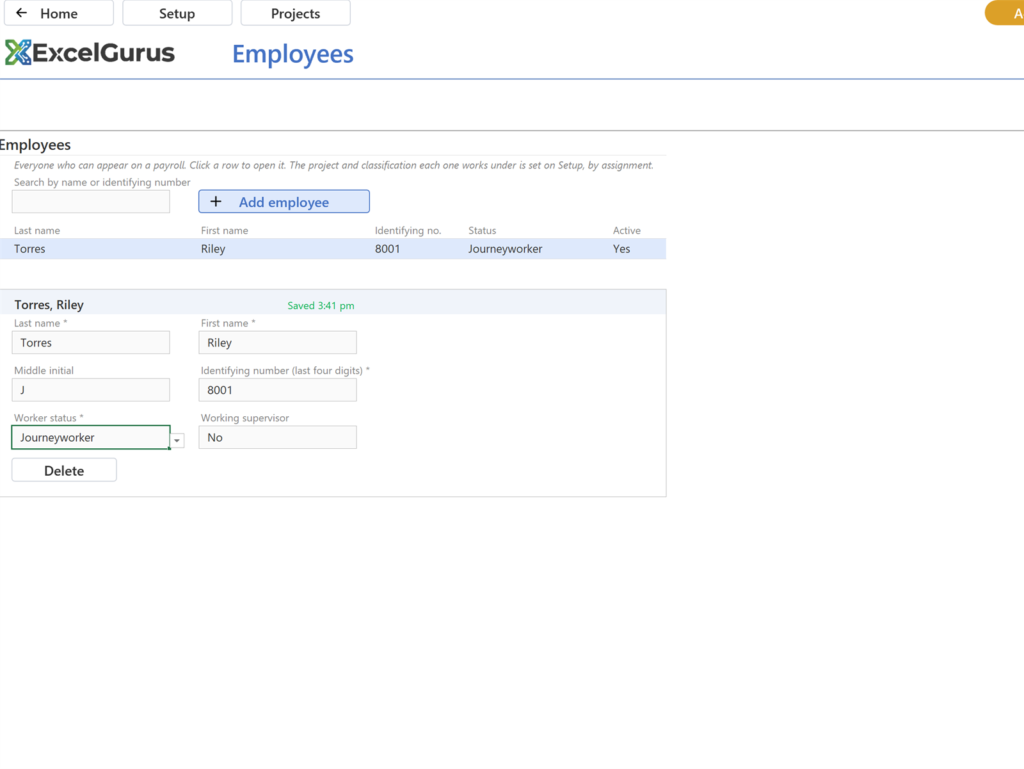
Step 17: In the card, type the last name, first name, middle initial and the last four…
In the card, type the last name, first name, middle initial and the last four digits of the identifying number, pressing Tab after each. Leave Worker status as Journeyworker and Working supervisor as No.
You should see: The list row reads Torres, Riley, 8001, Journeyworker, Yes, and the card's heading reads Torres, Riley.
Step 18: Click Add employee and enter Shah, Priya, no initial, 8002
Click Add employee and enter Shah, Priya, no initial, 8002.
You should see: A second row in the list.
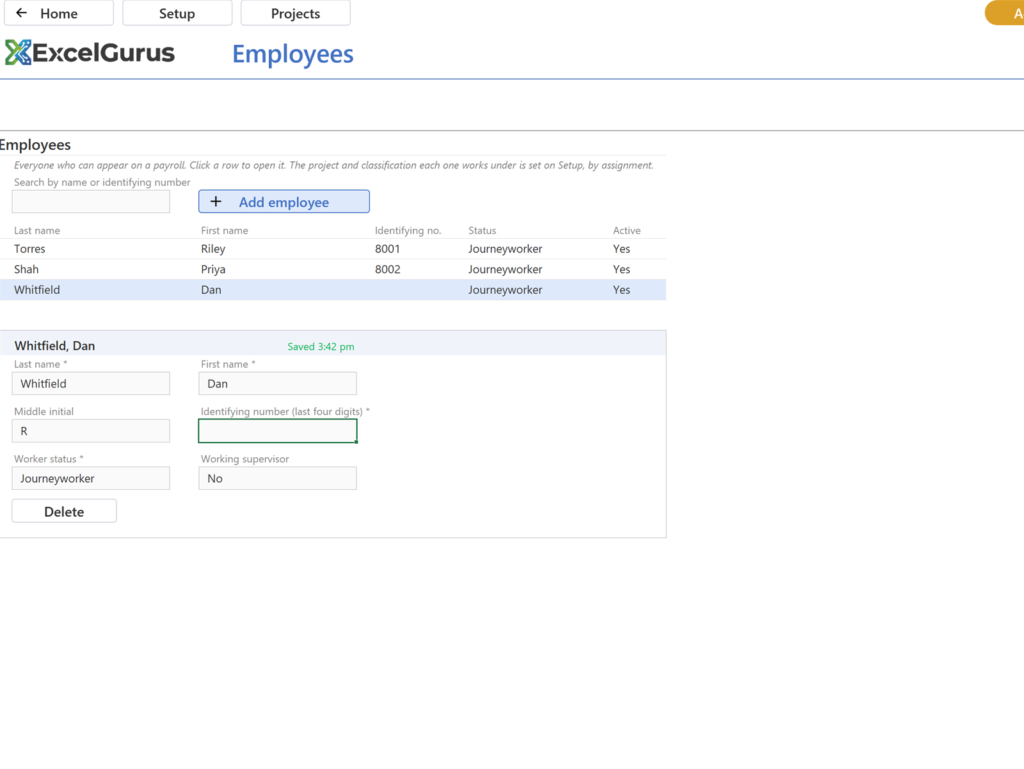
Step 19: Click Add employee and enter Whitfield, Dan, R, and leave the identifying num…
Click Add employee and enter Whitfield, Dan, R, and leave the identifying number blank for now.
You should see: Three rows in the list; Whitfield's number is empty.
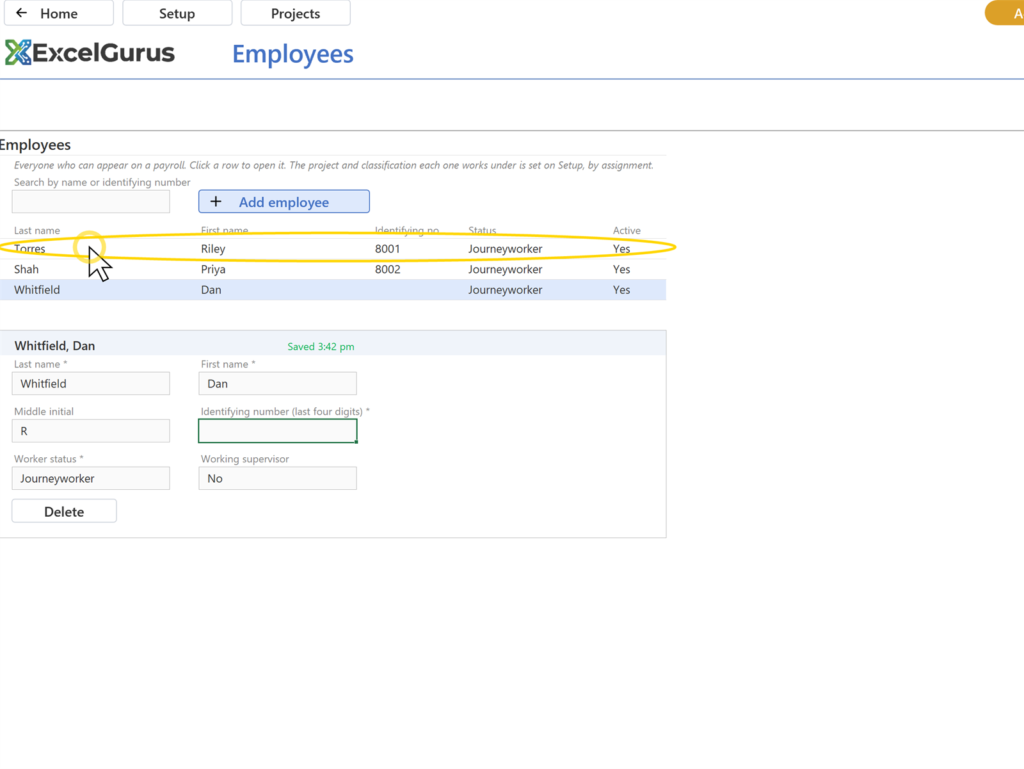
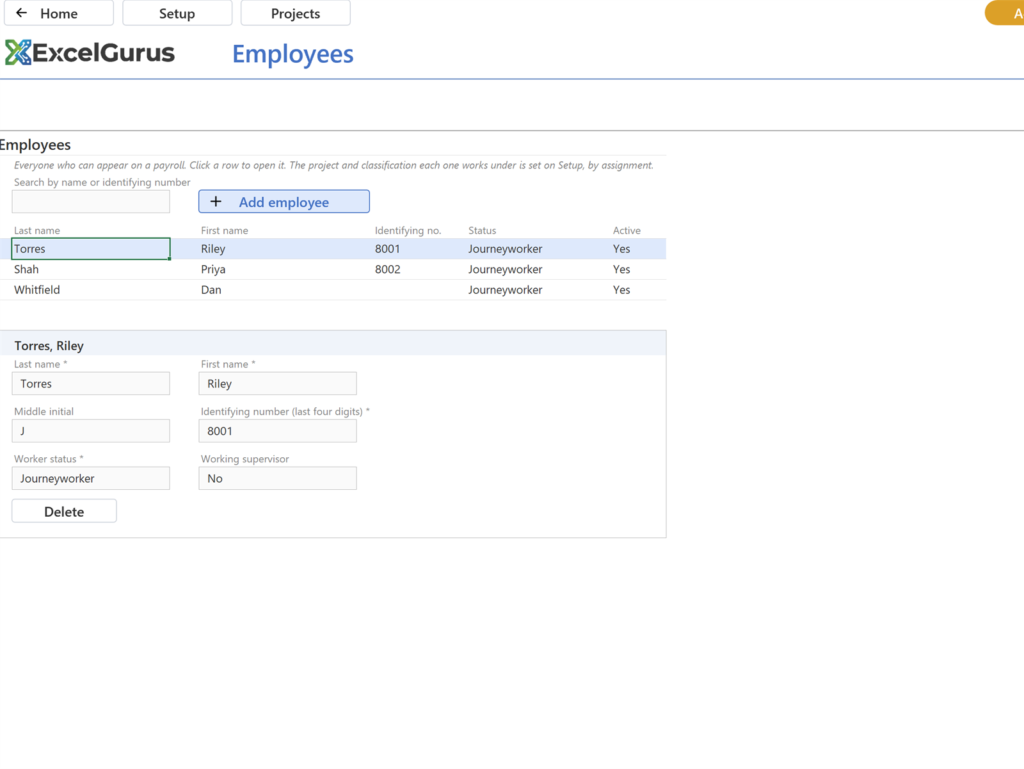
Step 20: Click the Torres row in the list
Click the Torres row in the list.
You should see: The card below switches to Torres. Any row opens its card the same way.
Assignments
Step 21: Click Setup and scroll down to the Assignments section
Click Setup and scroll down to the Assignments section.
You should see: The note about who works on each project, a Project dropdown showing your project, and a blue Add worker button.
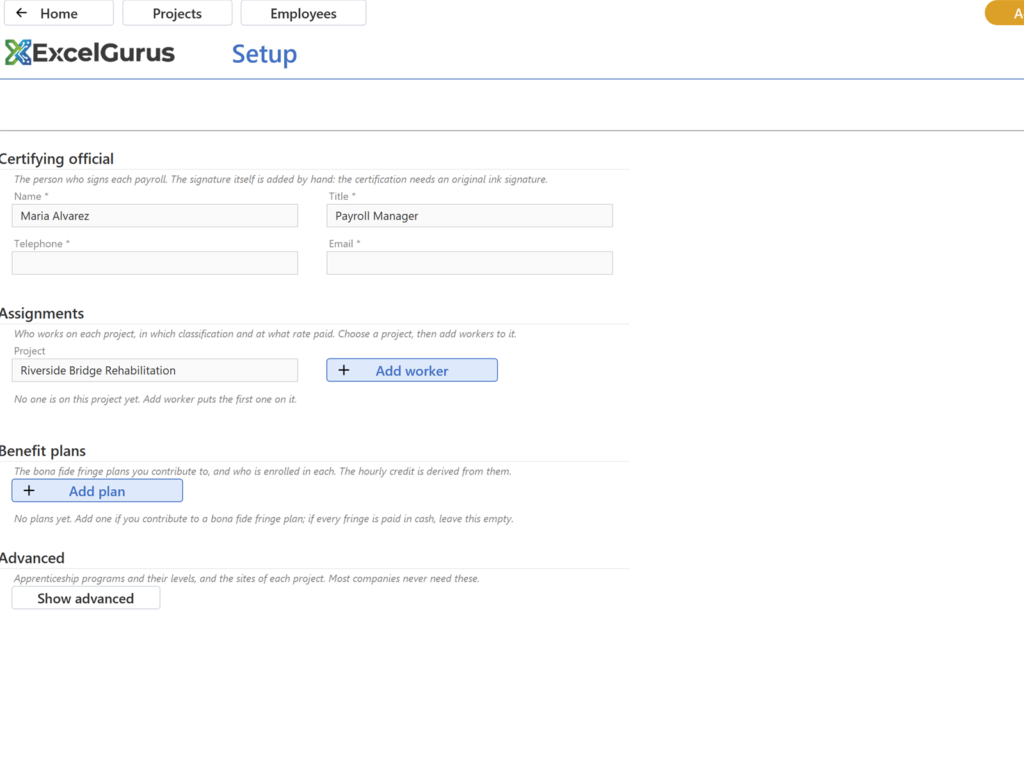
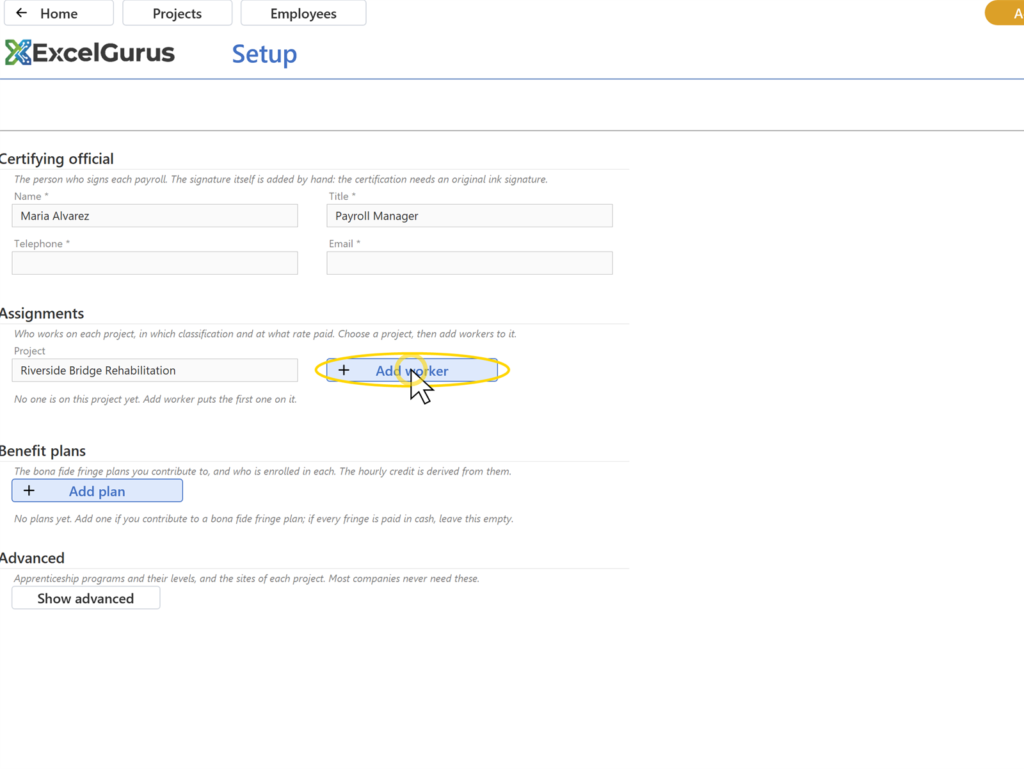
Step 22: Click Add worker
Click Add worker.
You should see: A dialog headed for the project, with Worker, Classification on this project, Rate basis, Rate paid, Cash paid in lieu of fringe and In effect from.
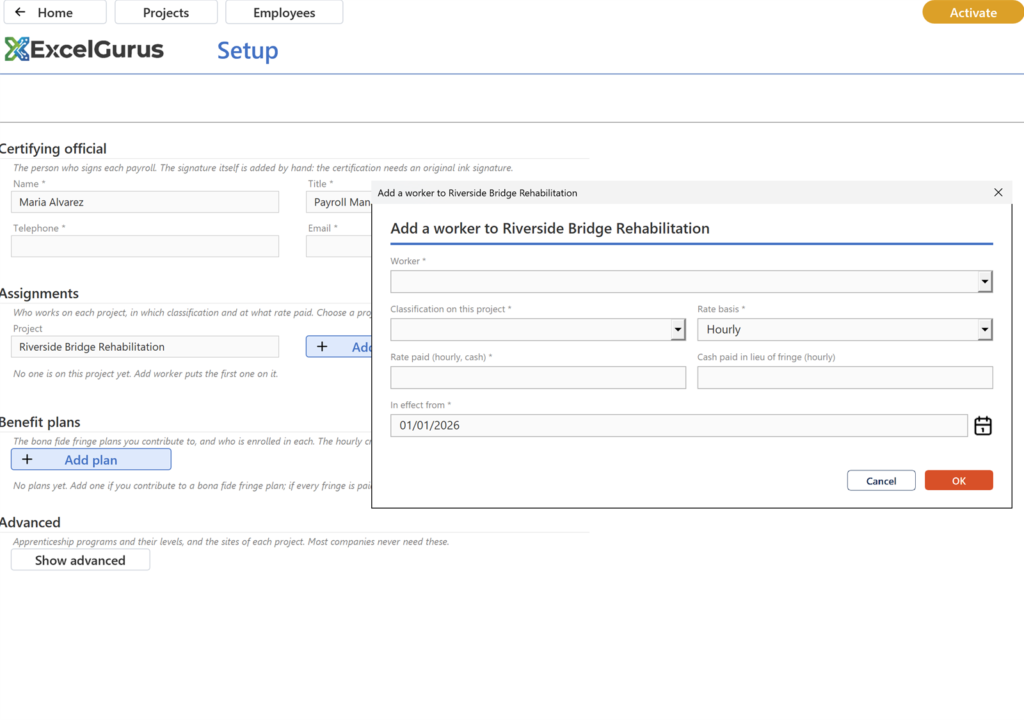
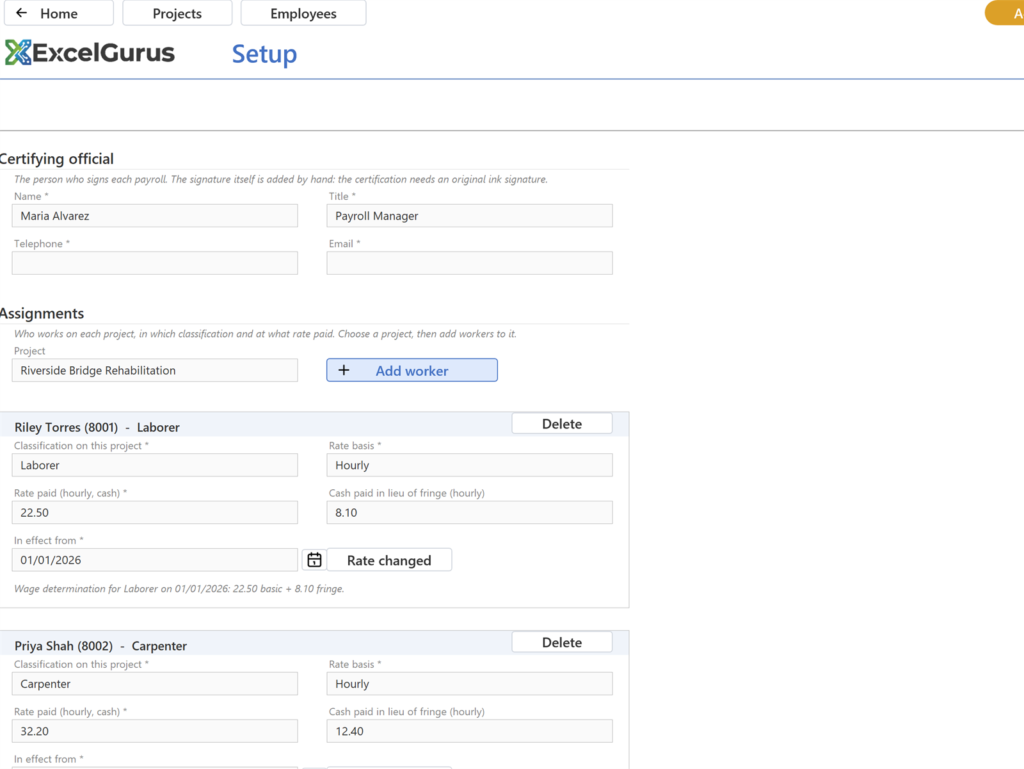
Step 23: Choose Torres, Riley under Worker and Laborer under Classification; leave Hou…
Choose Torres, Riley under Worker and Laborer under Classification; leave Hourly; type 22.50 under Rate paid and 8.10 under Cash paid in lieu of fringe; leave In effect from at January 1. Click OK.
You should see: A card for Torres under Assignments: Laborer, Hourly, 22.50, 8.10, with the wage determination it is measured against.
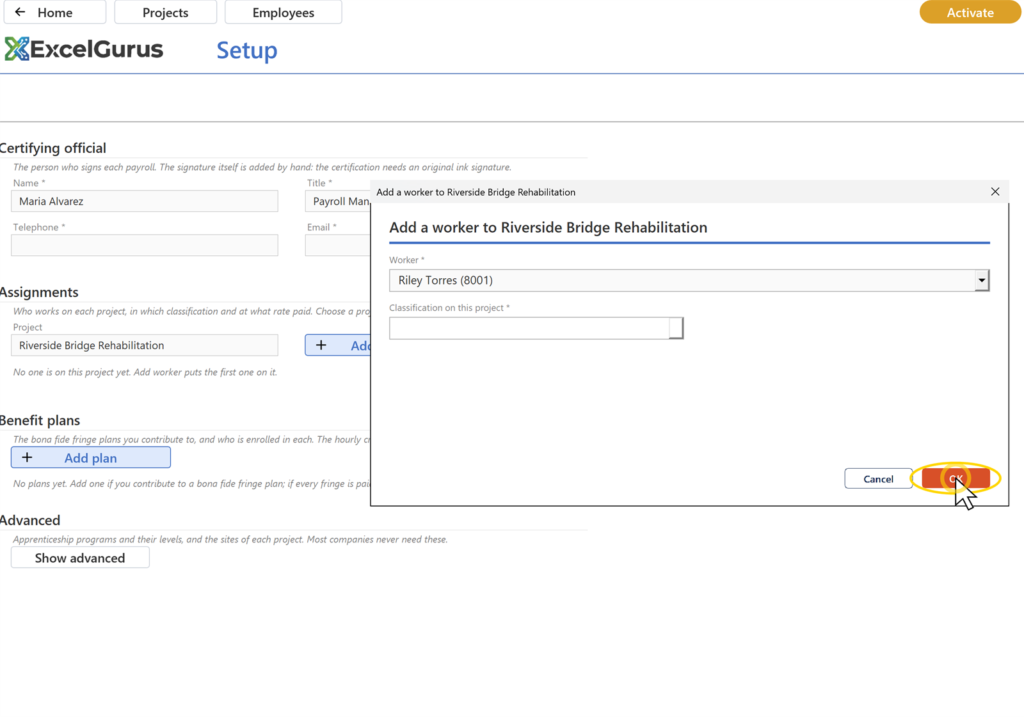
Step 24: Click Add worker again for Shah, Priya: Carpenter, Hourly, 32.20, 12.40
Click Add worker again for Shah, Priya: Carpenter, Hourly, 32.20, 12.40. And again for Whitfield, Dan: Laborer, Hourly, 23.00, 8.10.
You should see: Three assignment cards under the project, each with its classification, rates and the wage determination line.
Weekly entry
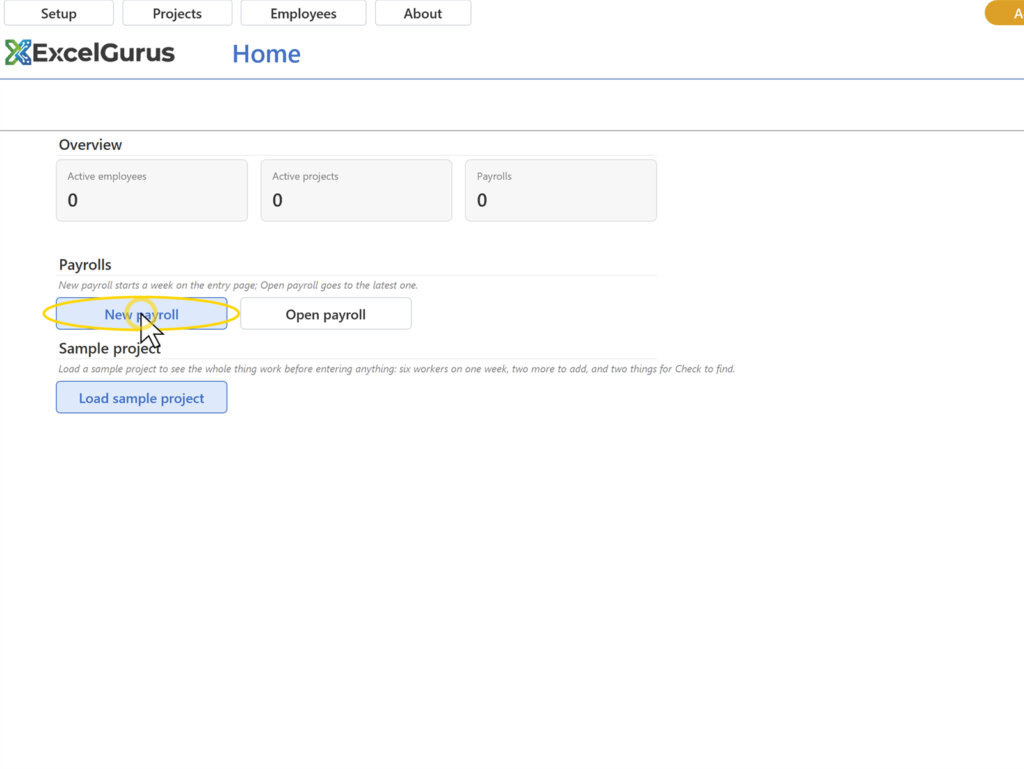
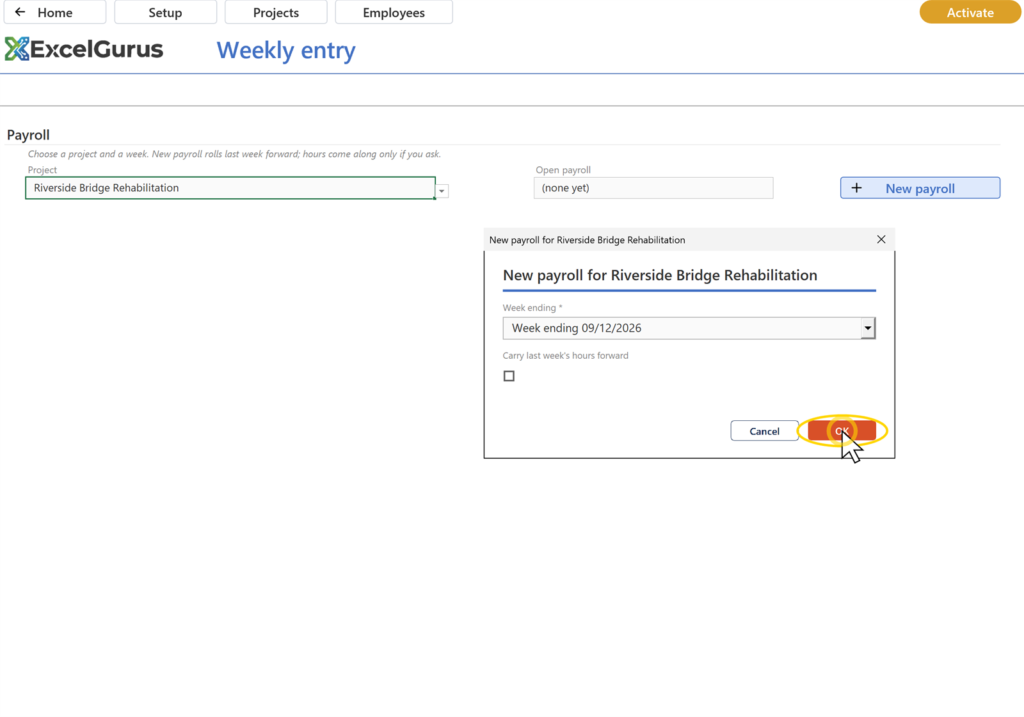
Step 25: Click Home, then the blue New payroll button
Click Home, then the blue New payroll button. In the dialog, keep the week ending offered (the most recent Saturday) and click OK.
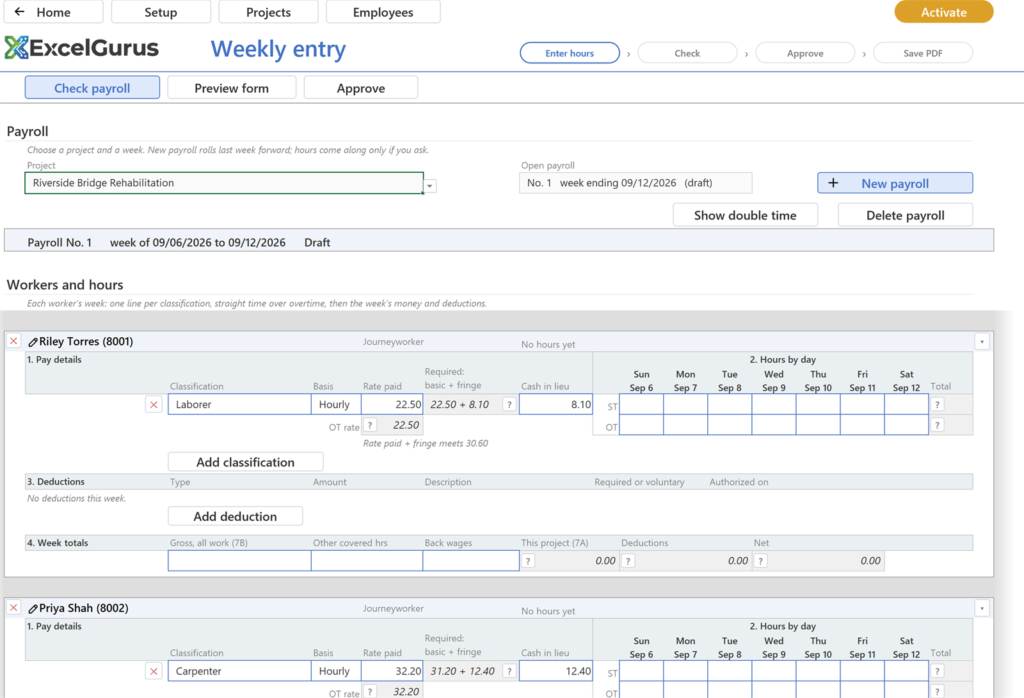
You should see: The Weekly entry page with a band reading Payroll No. 1, the week's dates and Draft, and one card per assigned worker.
Step 26: Read the header row
Read the header row.
You should see: Home, Setup, Projects, Employees and the chip; under it Check payroll in blue, Preview form and Approve in white; at the right, four bubbles: Enter hours, Check, Approve, Save PDF.
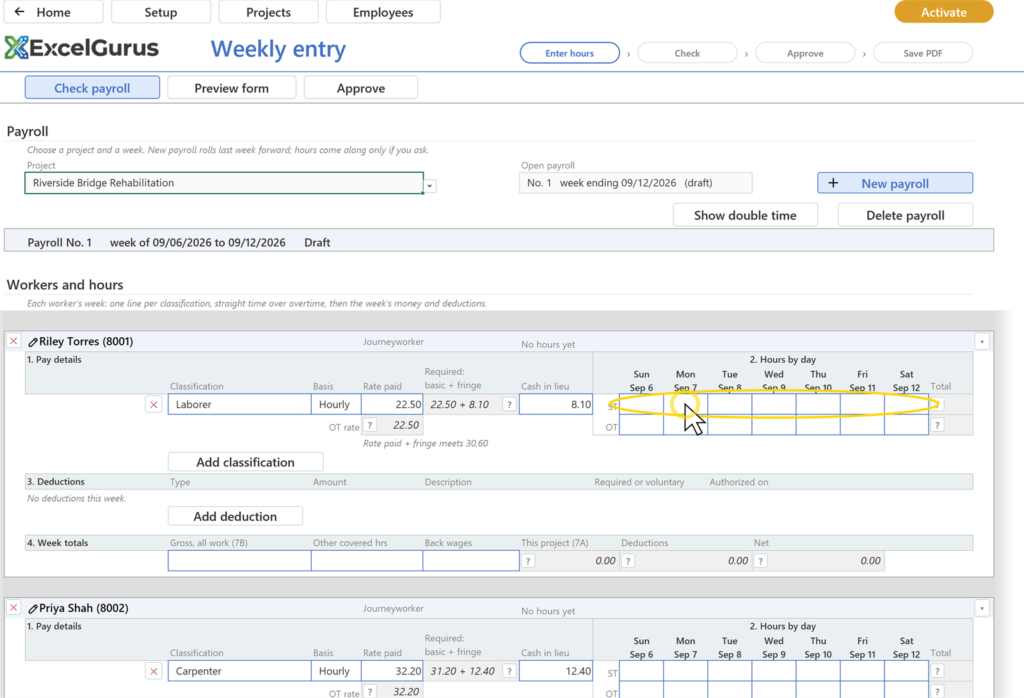
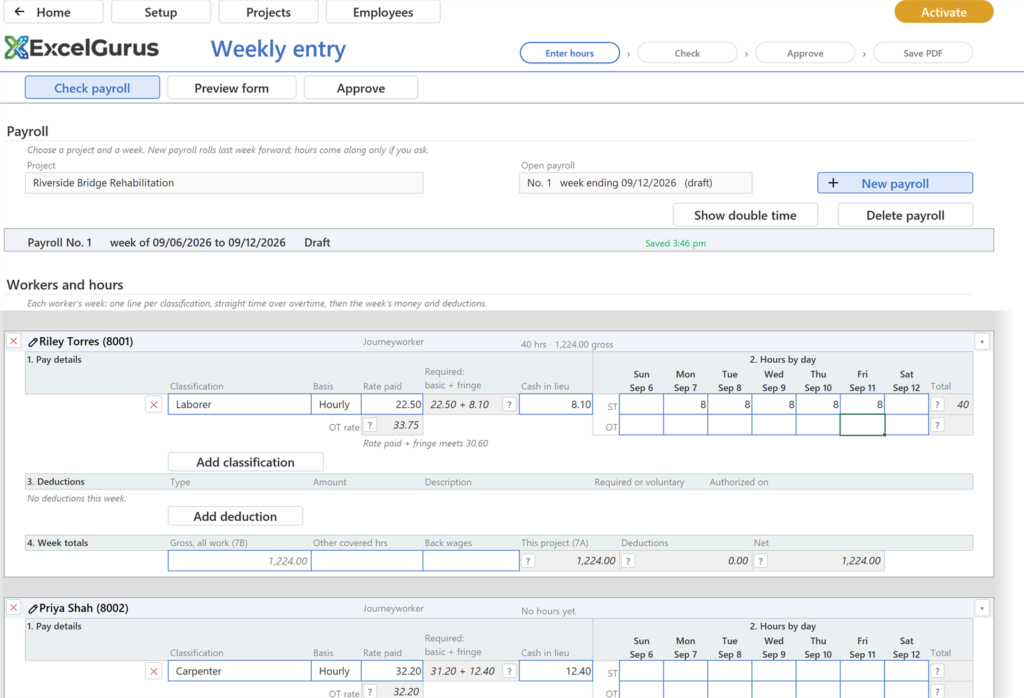
Step 27: On the Torres card, in the ST row under Hours by day, click the Mon cell and…
On the Torres card, in the ST row under Hours by day, click the Mon cell and type 8, Tab, 8, Tab, 8, Tab, 8, Tab, 8, Enter.
You should see: Total reads 40; the card's heading reads 40 hrs and the gross; the Week totals row fills in; a Saved note shows on the band.
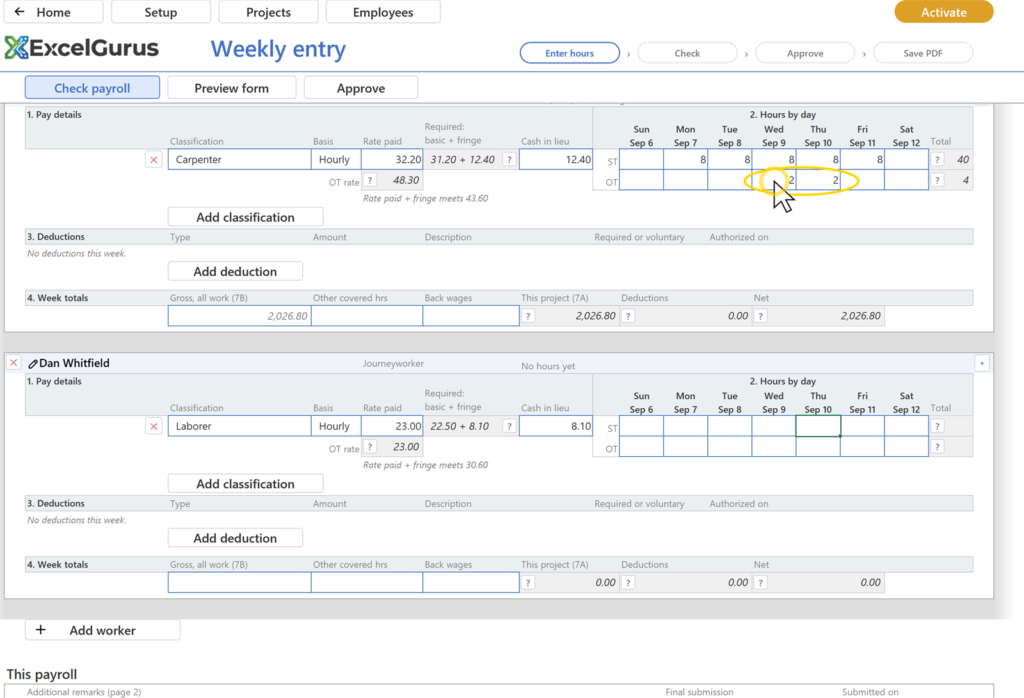
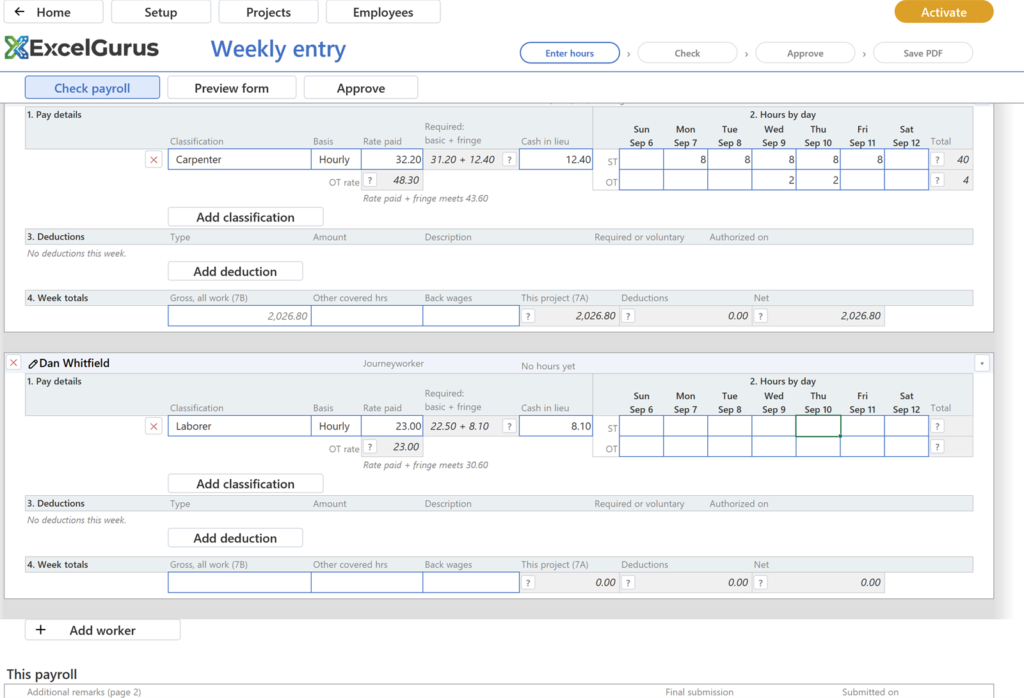
Step 28: On the Shah card, the same 8s Mon to Fri in the ST row; then in the OT row, c…
On the Shah card, the same 8s Mon to Fri in the ST row; then in the OT row, click the Wed cell, type 2, Tab, 2, Enter.
You should see: The heading reads 44 hrs (4 OT); the OT rate under Rate paid reads 48.30, time and a half of 32.20; the gross is 2,026.80.
Step 29: Leave the Whitfield card empty
Leave the Whitfield card empty.
You should see: His card reads No hours yet.
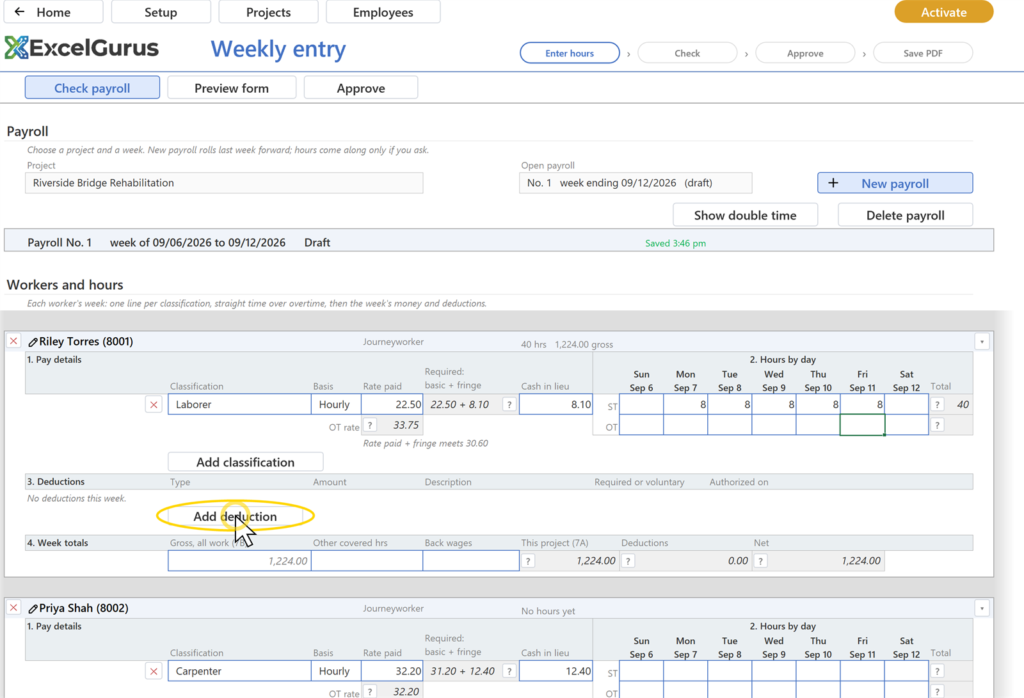
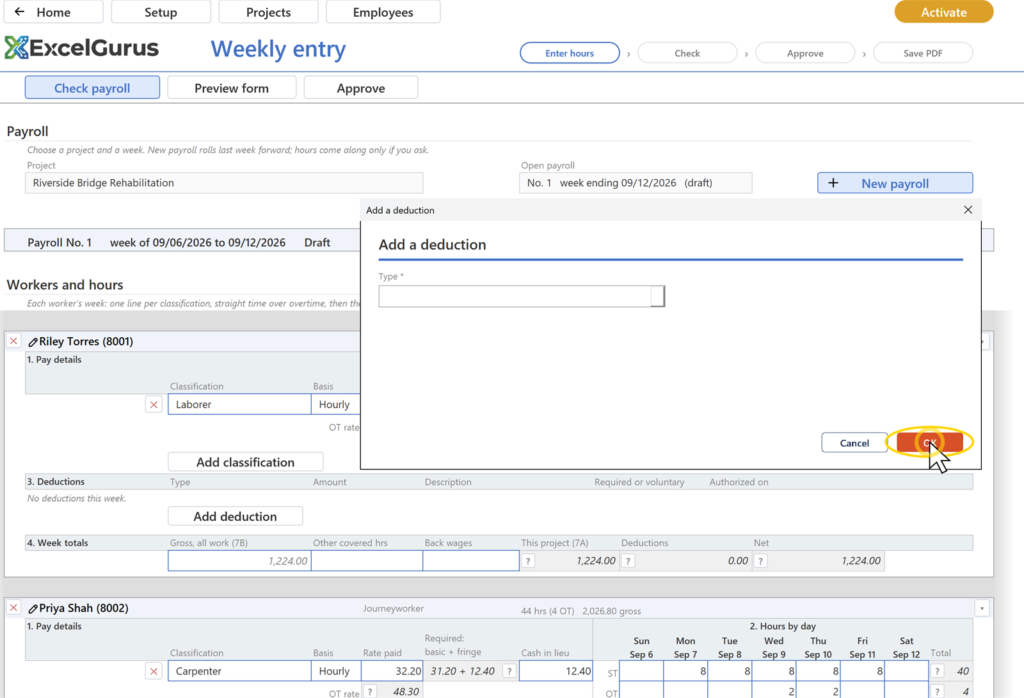
Step 30: On the Torres card, under 3
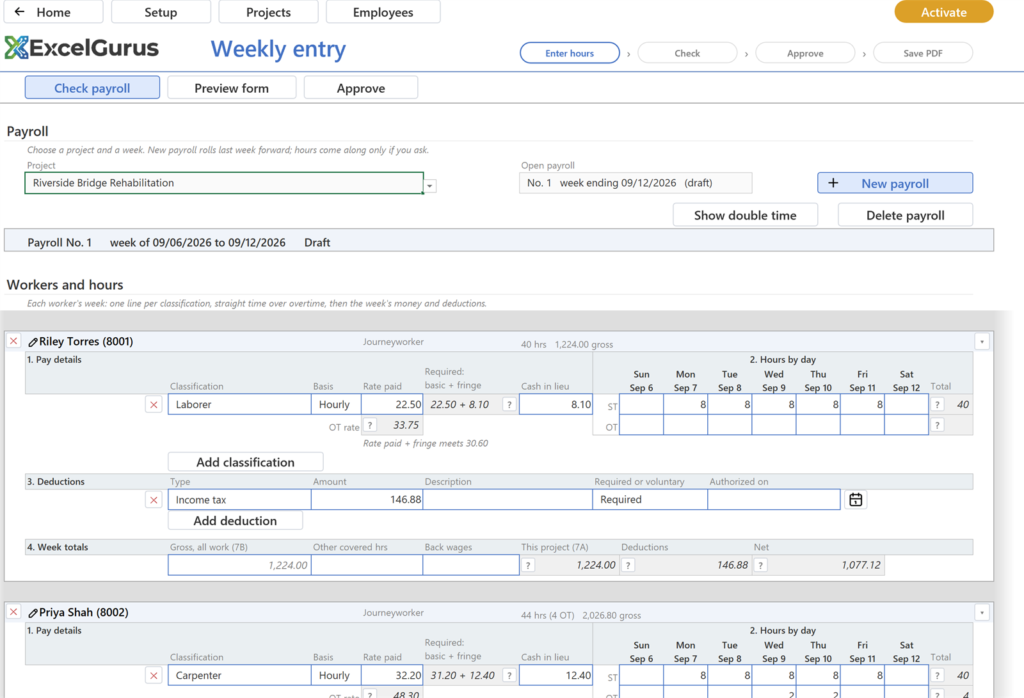
On the Torres card, under 3. Deductions, click Add deduction. Choose Income tax, type the amount, leave Description empty, keep Required, click OK.
You should see: The deduction row on the card; the week's Net drops by it.
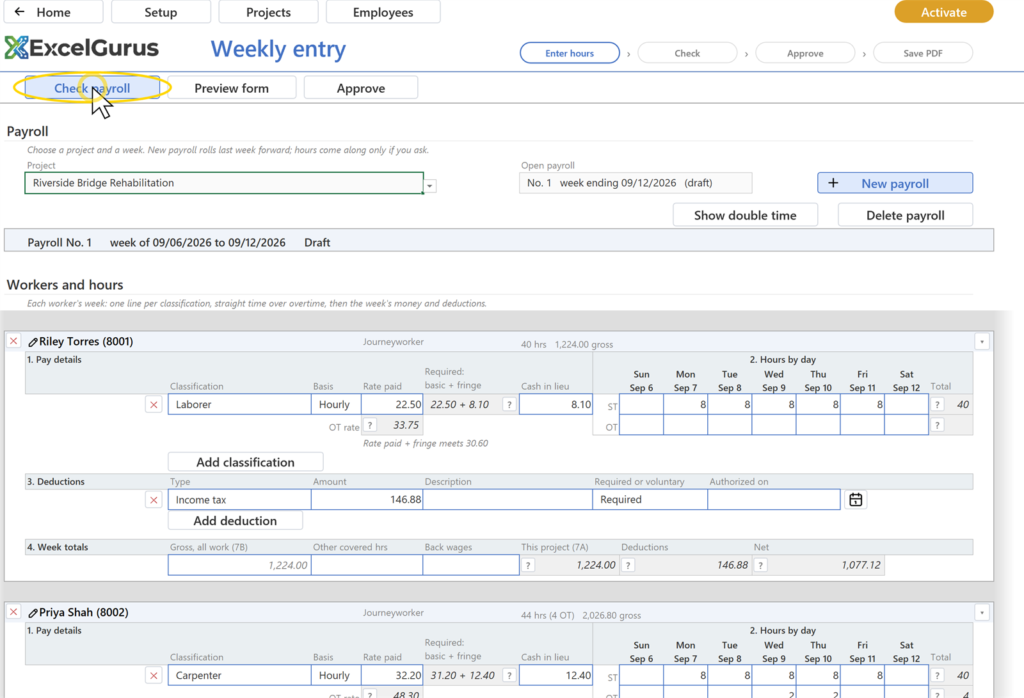
Step 31: Click Check payroll in the header row
Click Check payroll in the header row.
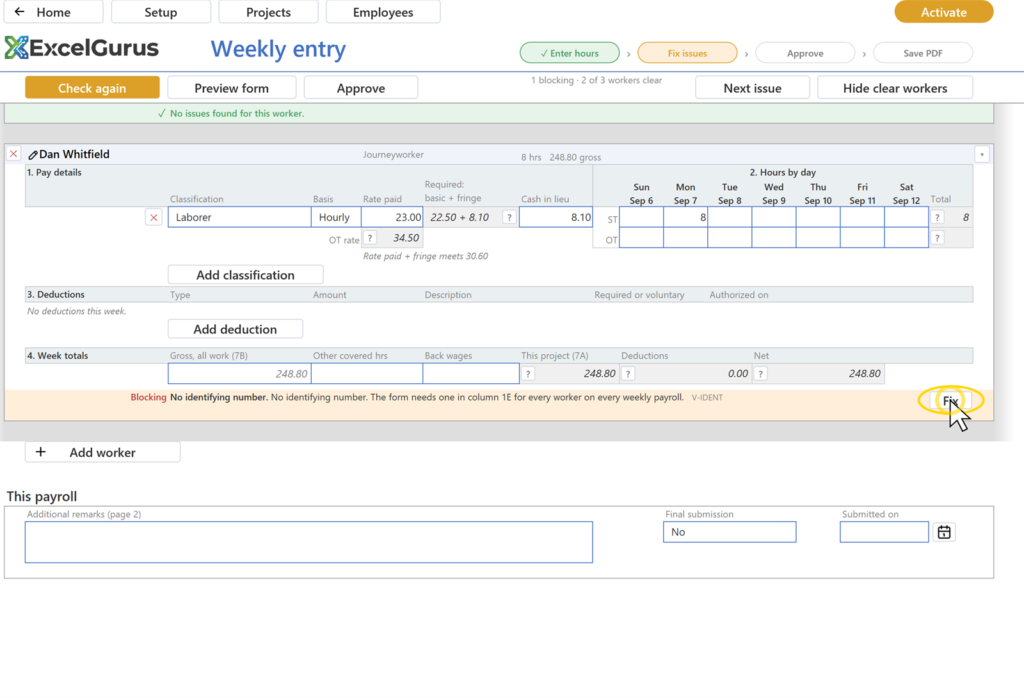
You should see: A tally between Approve and the right-hand buttons (2 blocking, 2 of 3 workers clear); the second bubble reads Fix issues in amber; the Check button now reads Check again; two new buttons at the right: Next issue and Hide clear workers. Each worker's findings sit under that worker's card.
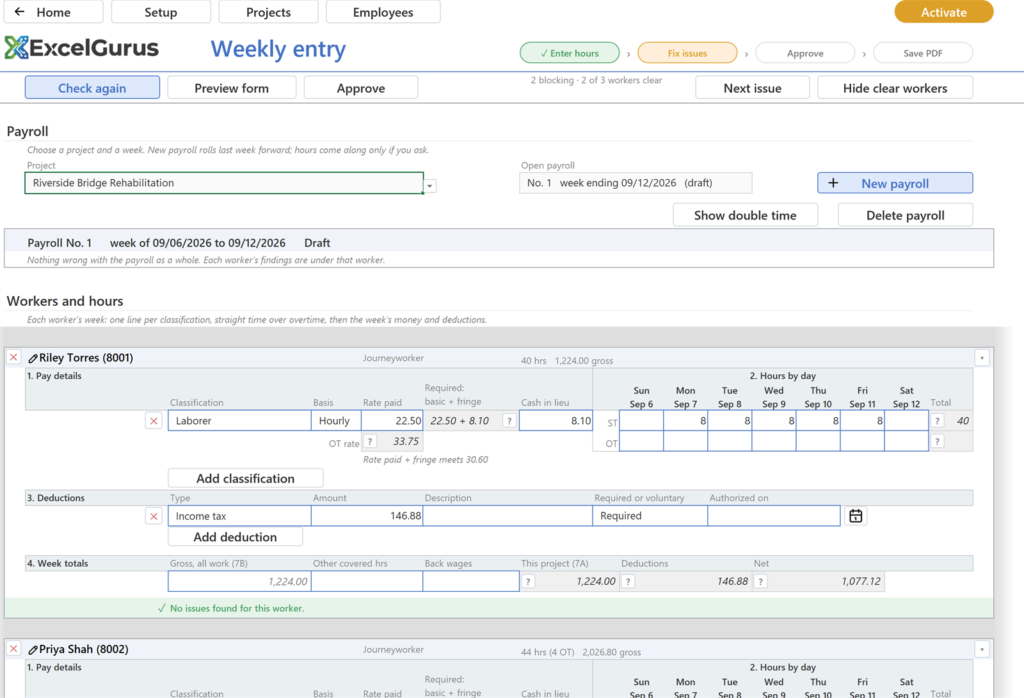
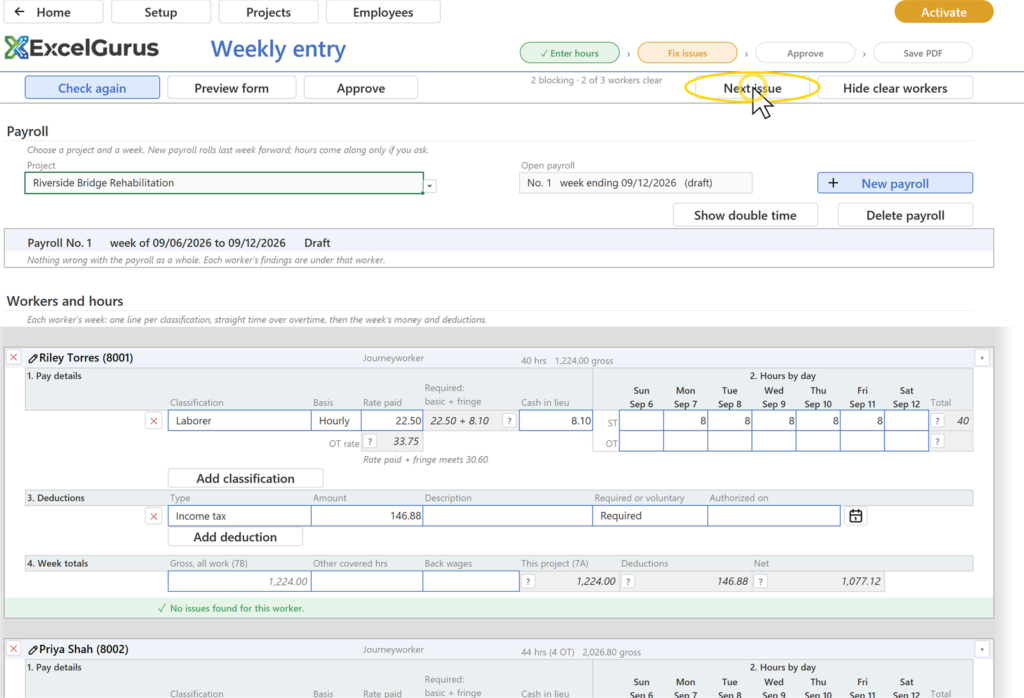
Step 32: Click Next issue, or Fix on No hours this week
Click Next issue, or Fix on No hours this week. Whitfield's day cells light yellow and a callout says to enter the hours or remove the worker. Click his Mon ST cell, type 8, Enter.
You should see: The finding row goes and Check again turns amber, because the page has changed since the last check.
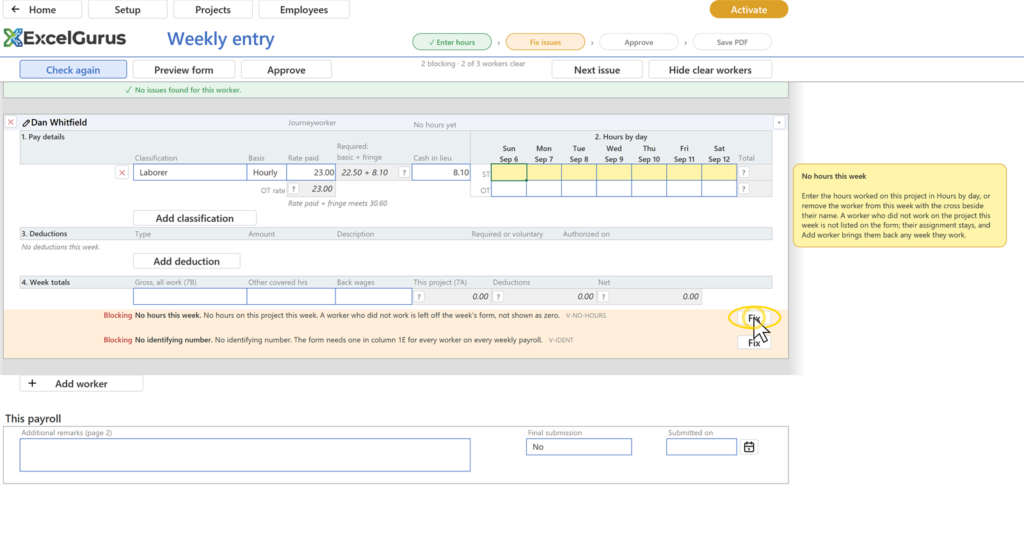
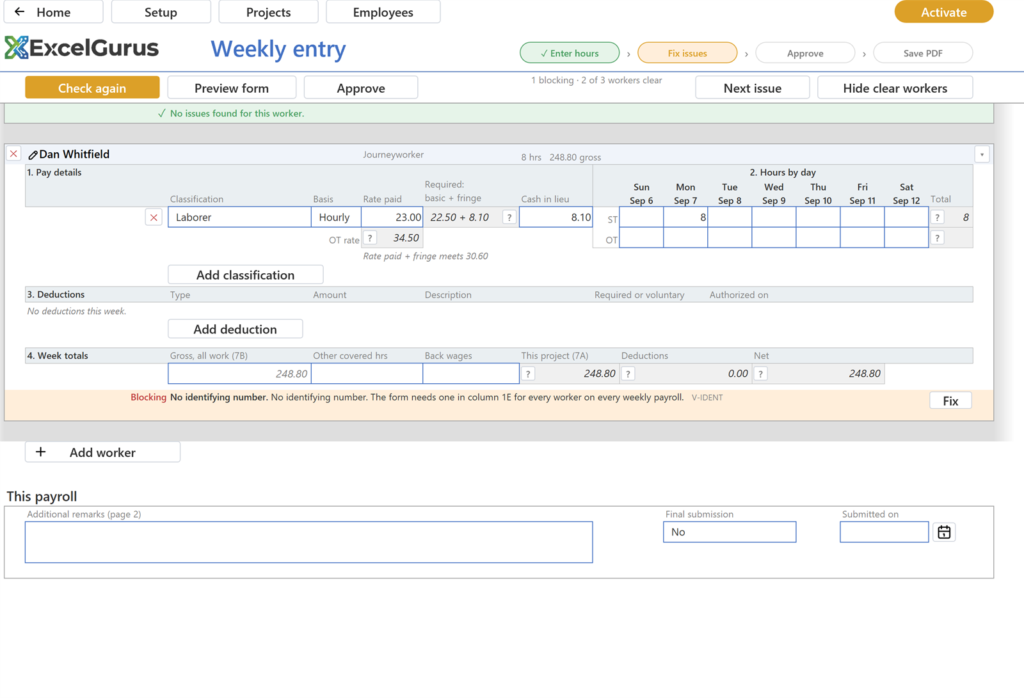
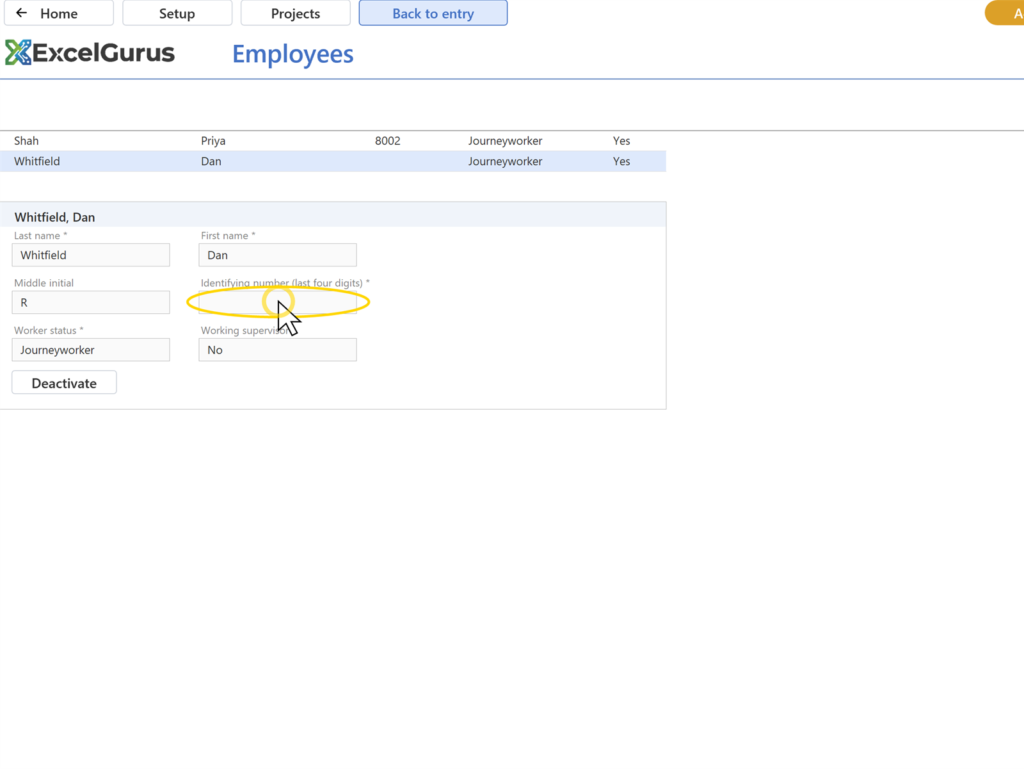
Step 33: Click Fix on No identifying number
Click Fix on No identifying number. The Employees page opens on Whitfield's card with Back to entry in the header row. Click under Identifying number, type the last four digits, Tab, then click Back to entry.
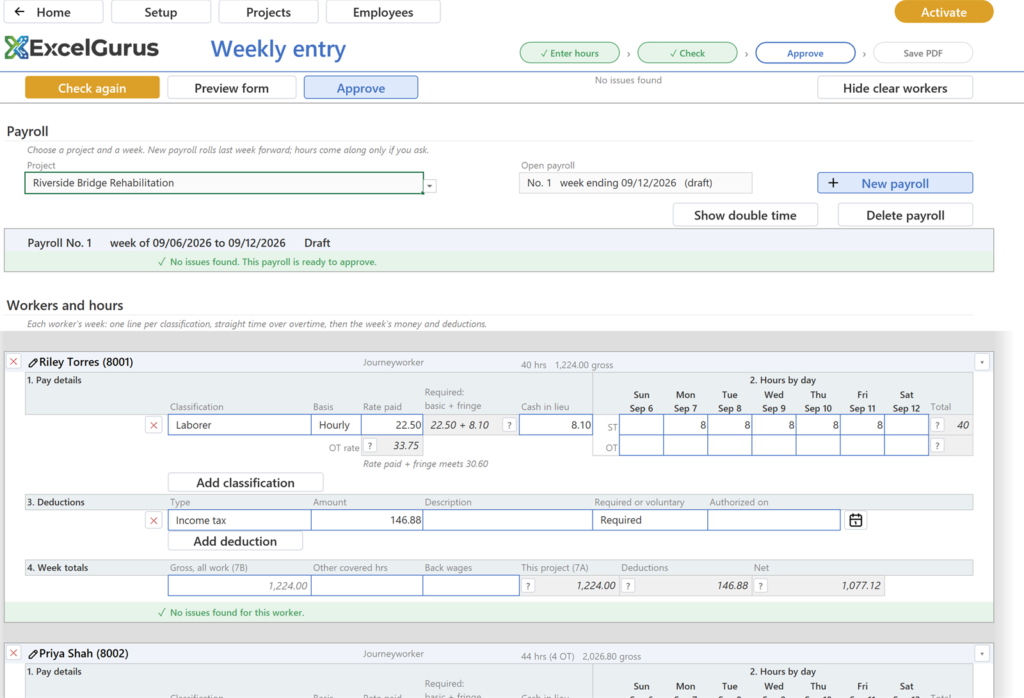
You should see: The Weekly entry page again; the finding is gone and the band reads No issues found.
Step 34: Click Check again
Click Check again.
You should see: The tally reads No issues found; the Check bubble is ticked; Approve in the header row is blue; Check again is white again.
Step 35: On the Whitfield card, click the small cross at the left of the card's headin…
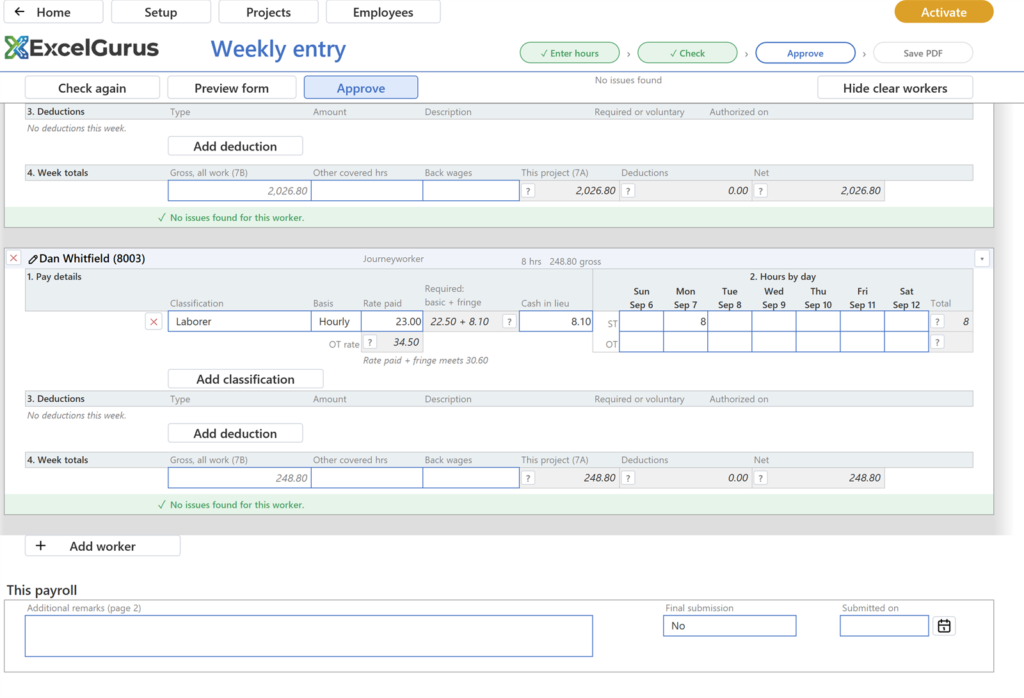
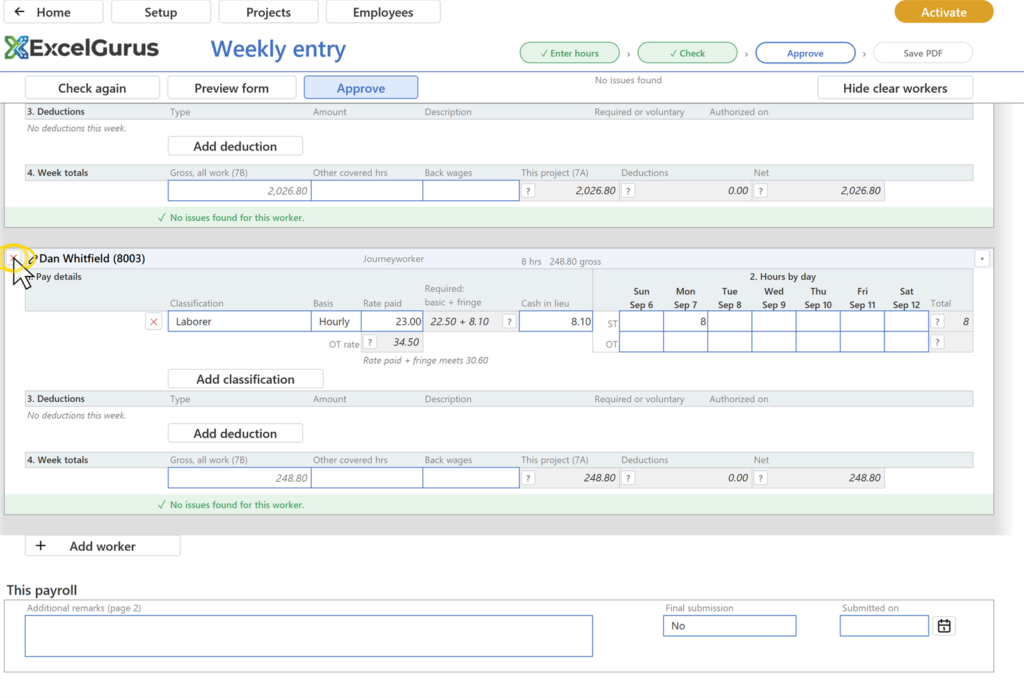
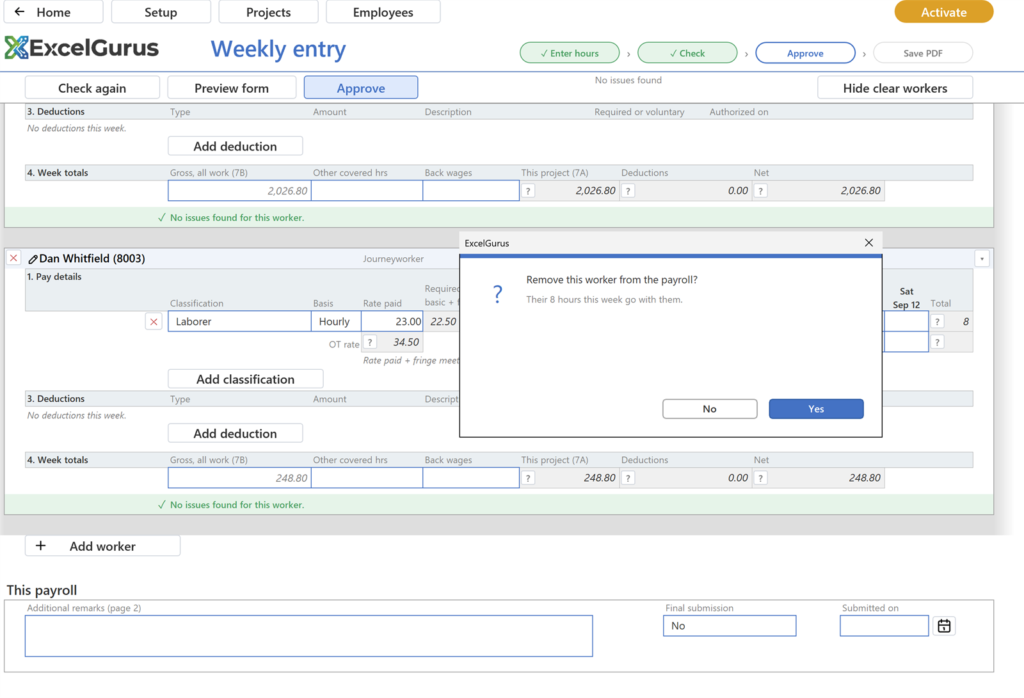
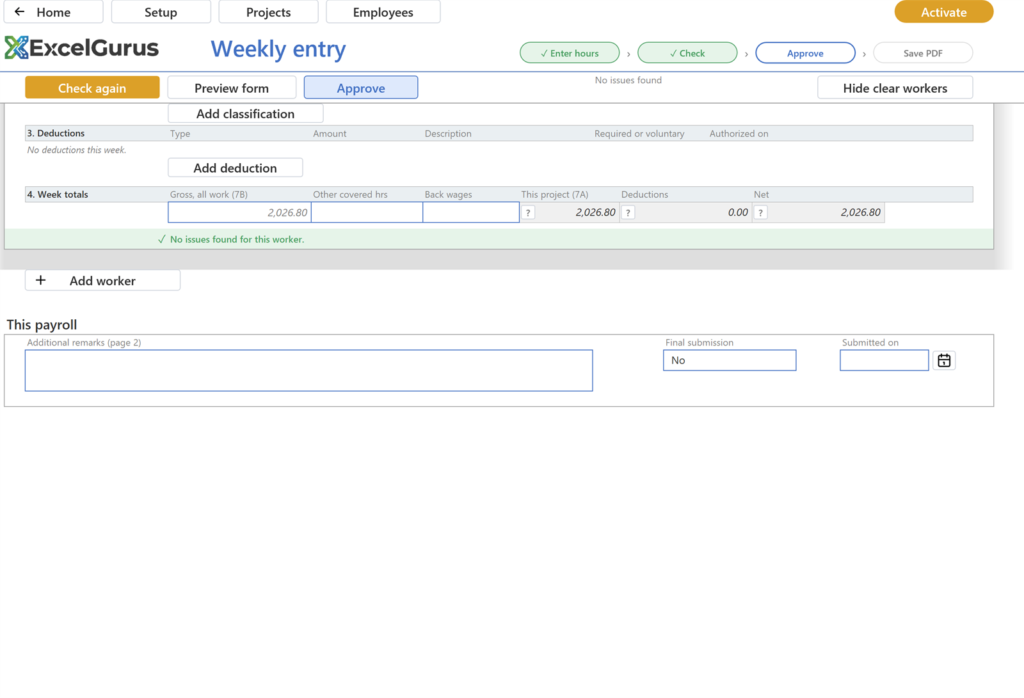
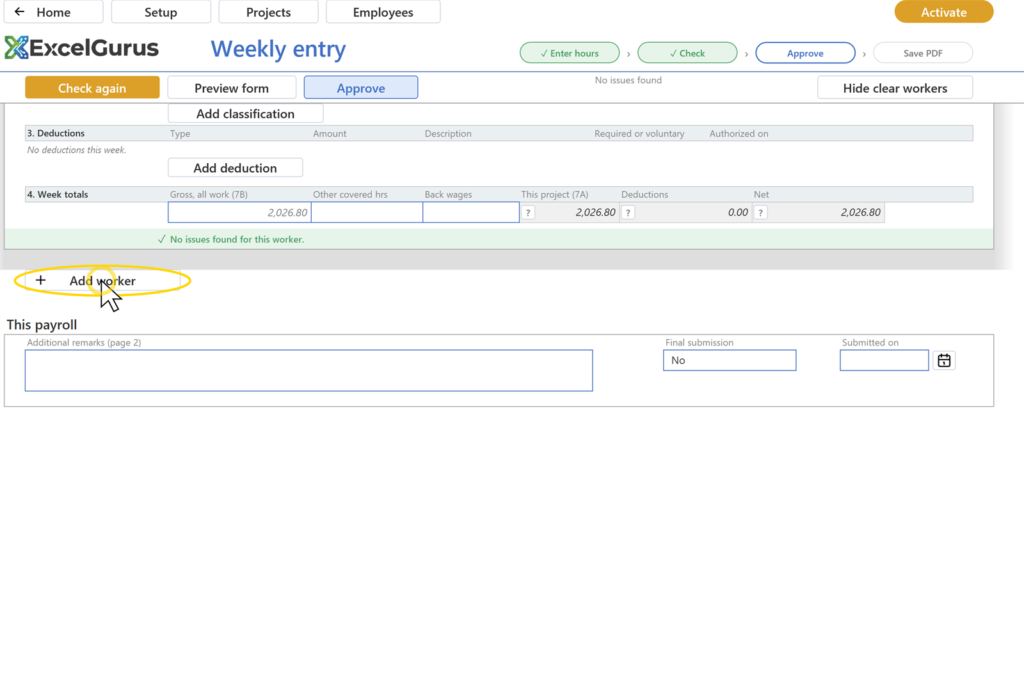
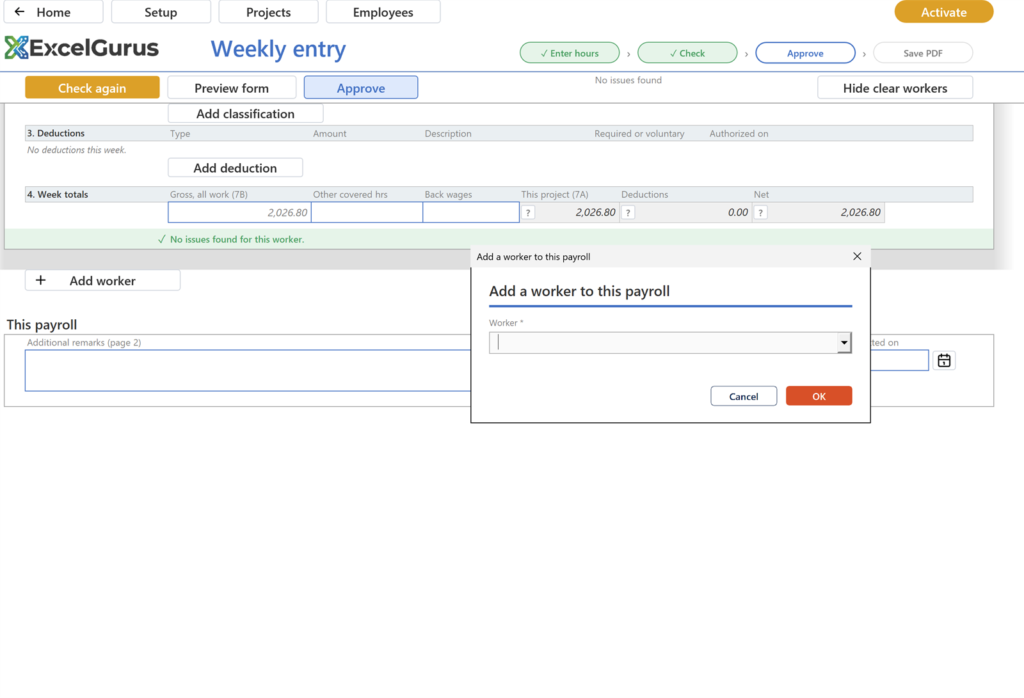
On the Whitfield card, click the small cross at the left of the card's heading and confirm. Then click Add worker under the cards and look at the Worker list; Cancel.
You should see: The confirmation names his 8 hours; the card goes and two remain; Check again turns amber; the Add worker list offers Whitfield, Dan, with the others marked already on this payroll.
The form
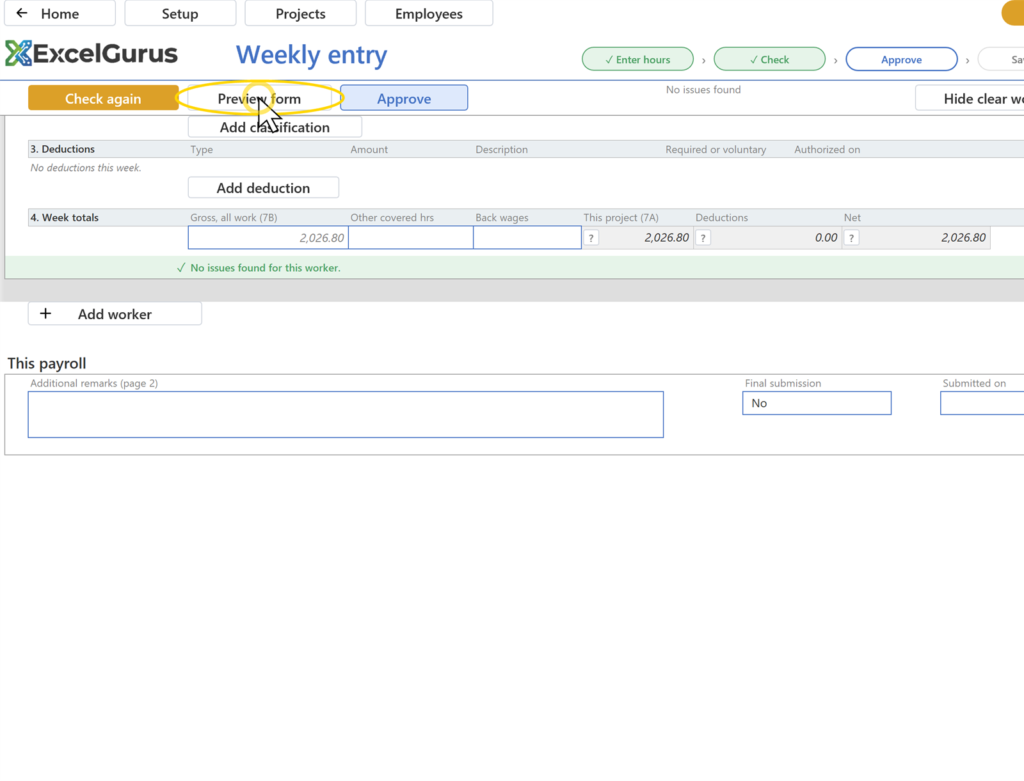
Step 36: Click Preview form
Click Preview form.
You should see: The rendered form, page 1 of 2, with TRIAL COPY / NOT FOR SUBMISSION across it in red on the trial; the header row reads Back to entry, Home, Approve and Remove the mark; a dark strip with Page 1 of 2 and Next.
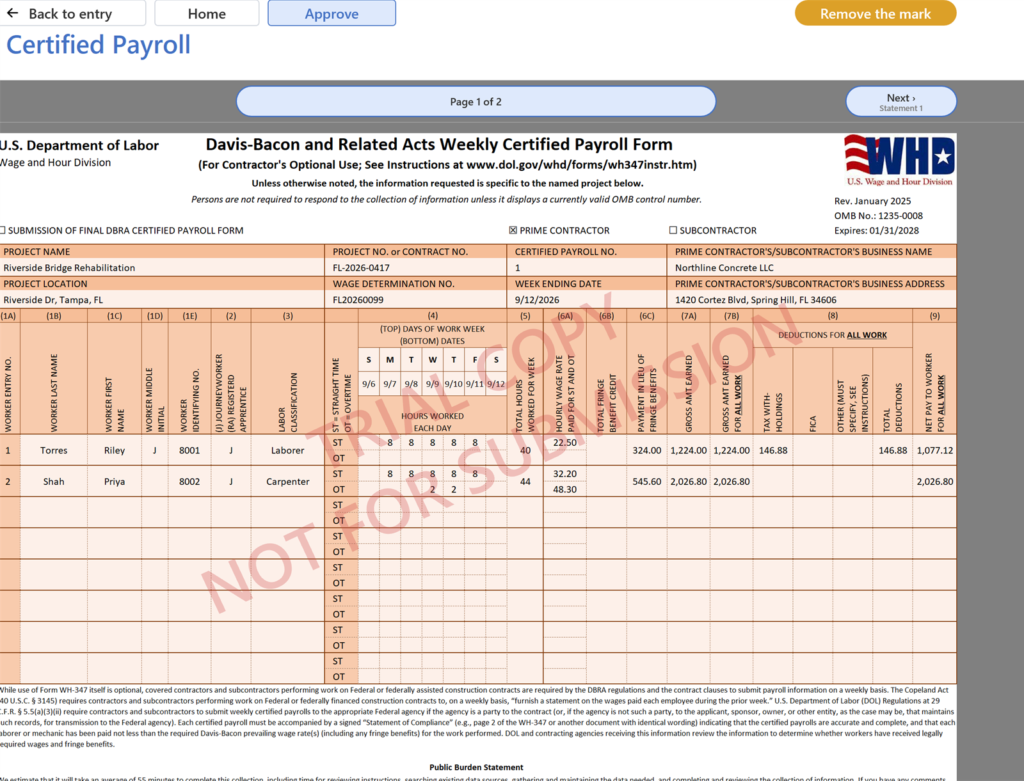
Step 37: Read page 1 against the grid
Read page 1 against the grid.
You should see: Torres and Shah with their identifying numbers, classification, hours by day, rate paid, gross, deductions and net as entered; no Whitfield row.
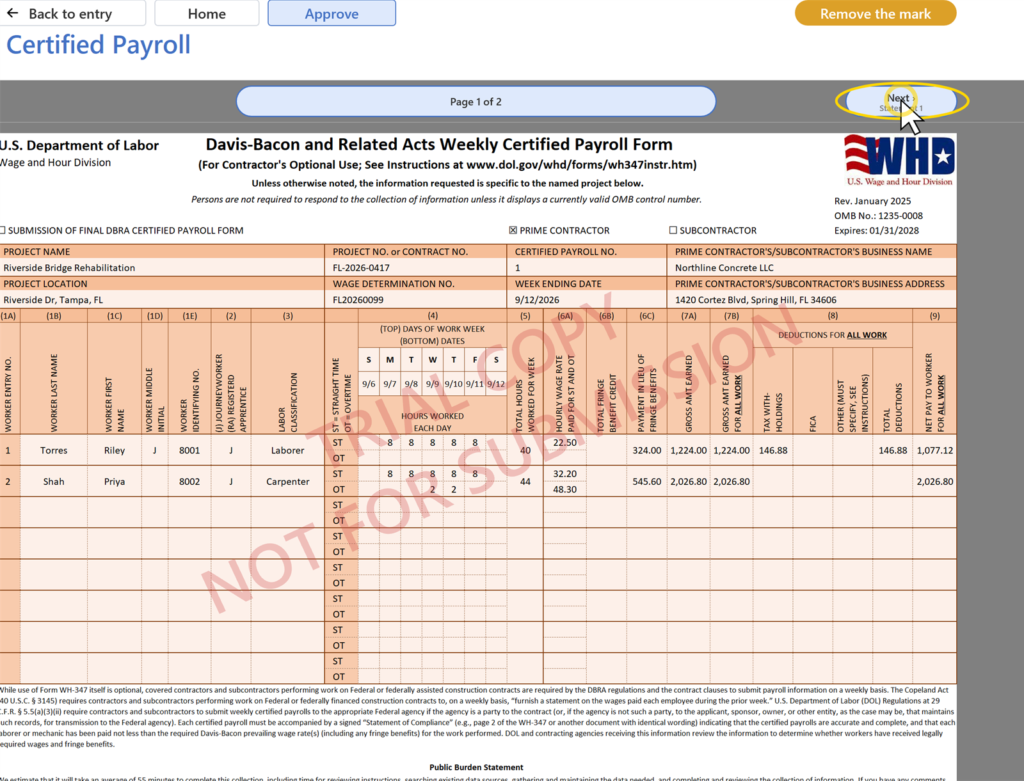
Step 38: Click Next in the dark strip
Click Next in the dark strip.
You should see: Page 2, the Statement of Compliance, with the company and the certifying official's name and title from Setup.
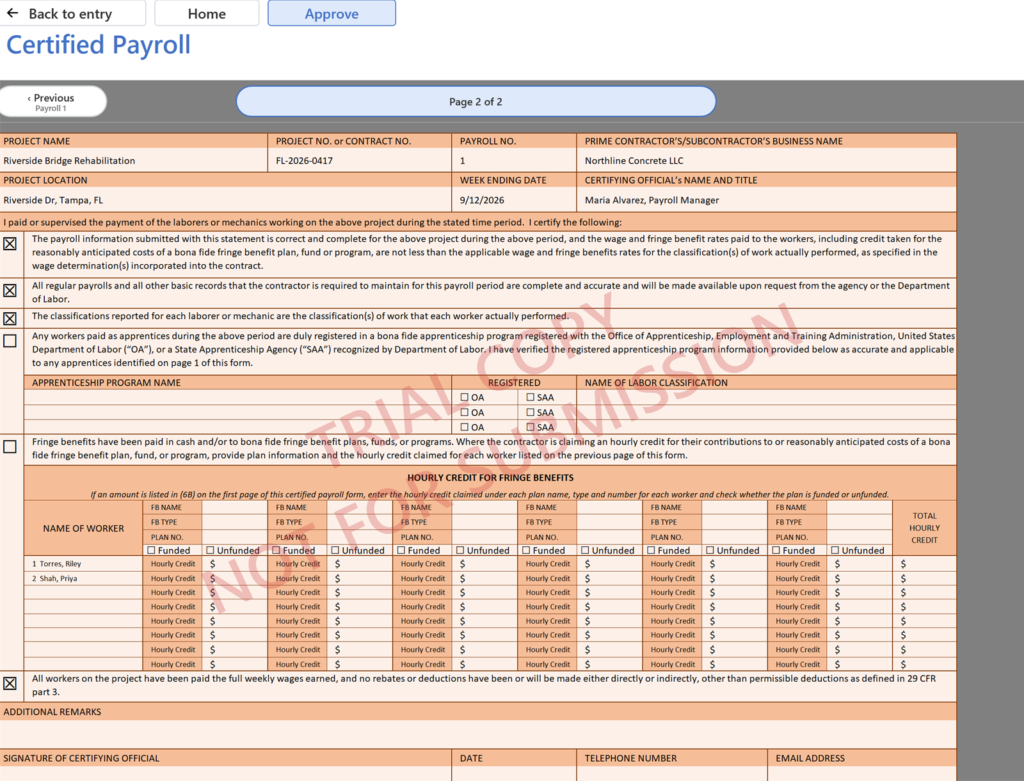
Step 39: Click Back to entry
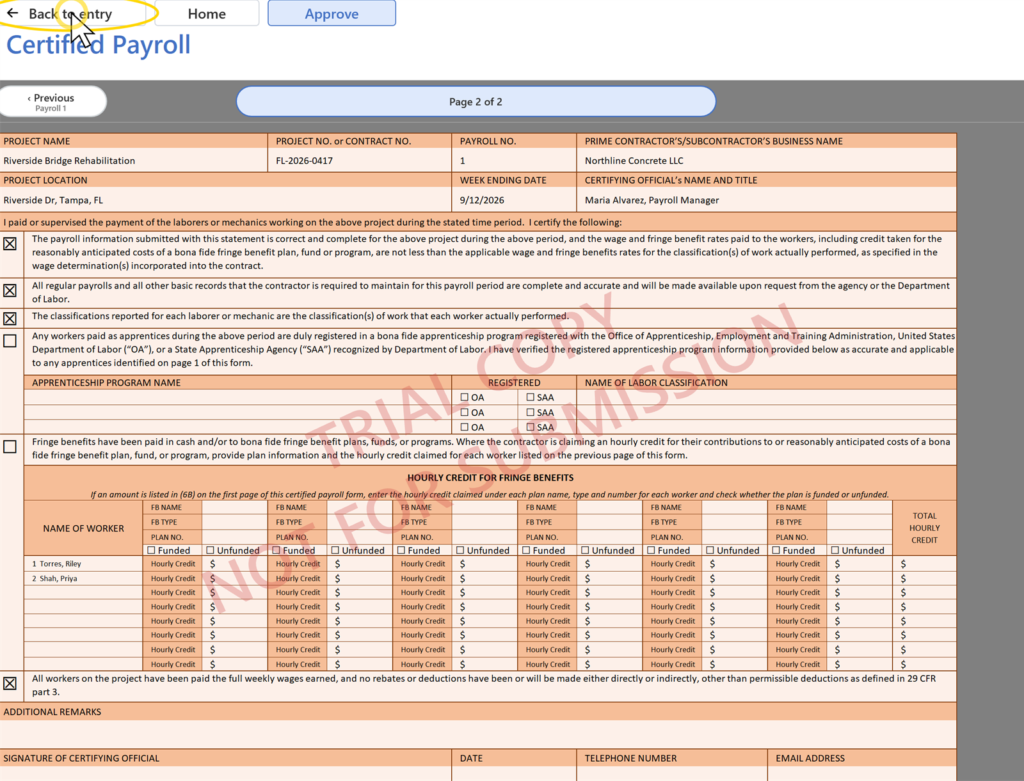
Click Back to entry.
You should see: The Weekly entry page on Payroll No. 1.
Approve, PDF
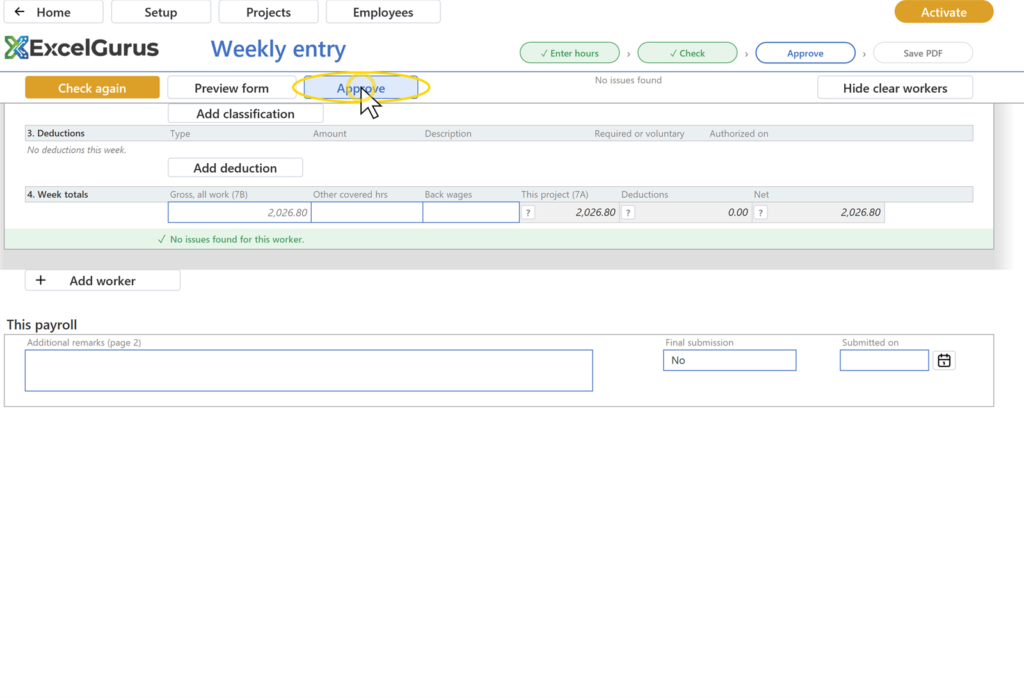
Step 40: Click Approve
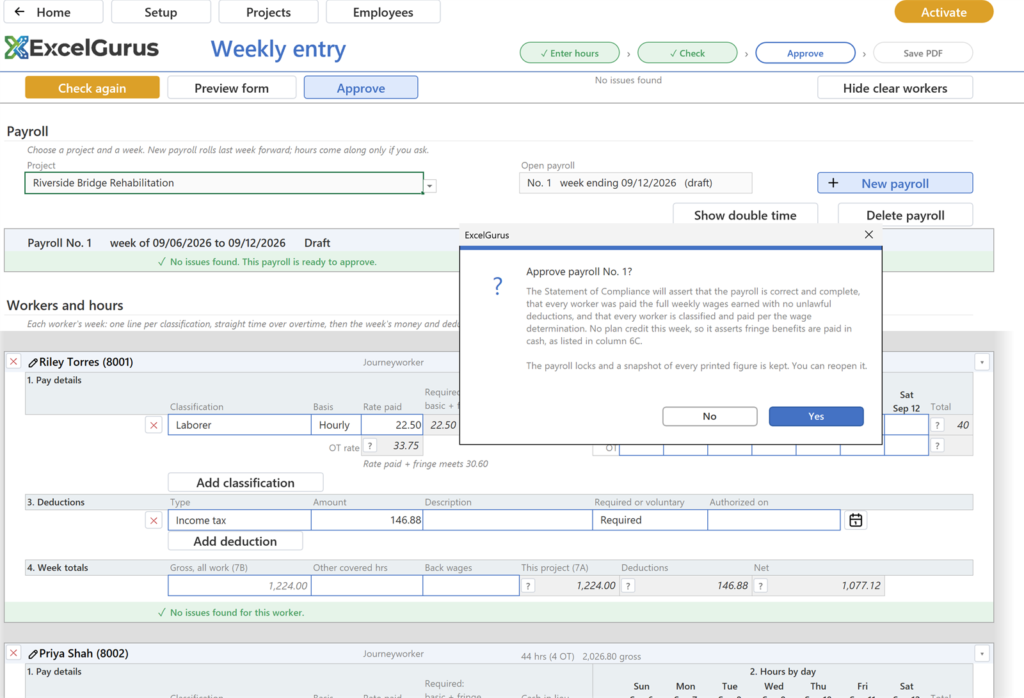
Click Approve. A confirmation states what the Statement of Compliance will assert; confirm.
You should see: The band reads Approved with today's date and No issues found, Approved, Reopen to change anything; the crosses and Add buttons are gone; the header row reads Check again, Preview form, Reopen and Save PDF in blue; the strip ticks Approve.
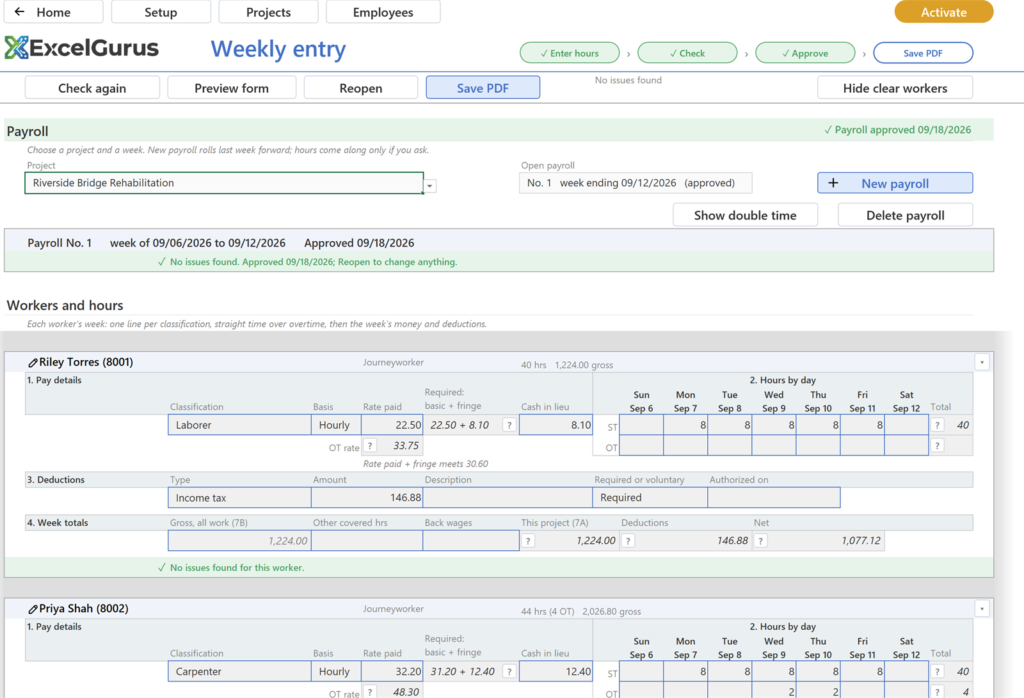
Step 41: Click Save PDF
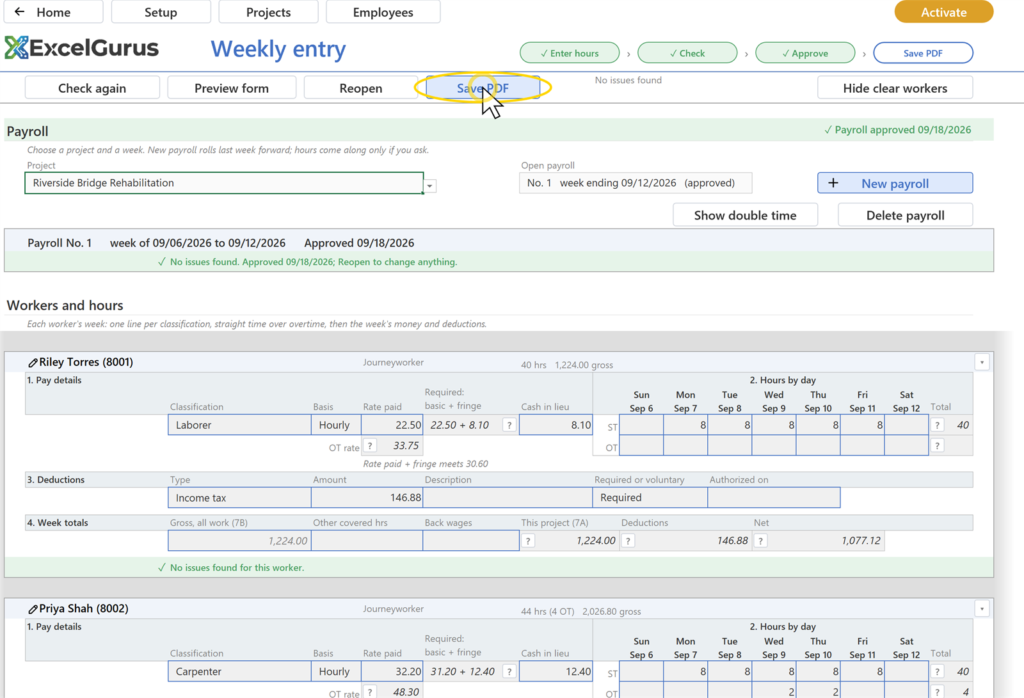
Click Save PDF.
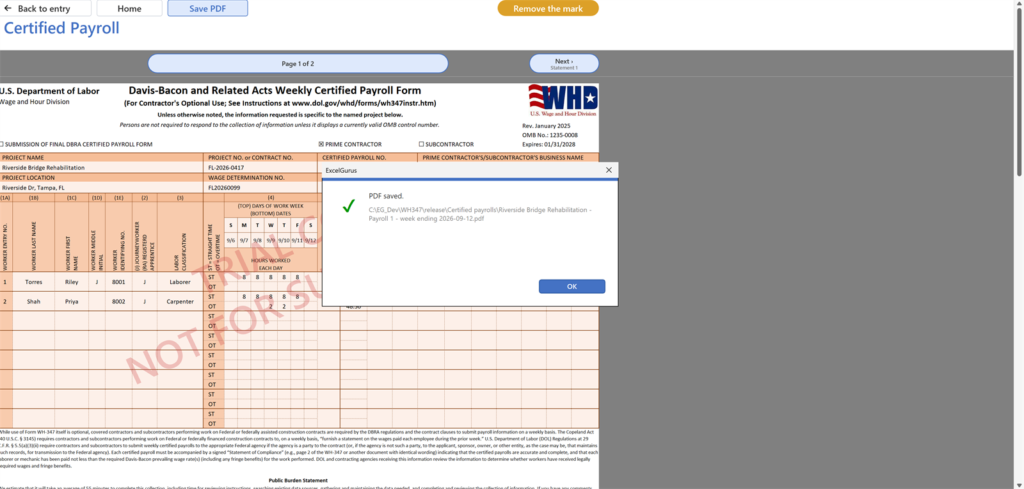
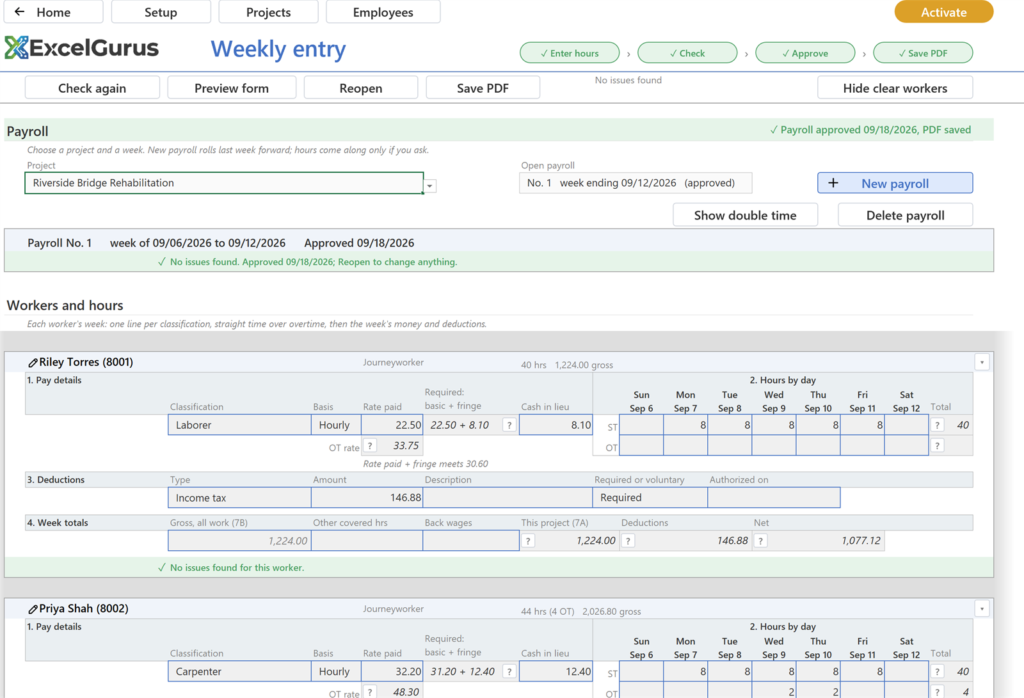
You should see: A message names the PDF's path, in a folder called Certified payrolls beside the workbook: two Letter pages, the red mark on each on the trial. Back on the entry page the band reads PDF saved and the strip ticks Save PDF.
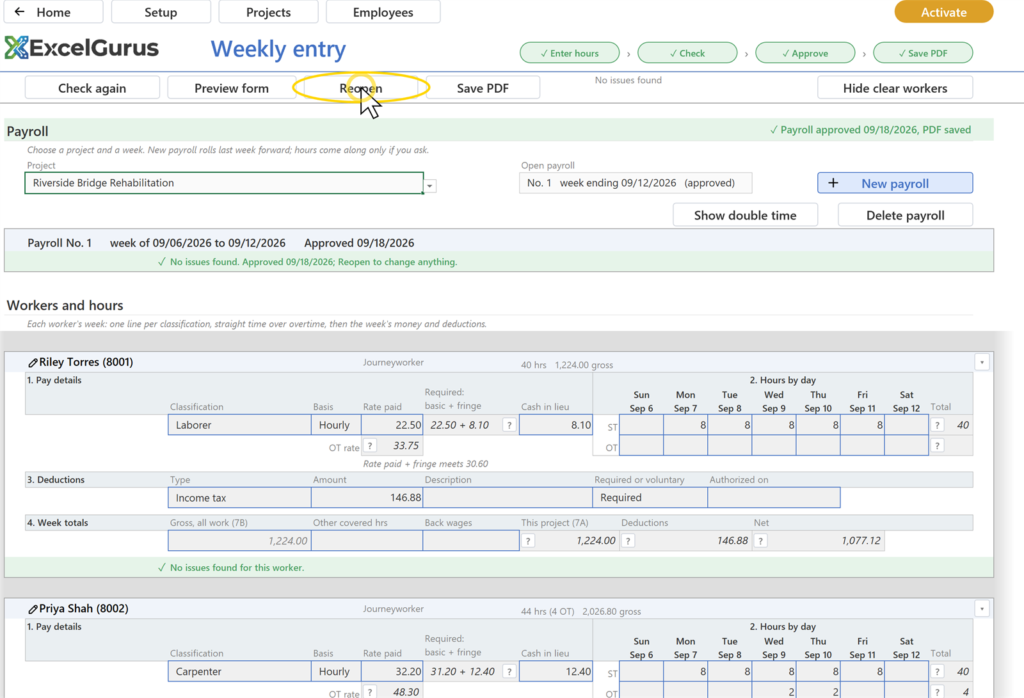
Step 42: Click Reopen and confirm
Click Reopen and confirm.
You should see: The confirmation says the approved version is kept; the band reads Draft again and the crosses and Add buttons are back.
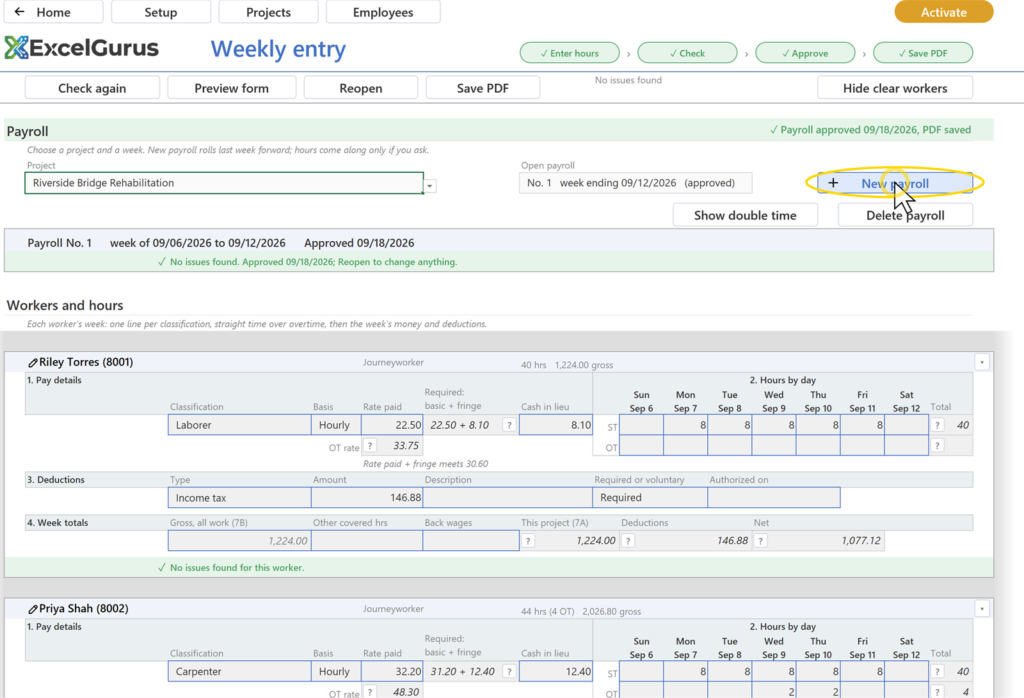
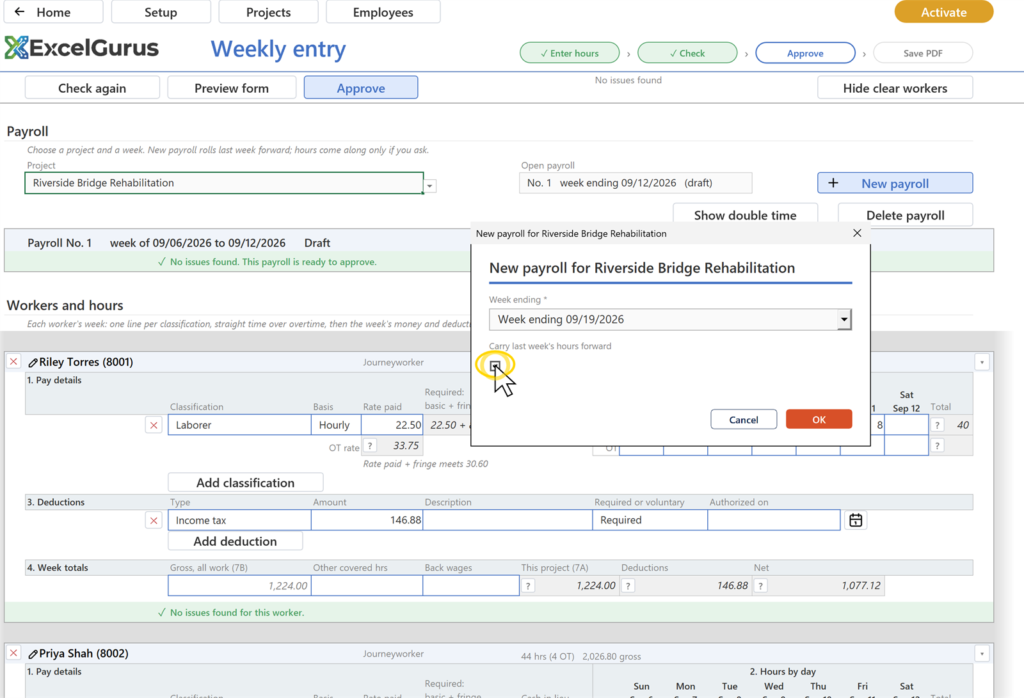
Step 43: Click New payroll, keep the next week offered, tick Carry last week's hours f…
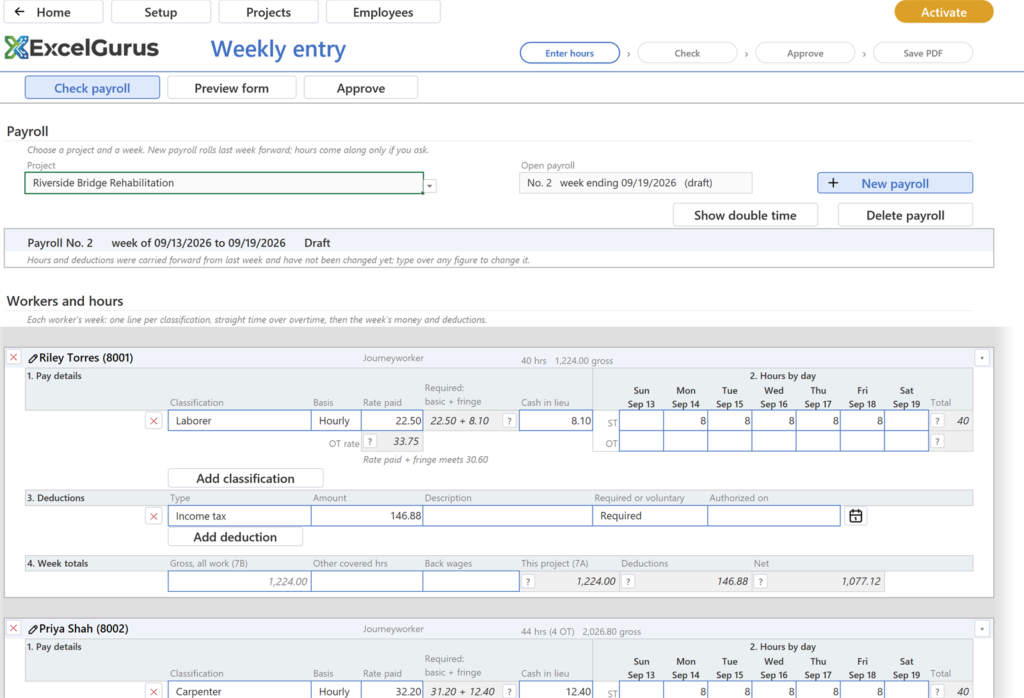
Click New payroll, keep the next week offered, tick Carry last week's hours forward, click OK.
You should see: Payroll No. 2, the same workers with the same hours and deductions, and a note that they were carried forward and can be typed over.
The licence
The trial is the whole product; the only difference a license makes is the TRIAL COPY / NOT FOR SUBMISSION mark on every printed page. A license covers two computers and unlocks the file you already have.
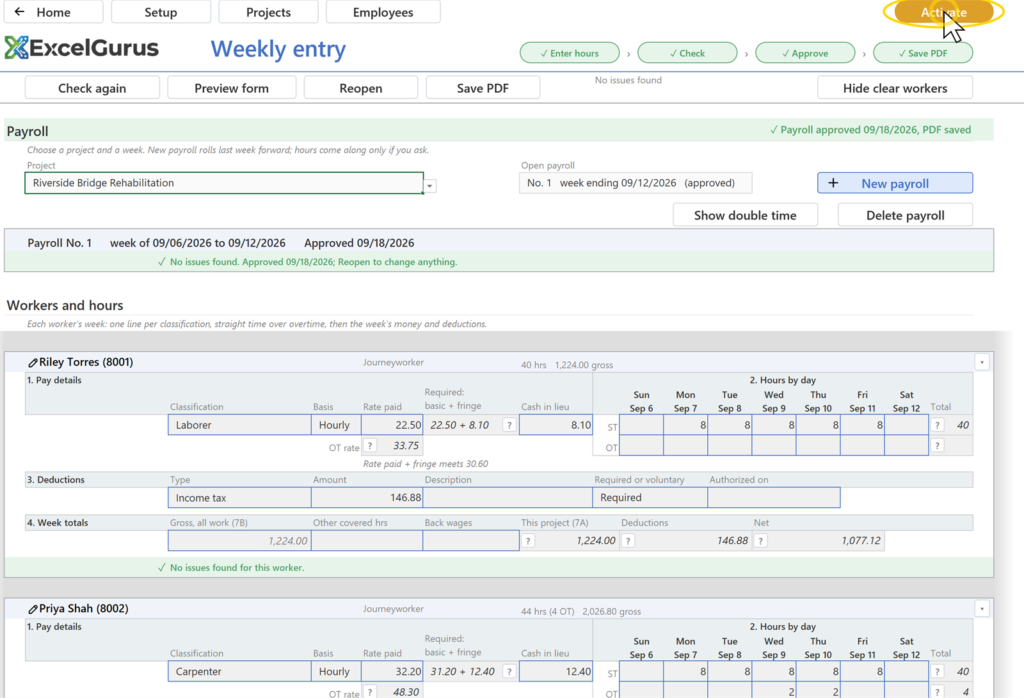
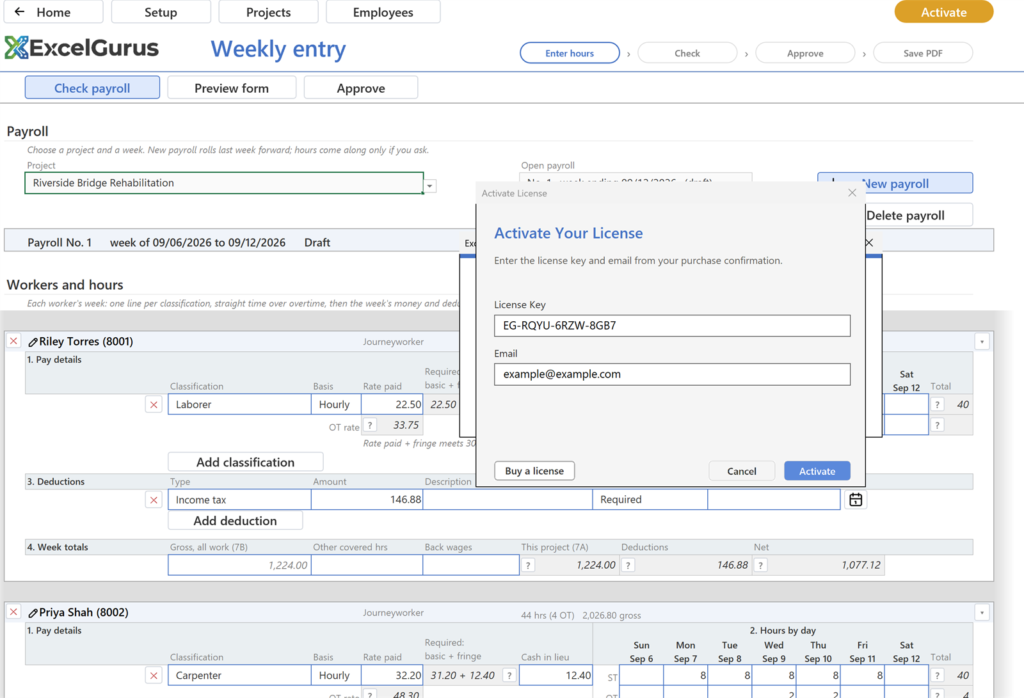
Step 44: Click the Activate chip in the header row
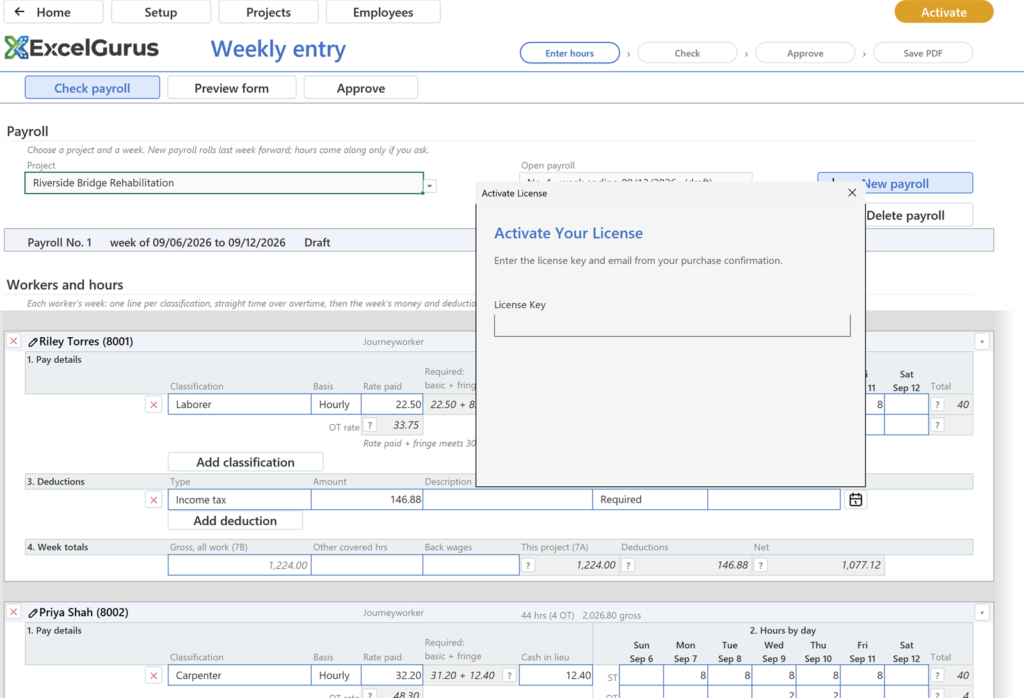
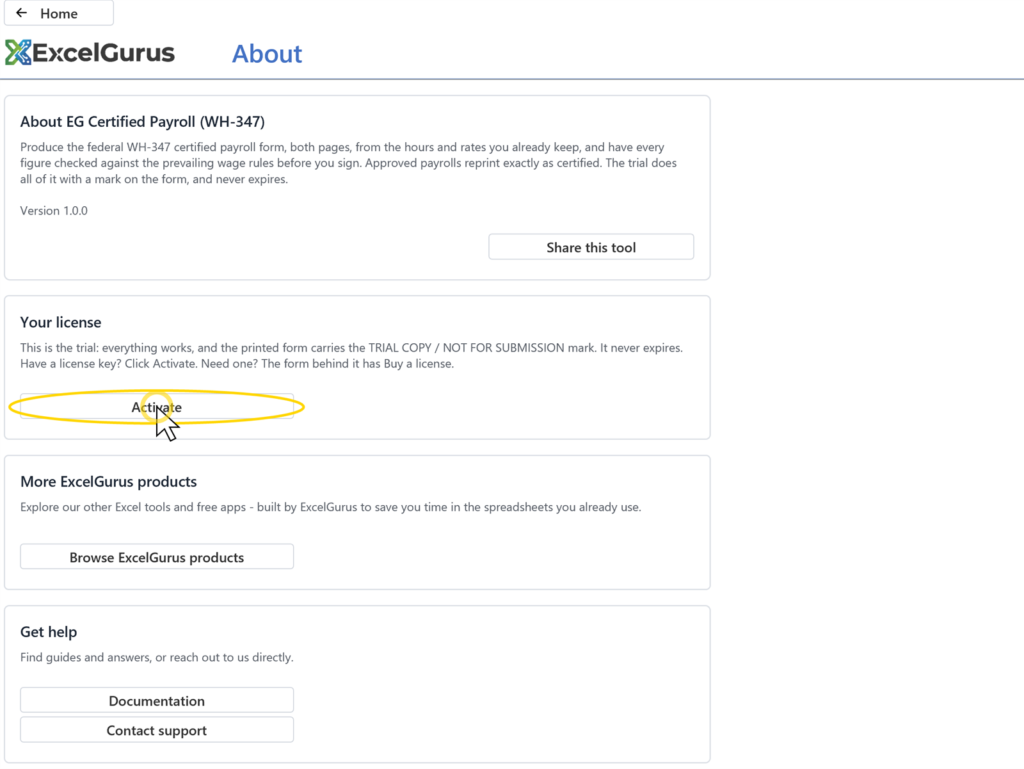
Click the Activate chip in the header row.
You should see: A dialog titled Activate License, with License Key and Email fields and three buttons: Buy a license at the left, Cancel and Activate at the right.
Step 45: Click Buy a license
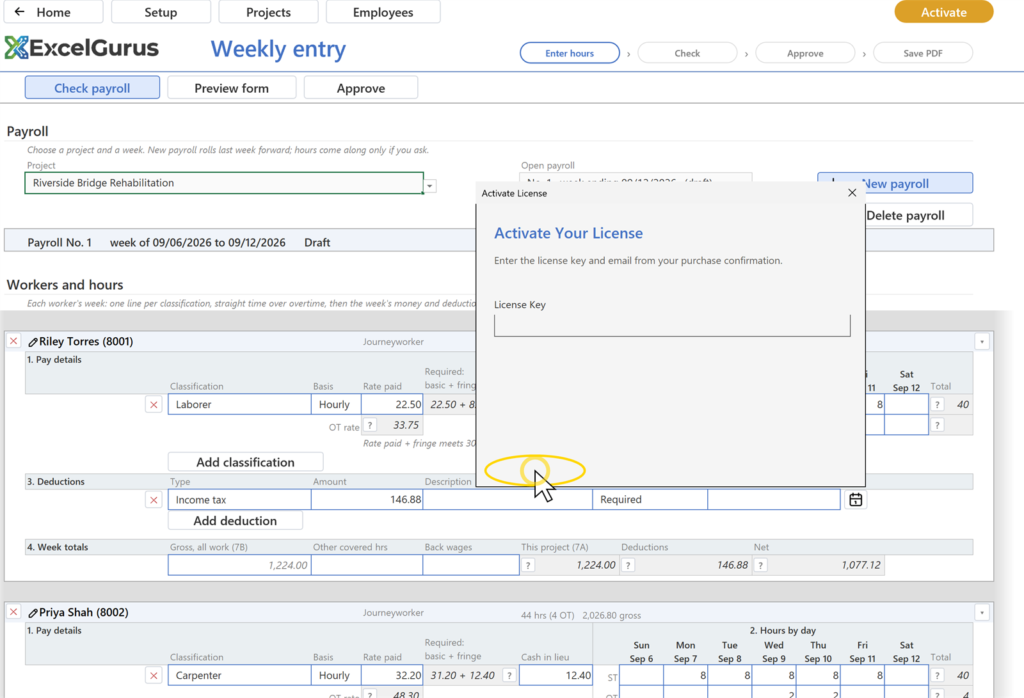
Click Buy a license.
You should see: Your browser opens the product page on excel-gurus.com. Back in Excel, click Cancel.
Step 46: Click the chip again
Click the chip again. Type your license key and the email from your purchase confirmation, then click Activate.
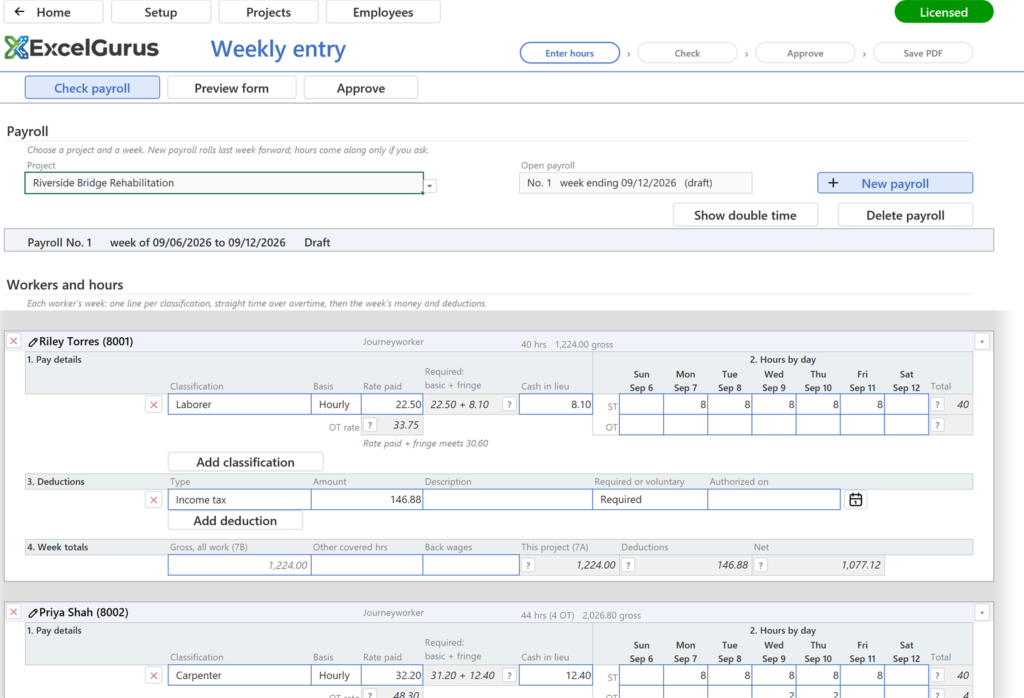
You should see: A message saying License activated, with the licensee and licence type; after OK the chip reads Licensed in green on every page.
Step 47: Click Preview form
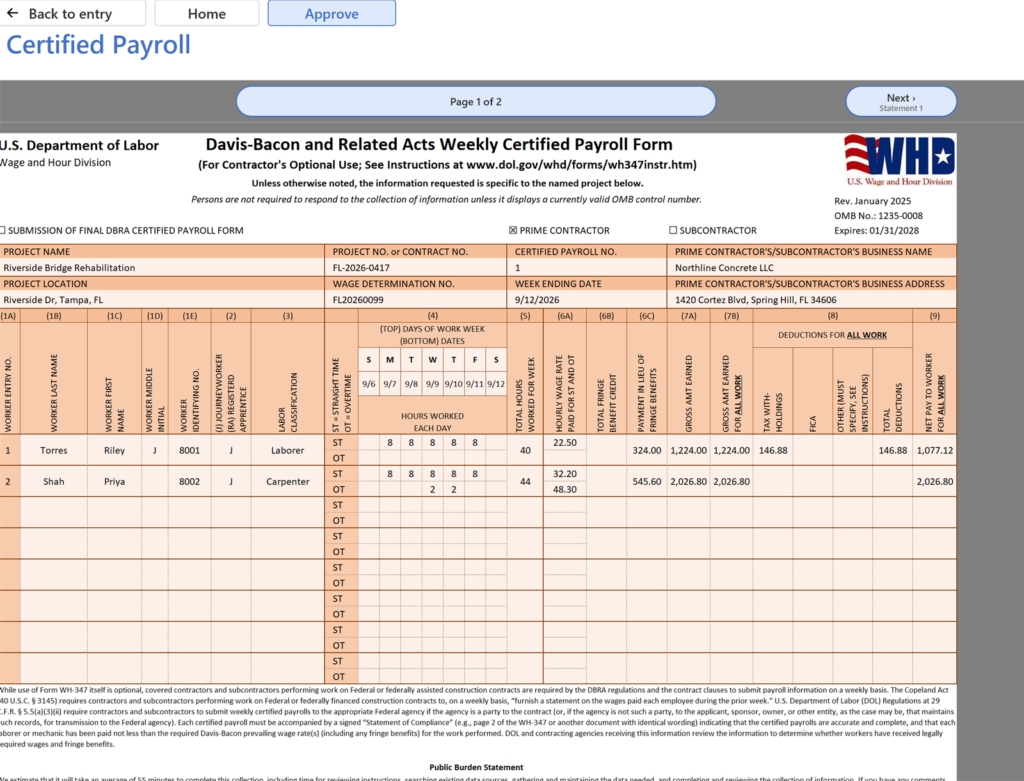
Click Preview form.
You should see: No red mark and no Remove the mark button: the licensed form is clean. Click Back to entry.
Step 48: Click the Licensed chip
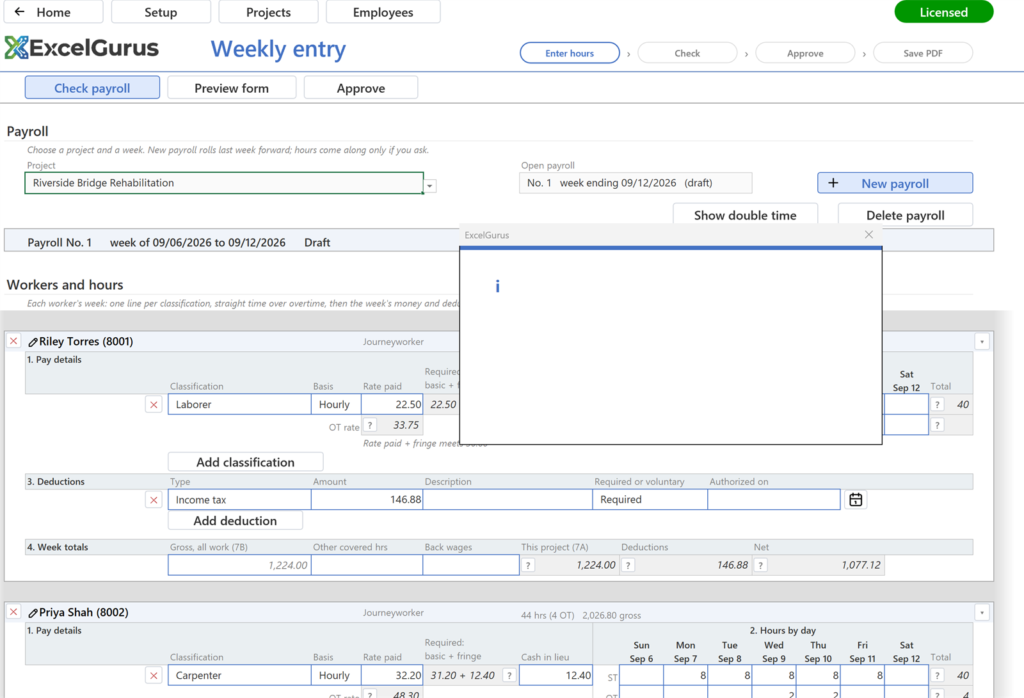
Click the Licensed chip.
You should see: A popup titled License: licensed to, status, key, products and machine, with Close and Deactivate. Click Close.
Step 49: Click Home, then About
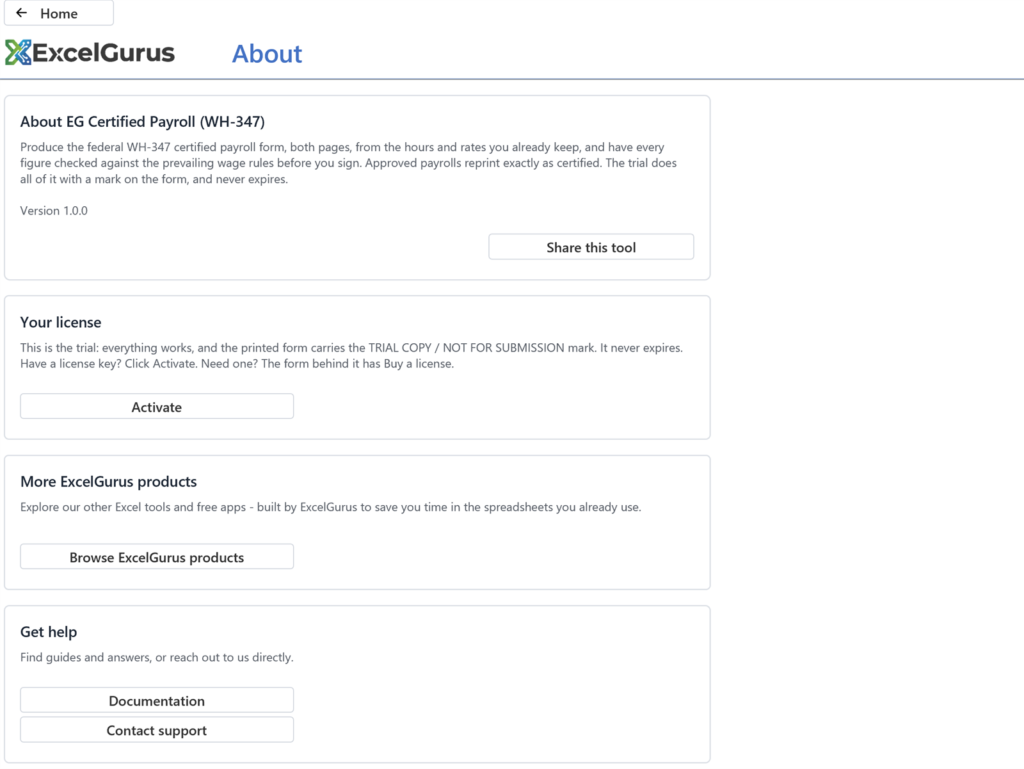
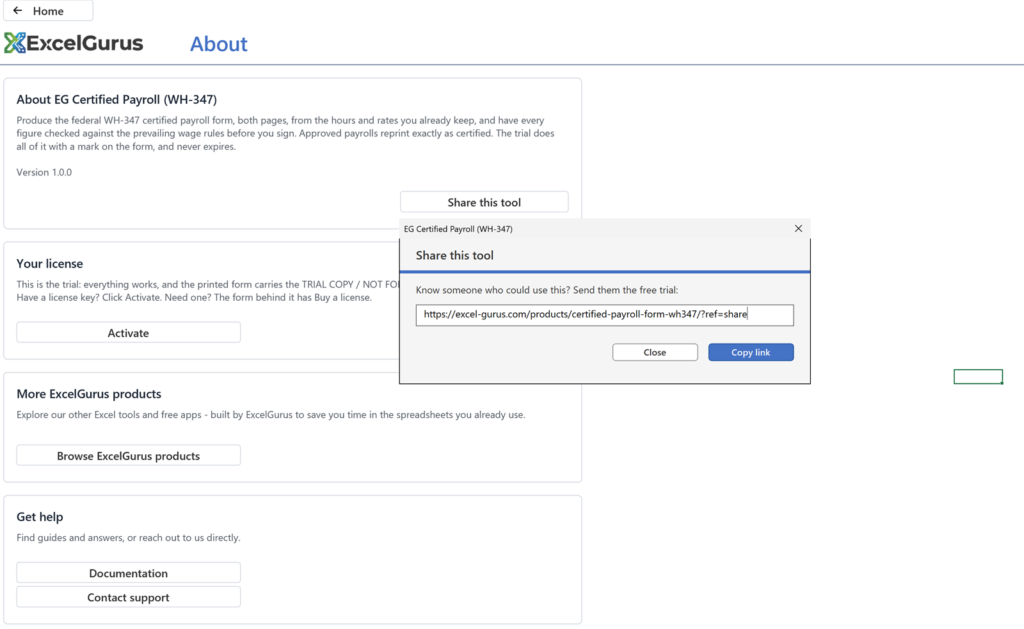
Click Home, then About.
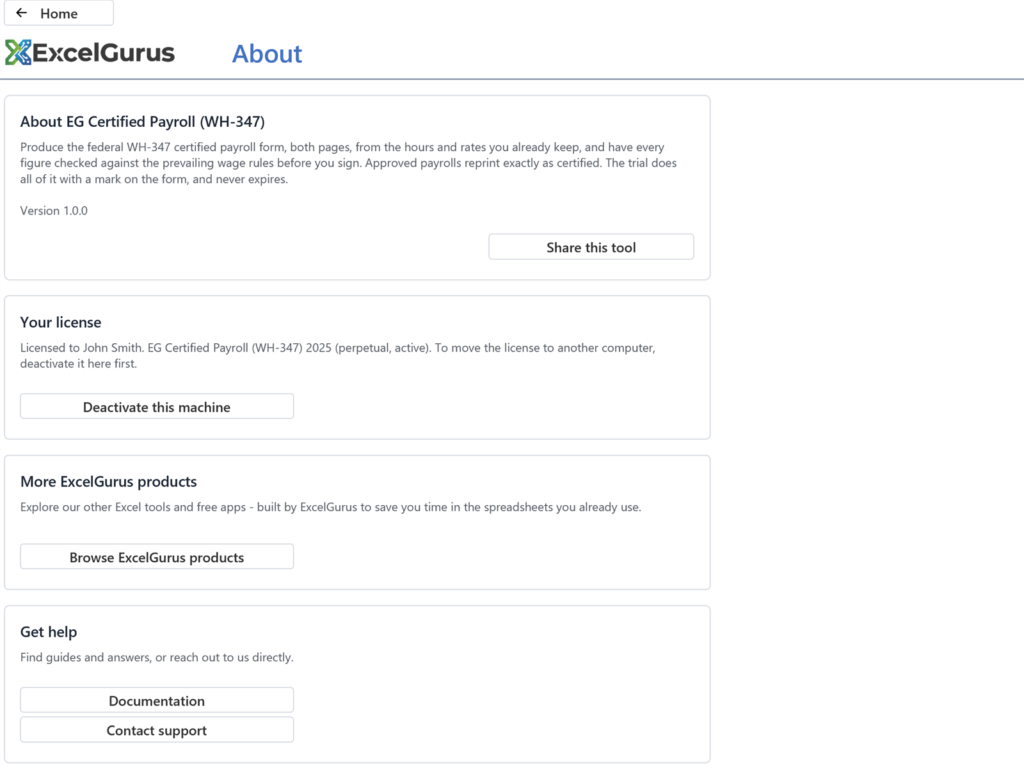
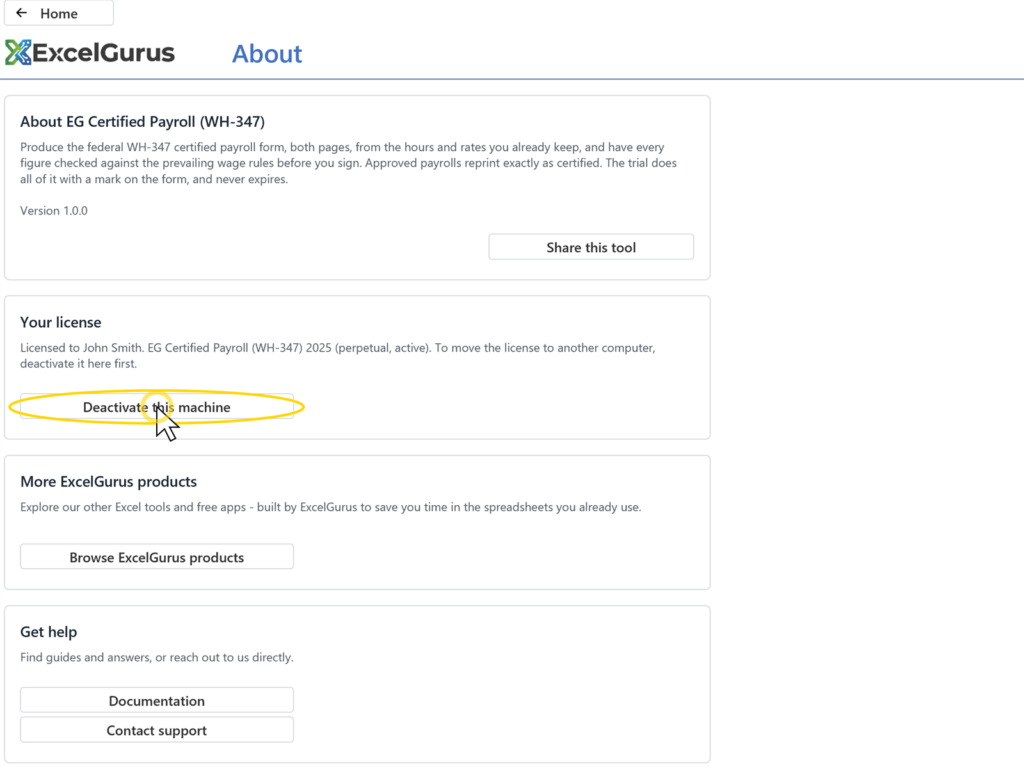
You should see: About EG Certified Payroll (WH-347) with the product description and Version 1.0.0, Share this tool at the right; under it, Your license: on the trial a description of the mark and an Activate button, when licensed who it is licensed to and Deactivate this machine; then More ExcelGurus products, Get help and Troubleshooting.
Step 50: Click Share this tool
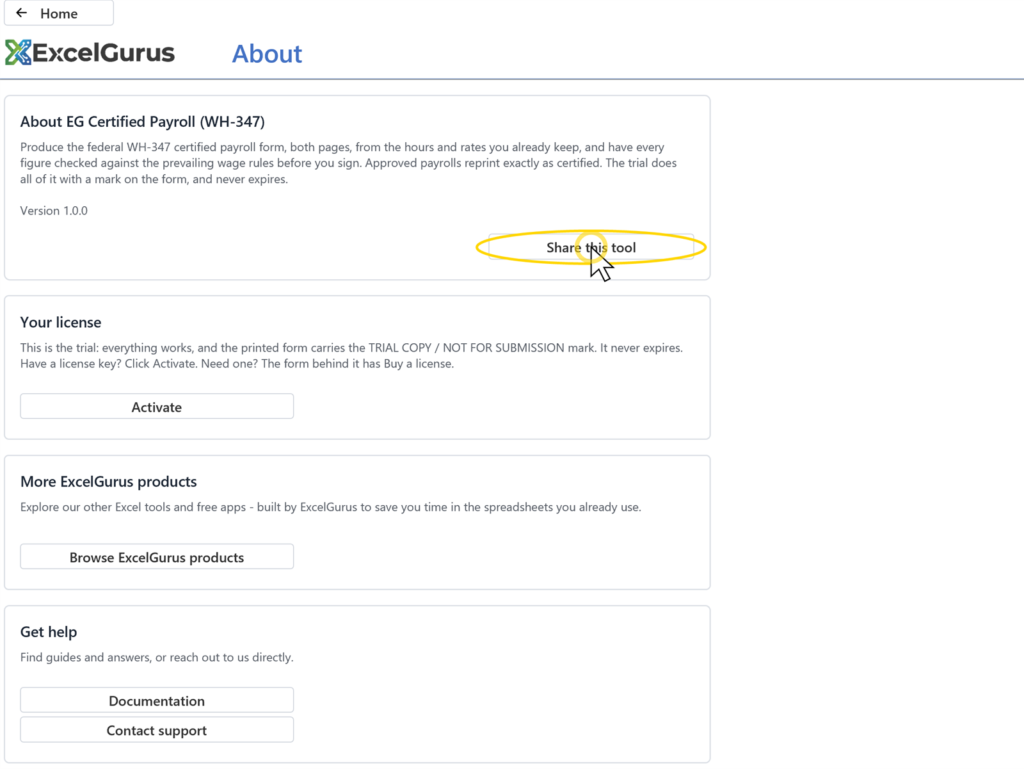
Click Share this tool.
You should see: A small dialog with the product page link and a Copy link button. Close it.
Step 51: To move the licence to another computer: on About click Deactivate this machi…
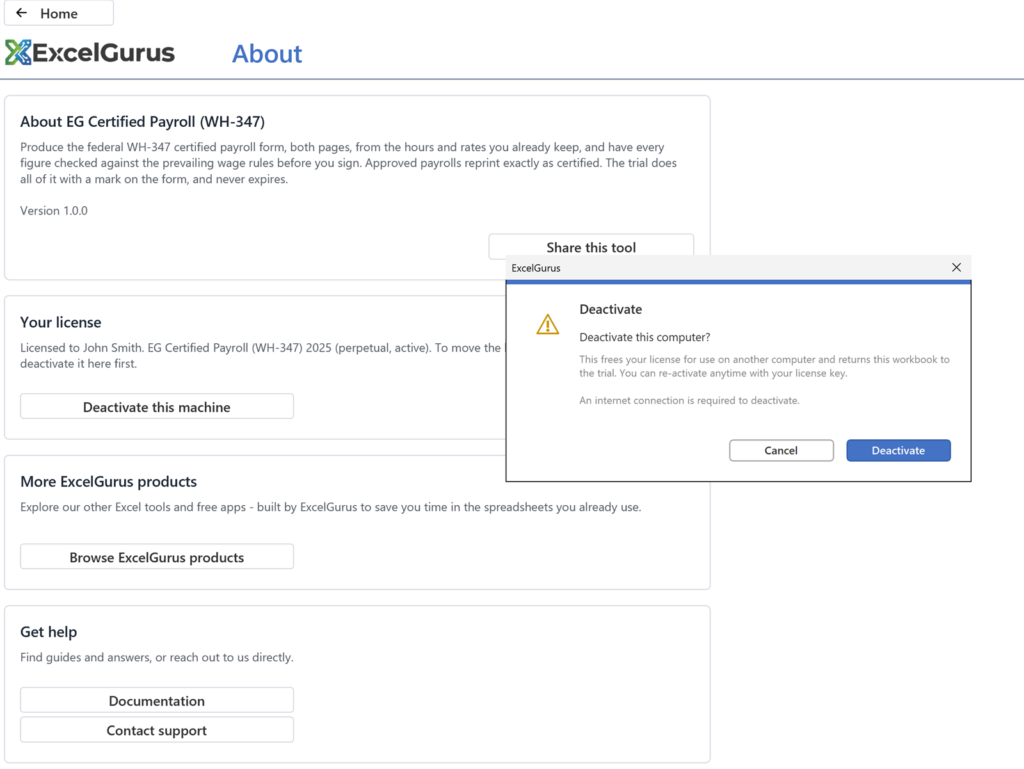
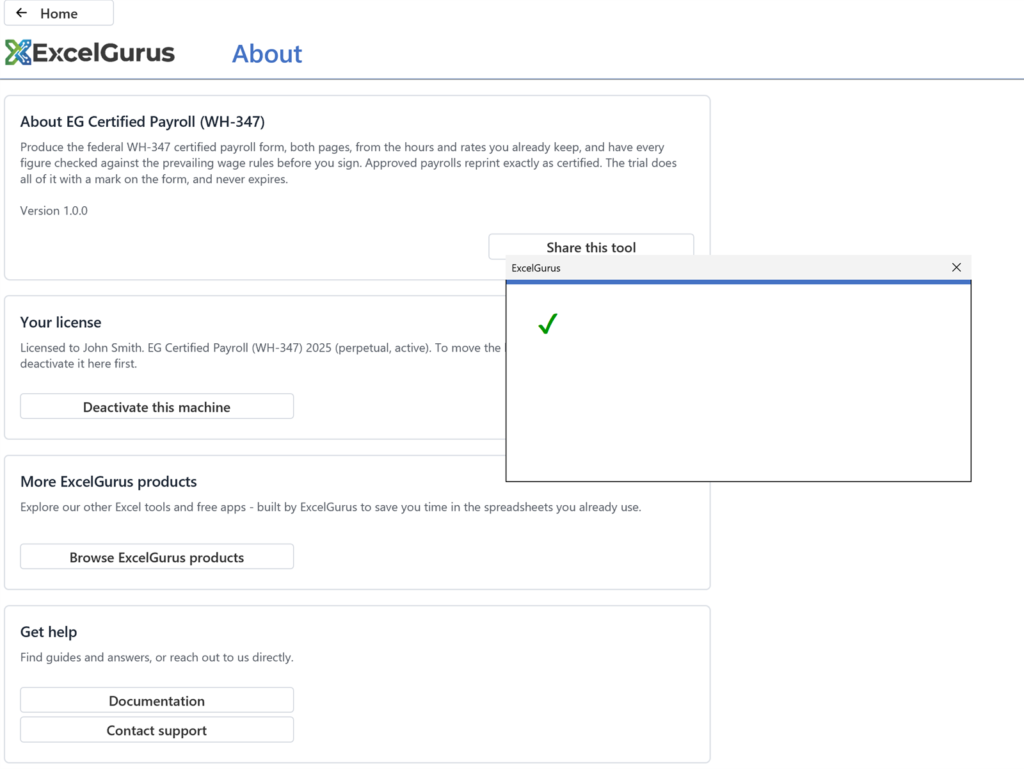
To move the licence to another computer: on About click Deactivate this machine (the Licensed chip's popup has the same Deactivate) and confirm; an internet connection is needed.
You should see: This computer has been deactivated; the panel offers Activate again, the chip reads Activate, and the form carries the mark once more.
The sample project
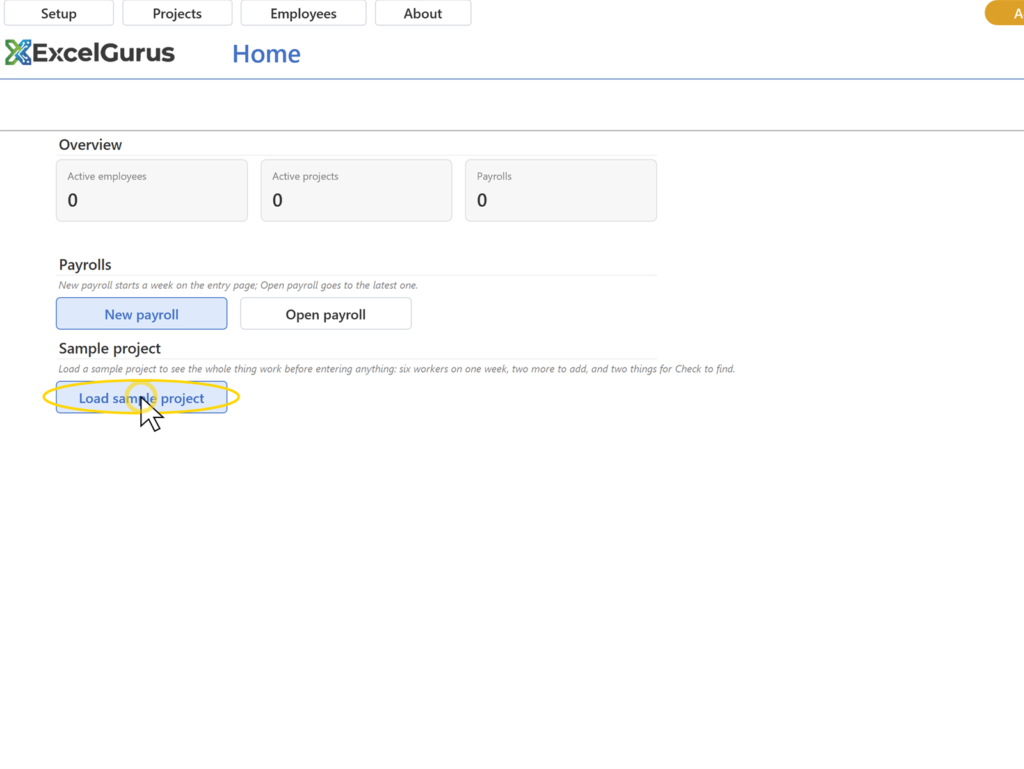
Step 52: Click Home, then Load sample project
Click Home, then Load sample project.
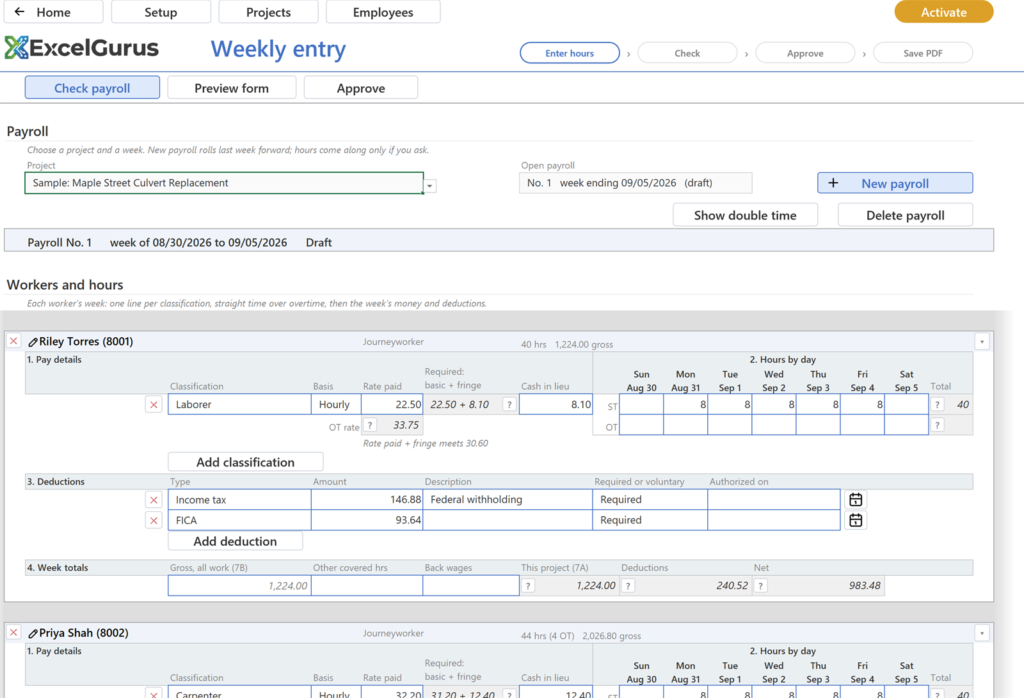
You should see: The Weekly entry page on a week for Sample: Maple Street Culvert Replacement, six worker cards with hours and deductions filled; Add worker offers two more workers.
Step 53: Click Check payroll, then Next issue
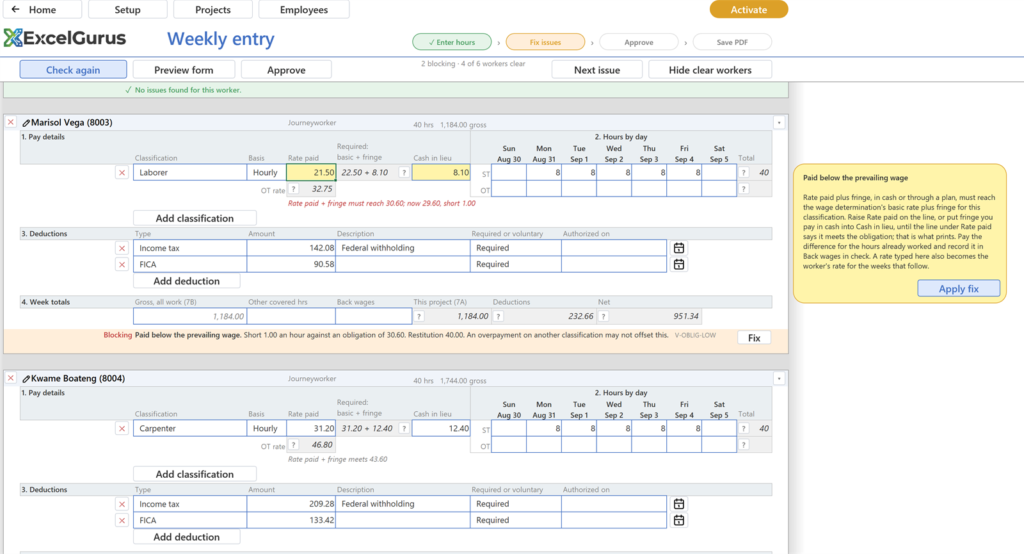
Click Check payroll, then Next issue.
You should see: Exactly two findings: Marisol Vega, Paid below the prevailing wage, and Dan Whitfield, No identifying number. Next issue lights Vega's Rate paid and Cash in lieu cells and opens a callout with an Apply fix button.
Step 54: Click Apply fix on the callout
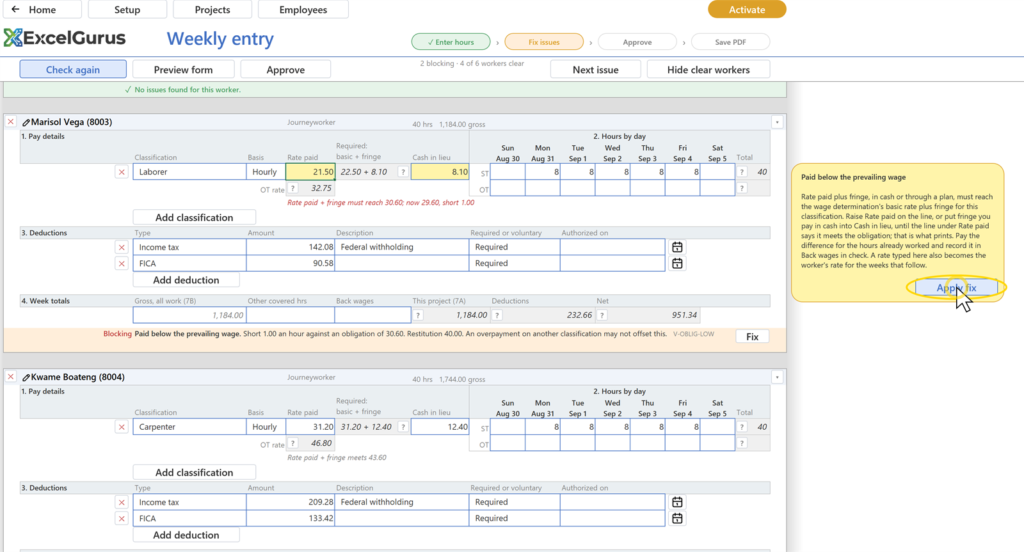
Click Apply fix on the callout.
You should see: Vega's rate rises to meet the obligation (22.50) and her finding goes; the tally reads 1 blocking.
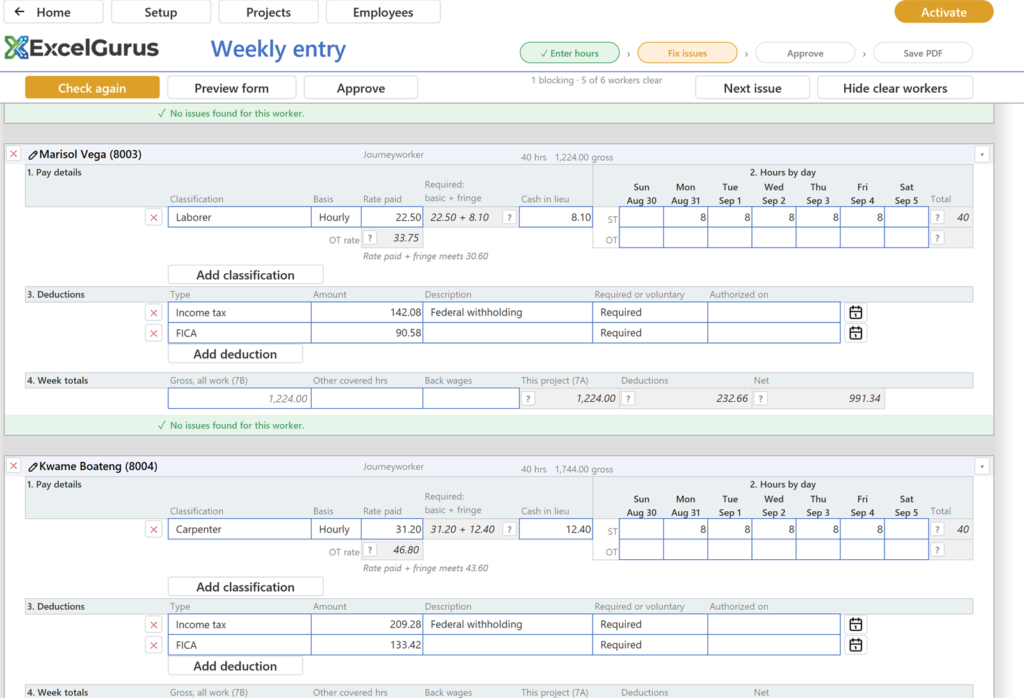
Step 55: Click Next issue (or Fix on Whitfield's finding), type the last four digits o…
Click Next issue (or Fix on Whitfield's finding), type the last four digits on his card, click Back to entry, then Check again.
You should see: No issues found.
Step 56: Click Preview form
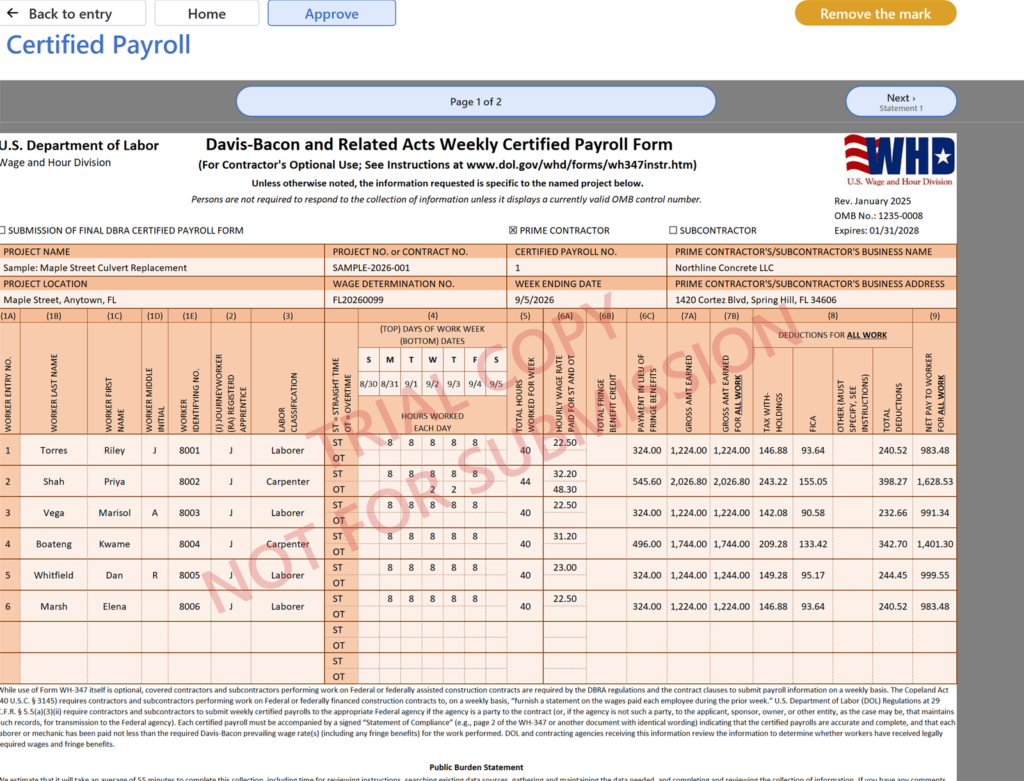
Click Preview form.
You should see: The sample's six workers on the form, with the TRIAL COPY mark as on any other project. Back to entry.
Step 57: Click Home, then Clear sample data, and confirm
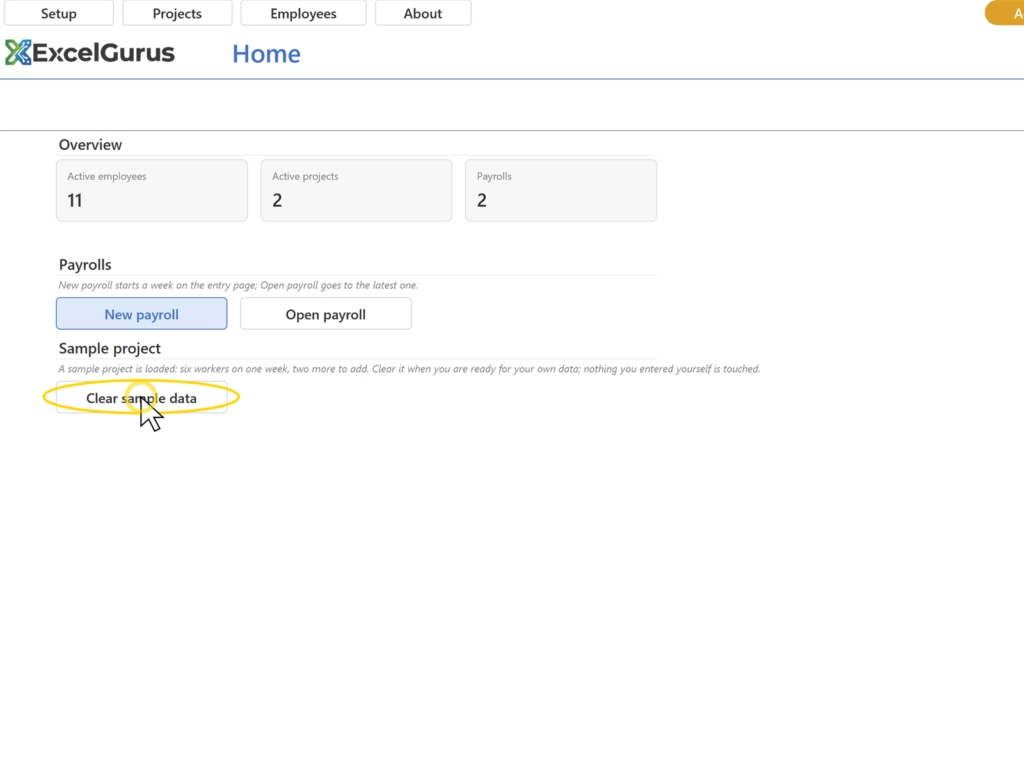
Click Home, then Clear sample data, and confirm.
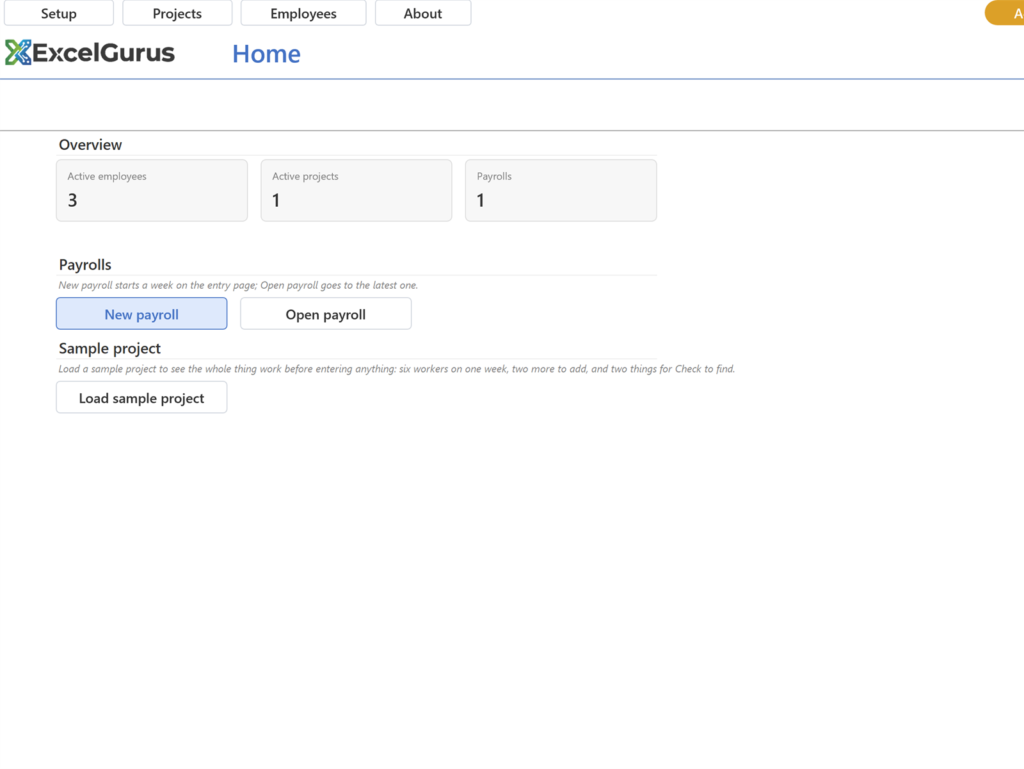
You should see: The sample project, its workers, its week and its deductions are gone; your own project and employees are untouched; the tiles read 3, 1 and your payroll count.
Closing and reopening
Step 58: Open with macros on
Open with macros on.
You should see: Home with your data intact; Open payroll goes to Payroll No. 1 at the top of the page.